1. Introdución
This manual provides comprehensive instructions for the setup, operation, maintenance, and troubleshooting of your BOMAKER Mini WiFi Projector 10''. Please read this manual thoroughly before using the projector to ensure proper operation and to maximize its lifespan. Keep this manual for future reference.
The BOMAKER Mini WiFi Projector 10'' is a portable 720P HD LCD projector designed for home cinema, gaming, and various multimedia applications. It features WiFi connectivity for smartphone mirroring, multiple input options including HDMI, USB, and AV, and supports projection sizes up to 300 inches.
2. Información importante de seguridade
Para evitar incendios, descargas eléctricas ou lesións, observe sempre as seguintes precaucións de seguridade:
- Non bloquee as aberturas de ventilación. Asegúrese de que haxa un fluxo de aire axeitado arredor do proxector.
- Non mire directamente á lente do proxector cando estea aceso.amp está acendido. A luz brillante pode causar danos nos ollos.
- Do not expose the projector to rain or moisture to avoid electric shock.
- Empregue só o adaptador de corrente subministrado co proxector.
- Coloque o proxector nunha superficie estable e nivelada.
- Desconecte o proxector da toma de corrente durante tormentas eléctricas ou cando non o use durante períodos prolongados.
- Non intente reparar este produto vostede mesmo. Encomende calquera tarefa de mantemento a persoal de servizo cualificado.
3. Contido do paquete
Verifique que todos os elementos que se indican a continuación estean incluídos no seu paquete:
- 1 x BOMAKER Mini WiFi Projector
- 1 x mando a distancia
- 1 x adaptador de alimentación
- 1 x cable HDMI
- 1 x Cable AV
- 1 x Manual de usuario
4. Produto rematadoview
Familiarize yourself with the various parts and connections of your projector.

Figura 4.1: Fronte view of the BOMAKER Mini WiFi Projector. This image shows the projector's lens, focus ring, and keystone correction dial, with a smartphone wirelessly connected and displaying content on its screen, illustrating the WiFi mirroring capability.
4.1. Portos de entrada/saída
The projector features a variety of ports for connecting different devices.

Figura 4.2: Traseira view of the projector displaying its connectivity options. From left to right, the ports include AV, USB, Audio Out, VGA, HDMI, and Micro SD card slot, allowing for versatile device connections.
- Porto AV: Conéctese a dispositivos máis antigos usando o cable AV incluído.
- Porto USB: Para conectar unidades USB para reproducir contido multimedia files.
- Saída de audio: Conecta altofalantes ou auriculares externos.
- Porto VGA: Connect to computers or laptops with a VGA output.
- Porto HDMI: Connect to devices like laptops, gaming consoles (PS4), TV sticks, etc.
- Ranura para tarxeta Micro SD: Insira unha tarxeta Micro SD para reproducir contido multimedia files.
5. Configuración
5.1 Colocación
Choose a suitable location for your projector. For optimal viewing, place the projector on a flat, stable surface or mount it. The optimal projection distance is between 8.2 and 11.2 feet (2.5 to 3.4 meters) for a screen size of 30 to 300 inches.
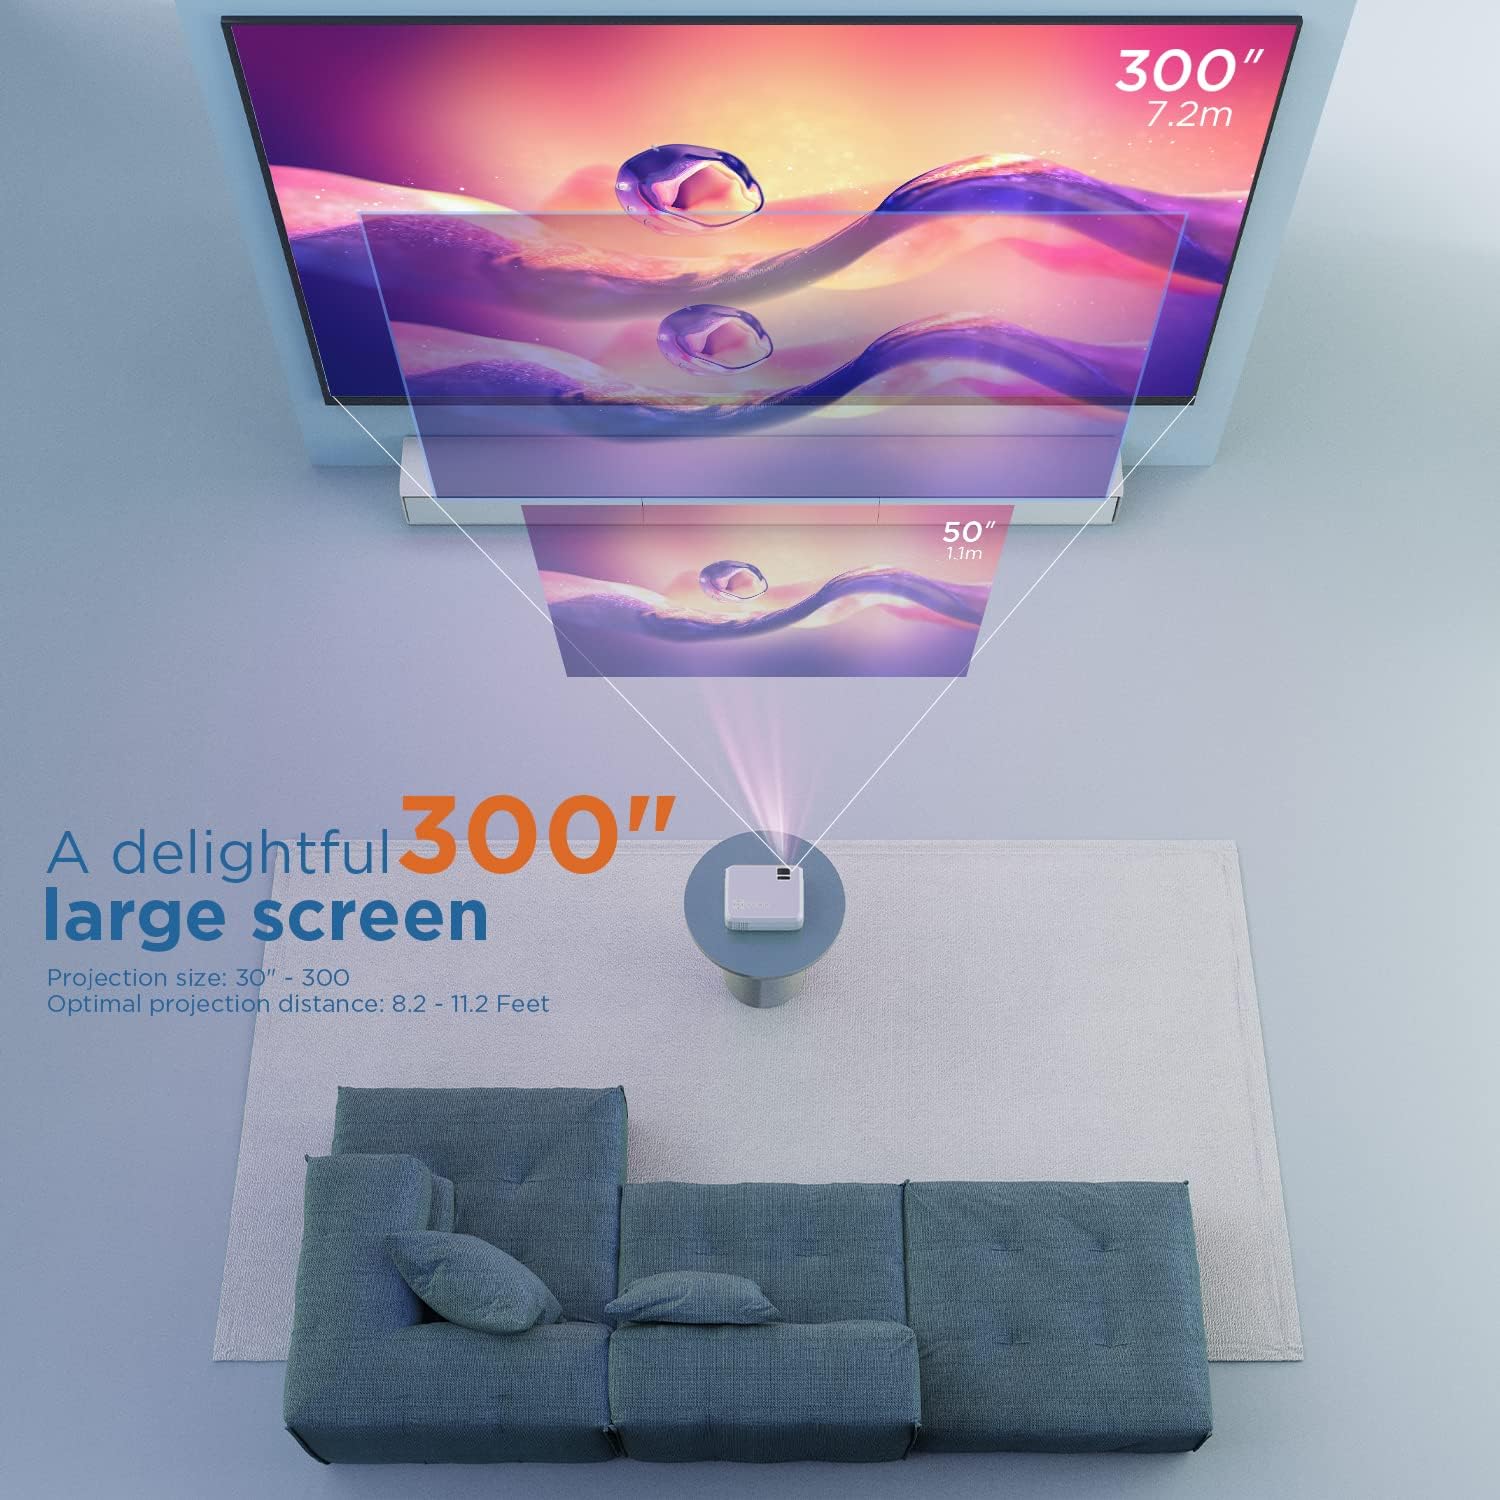
Figura 5.1: Illustration of projection distances and corresponding screen sizes. The image demonstrates how varying the distance between the projector and the screen affects the projected image size, from 50 inches (1.1m) to 300 inches (7.2m).
5.2. Conexión de alimentación
- Conecte o adaptador de corrente ao porto de entrada de alimentación do proxector.
- Enchufe o adaptador de alimentación a unha toma de corrente.
- Prema o botón de acendido do proxector ou do mando a distancia para acendelo.
5.3. Enfoque e corrección Keystone
- Foco: Rotate the focus ring on the projector lens until the image is clear and sharp.
- Keystone: If the projected image appears trapezoidal, adjust the keystone correction dial (usually located near the lens) until the image is rectangular.
6. Instrucións de funcionamento
6.1. Funcionamento básico
- Encendido/apagado: Prema o botón de acendido do proxector ou do mando a distancia.
- Selección da fonte de entrada: Use the "Source" button on the remote or projector to select the desired input (HDMI, AV, USB, Micro SD, WiFi).
- Axuste de volume: Usa os botóns de volume do mando a distancia.
6.2. Dispositivos de conexión
The projector supports various connection methods:
6.2.1. Conexión HDMI
Connect your laptop, gaming console (PS4), TV stick (e.g., Roku, Fire TV), or other HDMI-enabled devices using an HDMI cable. Select "HDMI" as the input source.
6.2.2. USB/Micro SD Connection
Insert a USB drive or Micro SD card into the respective port. Select "USB" or "Micro SD" as the input source. The projector will display a menu to browse and play media files (photos, videos, music, text).
6.2.3. AV Connection
Use the included AV cable to connect to devices with AV output. Select "AV" as the input source.
6.2.4. WiFi Mirroring (Smartphone Connection)
The projector supports wireless screen mirroring from smartphones (iOS and Android).
- Select "WiFi" as the input source on the projector.
- Follow the on-screen instructions to connect your smartphone to the projector's WiFi network.
- Once connected, enable screen mirroring/casting feature on your smartphone (e.g., "Screen Mirroring" for iOS, "Smart View" or "Cast" for Android).
- Seleccione o proxector da lista de dispositivos dispoñibles.
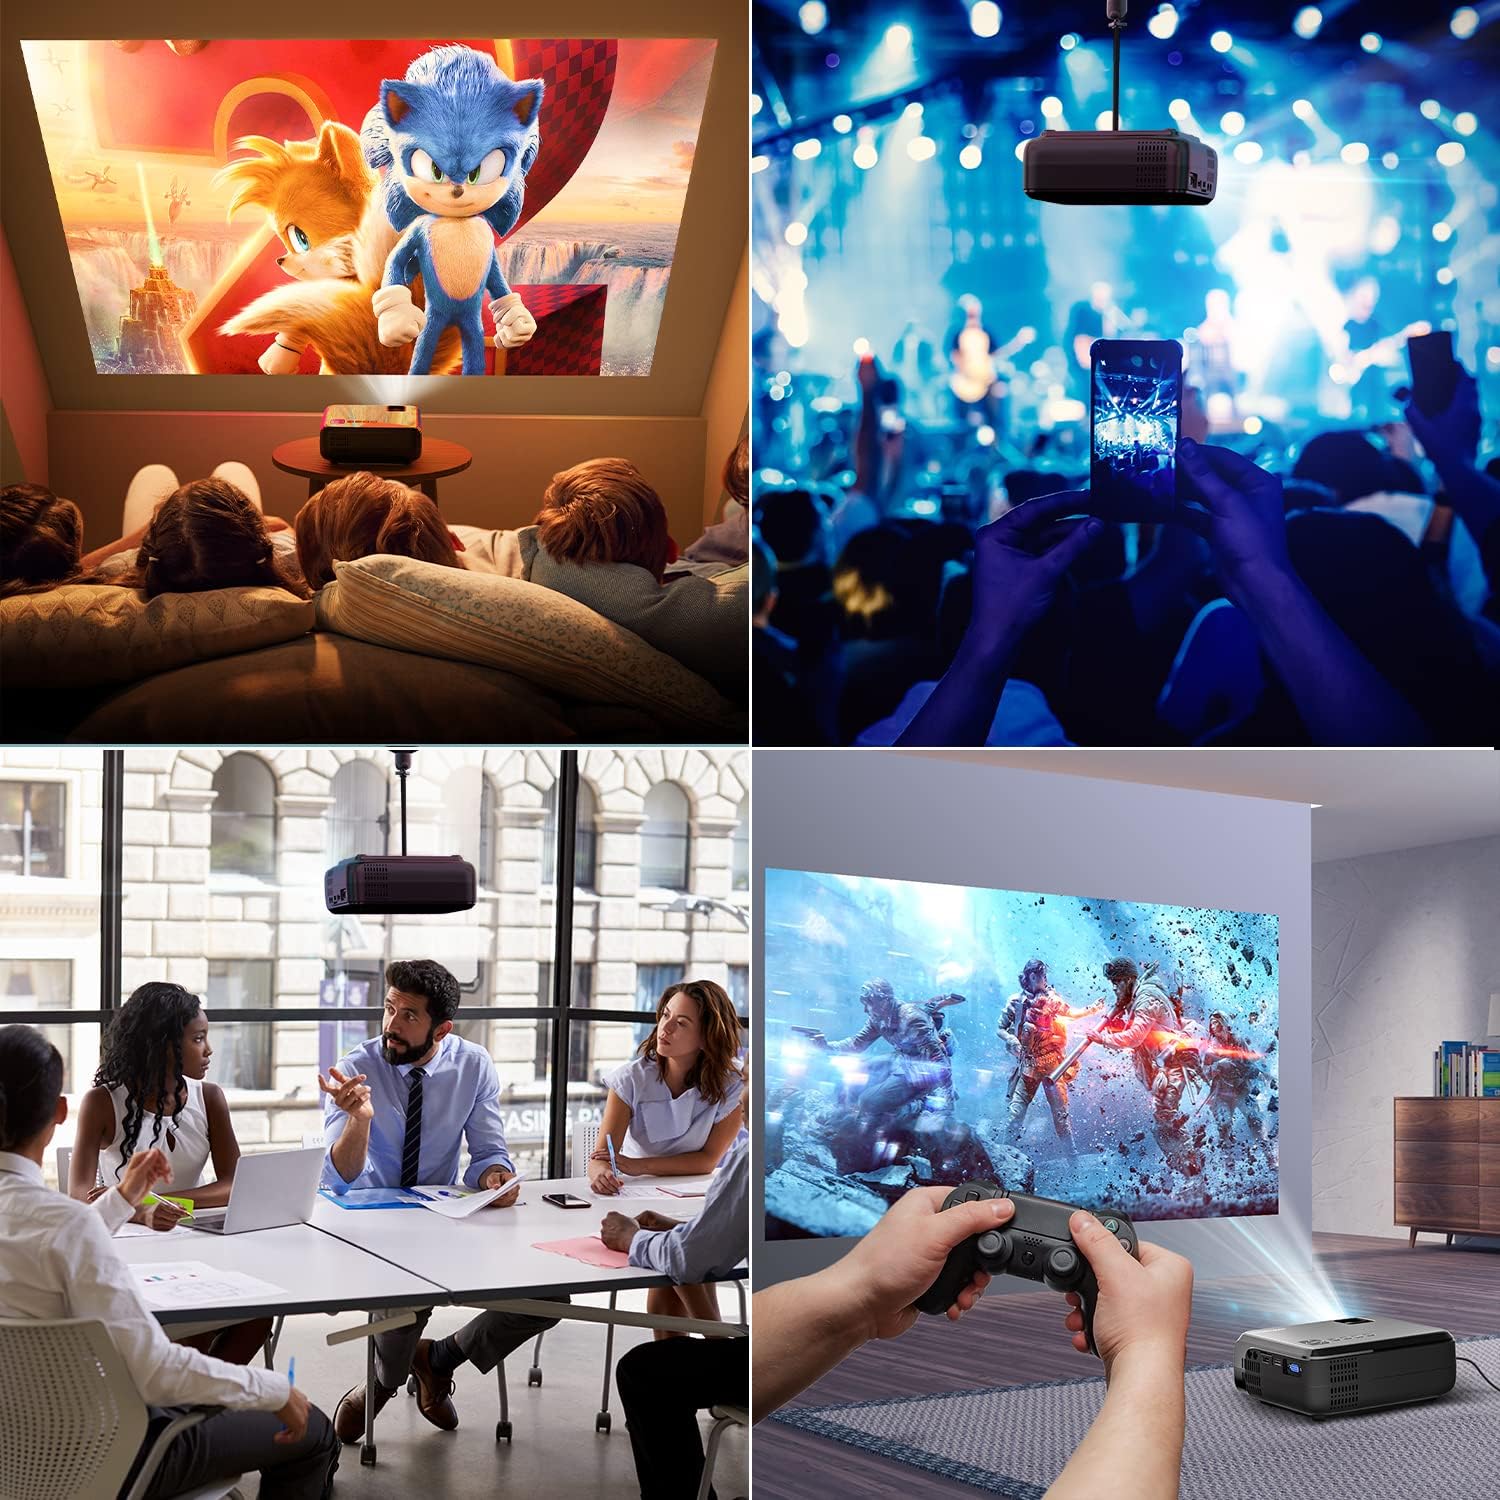
Figura 6.1: This image displays a collage of the projector in different environments: a family watching a movie, a person using a smartphone to control the projector at a concert, a business meeting with a presentation, and a person playing video games. It highlights the versatility of the BOMAKER Mini WiFi Projector for entertainment and professional use.
6.3. Visual Experience
The projector delivers a native 720P HD resolution, ensuring clear and detailed images. It supports 1080P decoding and features a high brightness output for vibrant visuals.
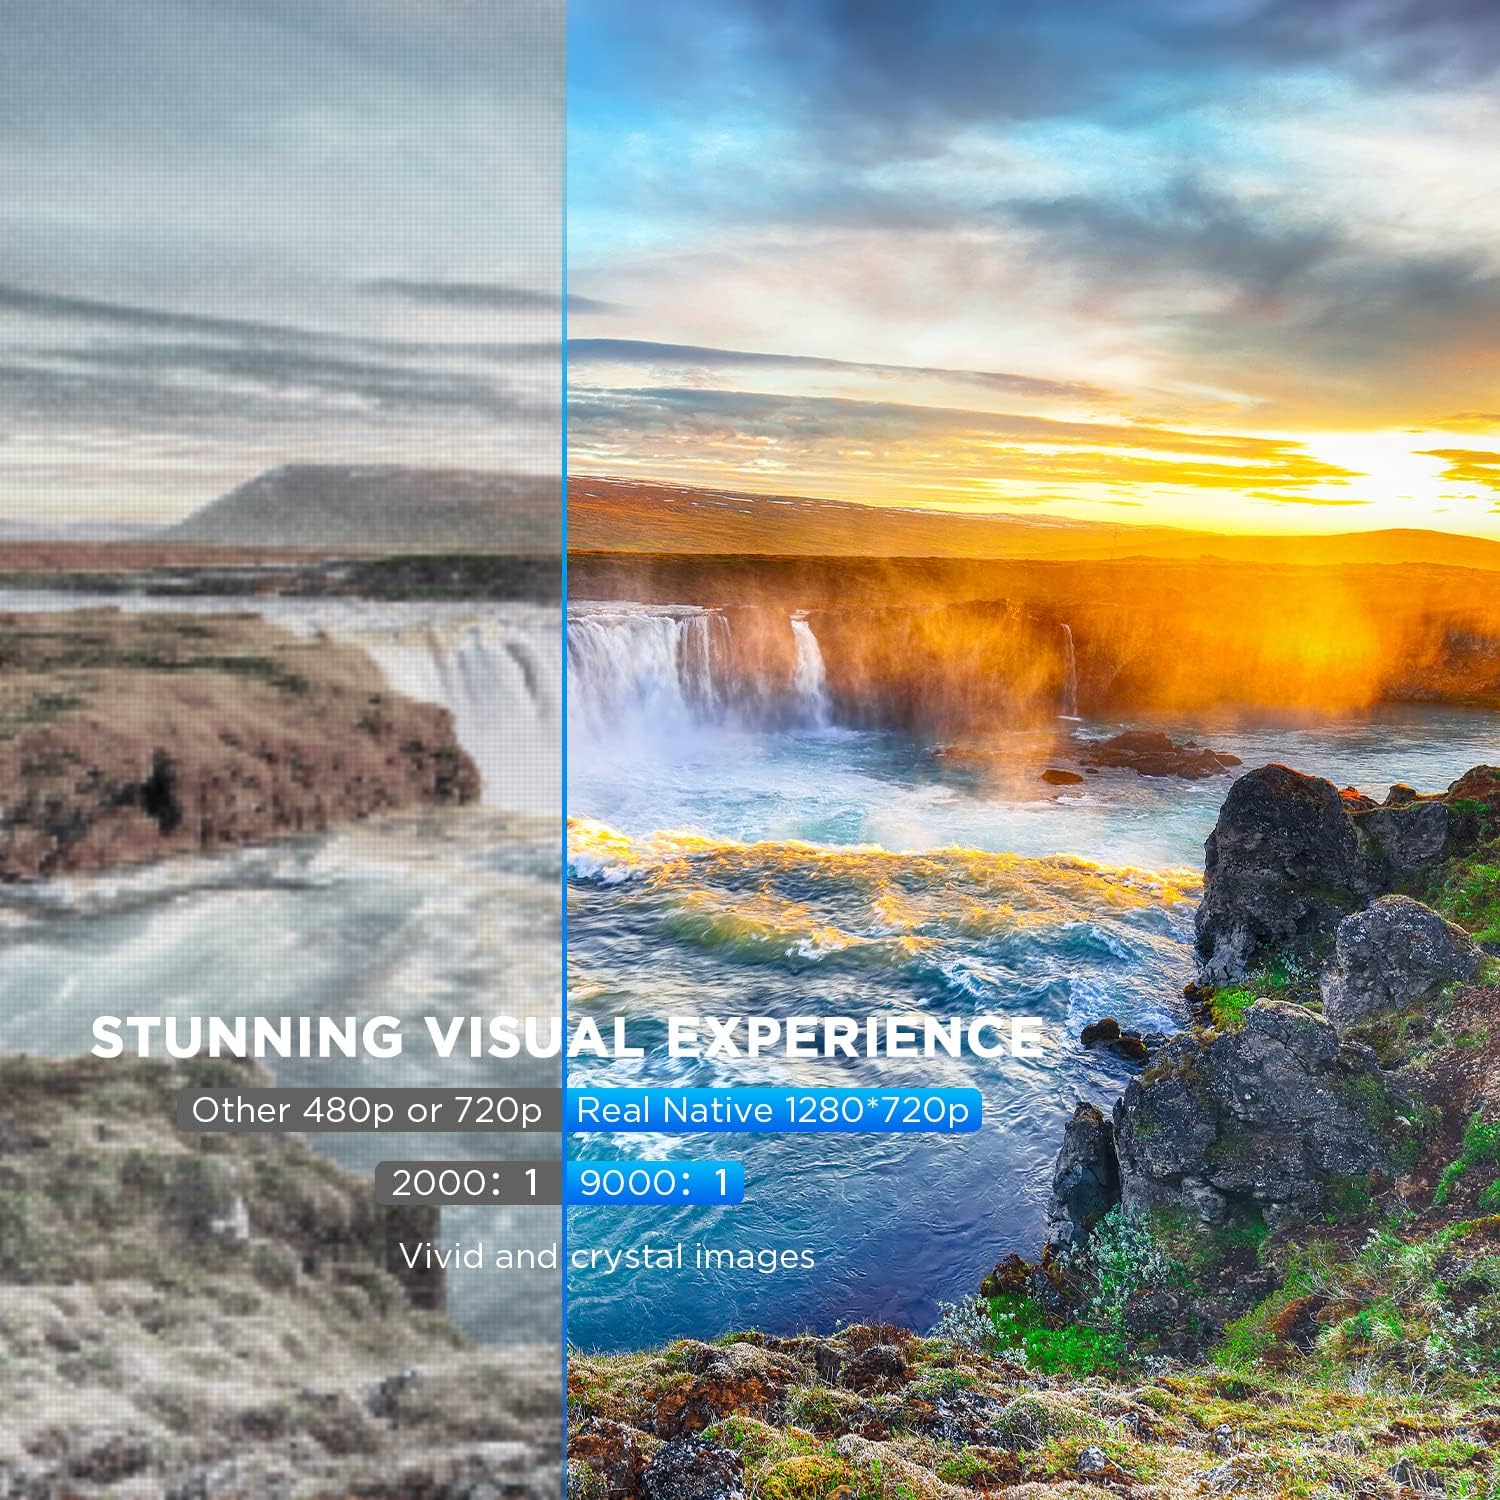
Figura 6.2: A side-by-side comparison demonstrating the difference between standard 480p/720p projection and the projector's real native 1280x720p resolution. The native resolution side shows significantly sharper details and richer colors in a landscape image, emphasizing the "Stunning Visual Experience" and "Vivid and crystal images".

Figura 6.3: This image illustrates the projector's "Crystal Clear Picture with Ultra-low Latency" feature, showing a vibrant, high-definition projection of a car racing scene on a large screen in a living room setting. The text highlights upgraded lens settings for a new visual experience with latency less than 30ms.
7. Mantemento
7.1. Limpeza da lente
Use a soft, lint-free cloth specifically designed for cleaning optical lenses. Do not use abrasive cleaners or solvents. Gently wipe the lens to remove dust or smudges.
7.2. Limpeza do corpo do proxector
Limpe o exterior do proxector cun pano suave e seco. Para a sucidade persistente, un pano lixeiramente seco.amp cloth can be used, followed by a dry cloth. Ensure no liquid enters the ventilation openings.
7.3. Almacenamento
When not in use, store the projector in a cool, dry place, away from direct sunlight and extreme temperatures. Cover the lens with its cap to protect it from dust.
8 Solución de problemas
Se tes problemas co teu proxector, consulta os seguintes problemas e solucións comúns:
| Problema | Causa posible | Solución |
|---|---|---|
| Non hai imaxe na pantalla | Power cable not connected; incorrect input source; device not powered on. | Check power connection; select correct input source; ensure connected device is on. |
| A imaxe está borrosa | Enfoque non axustado; proxector demasiado preto/lonxe da pantalla. | Axuste o anel de enfoque; recoloque o proxector. |
| A imaxe é trapezoidal | Keystone correction not adjusted. | Adjust the keystone correction dial. |
| Sen son | Volume too low; external speakers not connected; audio settings on source device. | Increase volume; connect external speakers if needed; check audio output settings on source device. |
| WiFi mirroring issues | Incorrect WiFi connection; smartphone mirroring feature not activated. | Ensure correct WiFi network is selected; activate screen mirroring on your smartphone. |
9. Especificacións
| Característica | Detalle |
|---|---|
| Marca | BOMAKER |
| Número de modelo | Mini WiFi Projector 10'' |
| Resolución de visualización | Native 1280 x 720 (Supports 1080P decoding) |
| Tipo de visualización | LCD |
| Tecnoloxía de conectividade | HDMI, Wi-Fi |
| Dispositivos compatibles | Smartphone, TV Stick, PS4, Laptop, USB Drive, Micro SD Card |
| Dimensións do produto | 22L x 17l x 9H centimeters |
| Factor de forma | Portátil |
| Usos recomendados | Cine en casa, xogos |
| Cor | Branco |
10. Garantía e soporte
For warranty information or technical support, please refer to the documentation included with your purchase or contact BOMAKER customer service. Details regarding specific warranty periods and support channels are typically provided on the manufacturer's official websitio web ou dentro da embalaxe do produto.


