1. Produto rematadoview
The DEWENWILS Outdoor Light Sensor Timer with Remote is designed to automate the control of outdoor electrical devices such as string lights, landscape lights, garden decorations, and pool pumps. It features dual 3-prong outlets, a light sensor for dusk-to-dawn operation, and a mechanical timer with multiple scheduling options. A wireless remote control provides convenient manual override functionality.
Características principais:
- Light Sensor & Countdown Timer: Offers various modes including ON, OFF, Dusk to Dawn, and ON at Dusk with a countdown of 2, 4, 6, or 8 hours.
- Control remoto sen fíos: Allows remote operation of connected devices from up to 100 feet away, even through walls and doors.
- Temporizador mecánico: Provides 48 setting options in 30-minute intervals over a 24-hour period, with daily repeat functionality.
- Saídas duais: Equipped with two 3-prong outlets to control multiple devices simultaneously.
- Deseño resistente á intemperie: Suitable for outdoor use, designed to withstand various weather conditions.

Image 1.1: The DEWENWILS outdoor timer shown in diverse outdoor applications, including controlling string lights, garden lights, and a sprinkler system. This illustrates the versatility of the timer for various outdoor electrical needs.
2. Información de seguridade
- Always ensure the timer is securely plugged into a grounded outlet.
- Non mergulles o temporizador na auga.
- Ensure the timer is mounted in a vertical position with the outlets facing downward to prevent water accumulation.
- Manteña os nenos lonxe do temporizador e dos dispositivos conectados.
- Do not exceed the maximum electrical rating of the timer.
- Desconecte o temporizador da fonte de alimentación antes de limpalo ou realizar calquera mantemento.
3. Configuración e instalación
- Escolle unha localización: Select an outdoor location that is protected from direct heavy rain and allows for vertical mounting. The timer must be mounted in a vertical position with the outlets facing downward and at least 2 feet (0.6 meters) above the ground for optimal weather protection.
- Montaxe: Use a screw or nail (not included) to hang the timer from its integrated mounting hole.
- Conectar: Insert the timer's plug into a grounded outdoor electrical outlet.
- Conectar dispositivos: Plug your outdoor lights or appliances into the dual 3-prong outlets on the timer. Ensure the total wattage of connected devices does not exceed the timer's maximum rating.

Image 3.1: The DEWENWILS outdoor timer shown connected to string lights, highlighting its ease of programming, daily repeat function, overload protection, and 1/2 HP rating for motor loads.
4. Instrucións de funcionamento
4.1 Setting the Mechanical Timer
- Establecer a hora actual: Rotate the timer dial clockwise until the arrow on the dial points to the current time of day. The dial is marked in 24-hour format.
- Axustar os horarios de acendido/apagado: The dial has small pins around its circumference. Each pin represents 30 minutes. Push the pins abaixo for the periods you want the connected devices to be ON. Pull the pins up for the periods you want the connected devices to be DESACTIVADO. You can set up to 48 ON/OFF settings within a 24-hour period.
- Seleccione o modo de funcionamento: Use the manual override switch located on the side of the timer to select the desired mode:
- TEMPORIZADOR: The timer will operate according to the set pins on the dial.
- ACTIVADO: The connected devices will remain continuously ON, overriding the timer settings.
- OFF: The connected devices will remain continuously OFF, overriding the timer settings.

Imaxe 4.1: Primeiro plano view of the DEWENWILS timer dial, illustrating how to push pins down for 'ON' periods and pull them up for 'OFF' periods. The dial allows for 48 ON/OFF settings within a 24-hour cycle.
4.2 Timer Modes (Light Sensor Function)
In addition to the mechanical timer, the unit features a light sensor for specific operational modes:
- Always ON/OFF: Manual control, bypassing light sensor.
- Sensor de solpor ao amencer: Devices turn ON automatically at dusk and turn OFF at dawn.
- Light Sensor Countdown: Devices turn ON at dusk and remain ON for a set duration of 2, 4, 6, or 8 hours, then turn OFF.

Image 4.2: A graphic representation of the DEWENWILS timer's operational modes, including 'Always ON/OFF', 'Dusk to Dawn Sensor', and 'Light Sensor Countdown' for 2, 4, 6, or 8 hours.
4.3 Uso do mando a distancia
The included wireless remote control allows for convenient manual operation of the timer and connected devices.
- Botón ON: Press to turn connected devices ON.
- Botón OFF: Press to turn connected devices OFF.
- Rango: The remote operates using an RF signal, providing a range of up to 100 feet (30 meters) in line of sight. The signal can pass through walls and doors.

Image 4.3: The DEWENWILS remote control, demonstrating its ability to operate devices from up to 100 feet away, even through obstacles like walls and windows, as depicted in a winter scene.
4.4 Daily Repeat Setting
Once programmed, the mechanical timer settings will repeat daily. The light sensor modes also operate on a daily cycle. This ensures consistent automation without daily re-programming.
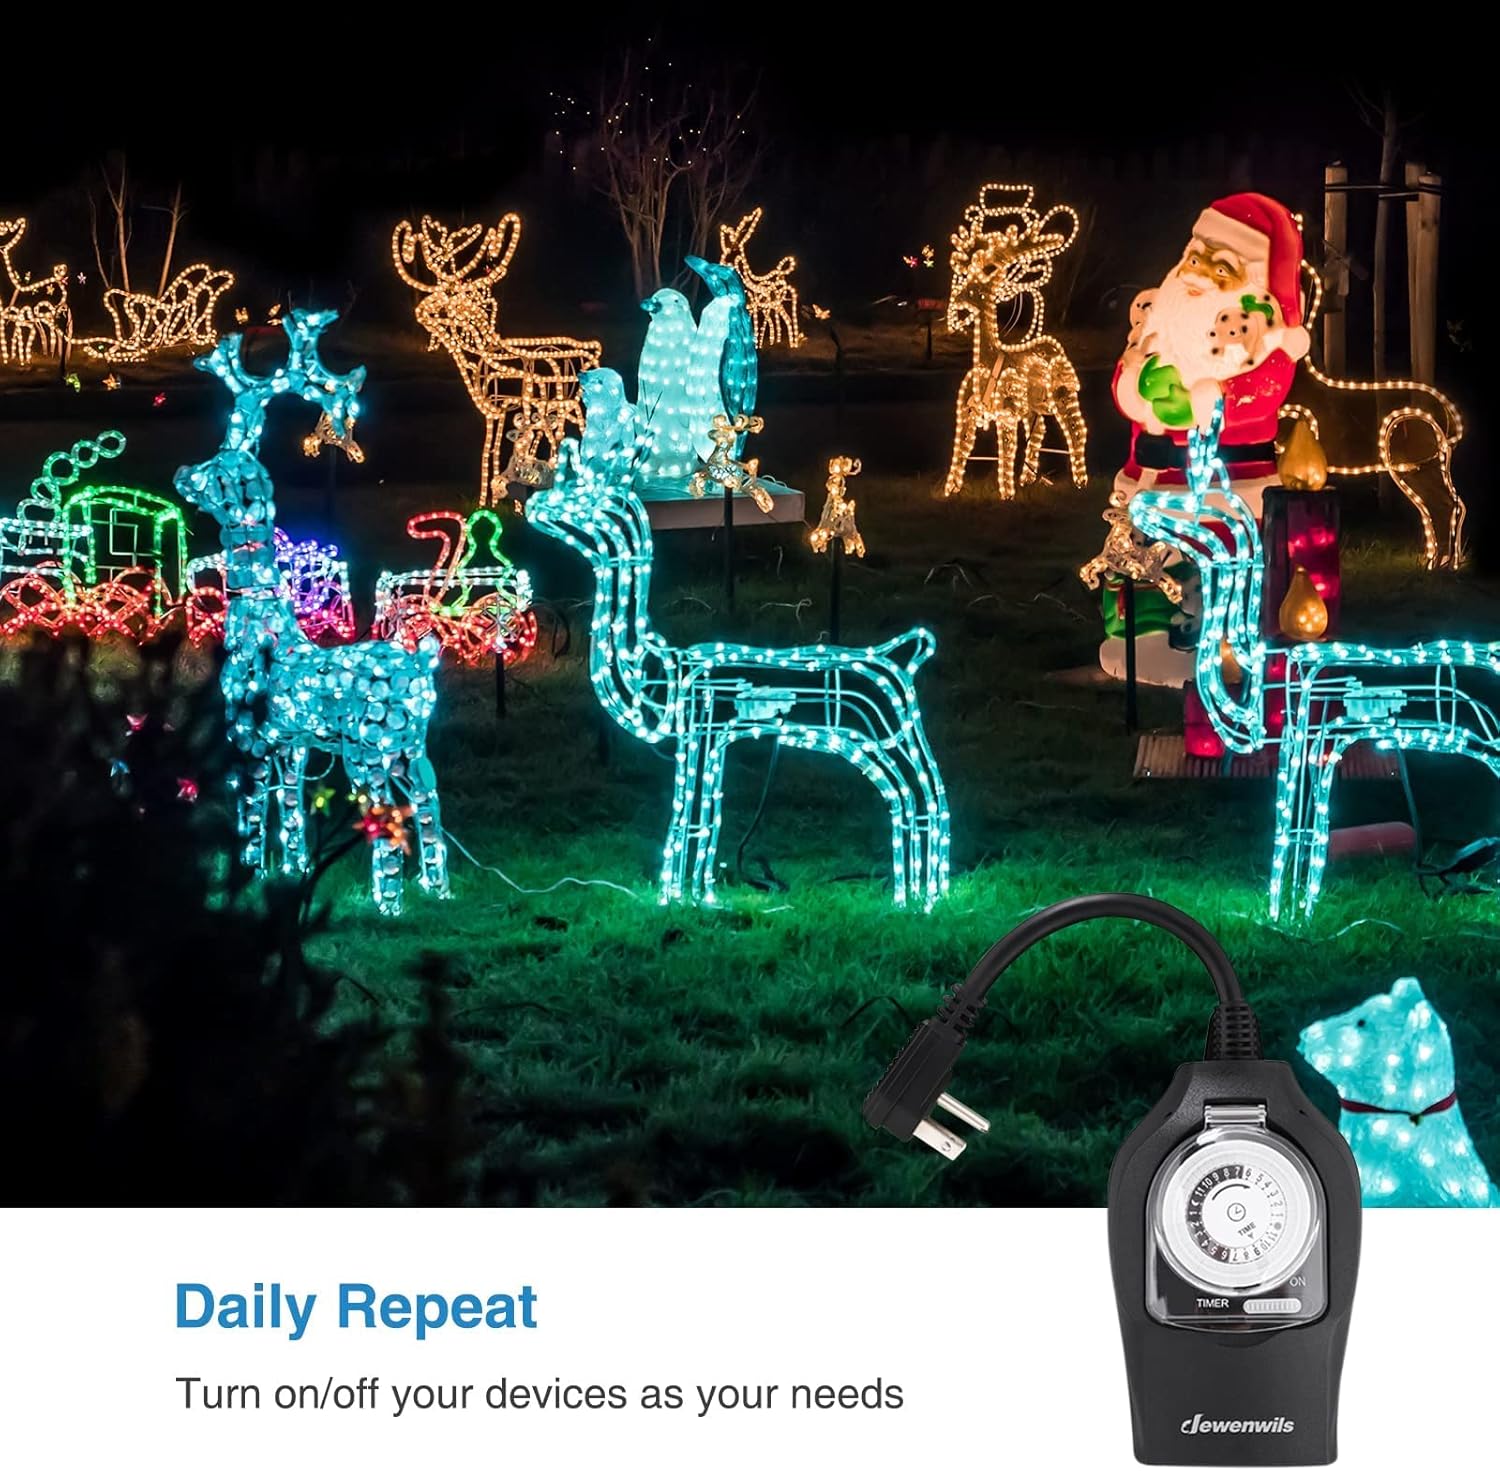
Image 4.4: The DEWENWILS timer shown in an outdoor setting controlling various Christmas light decorations, emphasizing its 'Daily Repeat' function for automated scheduling.
5. Mantemento
- Limpeza: Periodically wipe the timer with a soft, damp pano. Non empregue produtos químicos agresivos nin produtos de limpeza abrasivos. Asegúrese de que o temporizador estea desconectado antes de limpalo.
- Inspección: Regularly inspect the timer, cord, and plugs for any signs of damage, such as cracks, fraying, or corrosion. If damage is found, discontinue use and replace the unit.
- Verificación de precisión: For mechanical timers, it is recommended to check the time setting weekly to ensure its accuracy, as minor deviations can occur over time.
6 Solución de problemas
| Problema | Causa posible | Solución |
|---|---|---|
| Devices do not turn ON/OFF at set times. |
|
|
| O control remoto non funciona. |
|
|
| Devices remain continuously ON or OFF. | Manual override switch is set to ON or OFF. | Set the manual override switch to TIMER mode. |
| O temporizador non recibe enerxía. |
|
|
7. Especificacións
- Modelo: B09LC8D266
- Marca: DEWENWILS
- Cor: Negro
- Tipo de montaxe: Montaxe enchufable
- Estilo de cambio: Interruptor de marcación
- Número de configuracións: 48 (intervalos de 30 minutos)
- Remote RF Range: Ata 100 pés (línea de visión)
- Puntos de venda: Dual 3-prong grounded outlets
- Fabricante: DEWENWILS
8. Garantía e soporte
This DEWENWILS product is covered by a standard manufacturer's warranty. For specific warranty details, technical support, or assistance with your product, please contact DEWENWILS customer service directly. Refer to the product packaging or the DEWENWILS official websitio para información de contacto.


