1. Introdución
Thank you for choosing an Indesit appliance. This user manual provides essential information for the safe and efficient operation, installation, and maintenance of your Indesit BWE91485XWSSPTN washing machine. Please read these instructions carefully before using your appliance and keep them for future reference.
This manual covers important safety guidelines, detailed operating instructions, maintenance tips, and troubleshooting advice to ensure optimal performance and longevity of your washing machine.
2. Información de seguridade
Your safety and the safety of others are paramount. This manual contains important safety messages that must be read and observed at all times.
- Desconecte sempre o aparello da fonte de alimentación antes de realizar calquera limpeza ou mantemento.
- Este aparello non está pensado para o seu uso por persoas (incluídos nenos) con capacidades físicas, sensoriais ou mentais reducidas, ou con falta de experiencia e coñecementos, a menos que teñan supervisión ou instrucións sobre o uso do aparello por unha persoa responsable da súa seguridade.
- Os nenos deben ser supervisados para asegurarse de que non xoguen co aparello.
- Non empregues cables de extensión nin adaptadores múltiples.
- Asegúrate de que a lavadora estea debidamente conectada á terra.
- Do not open the detergent dispenser drawer while the machine is operating.
- Never force the porthole door open.
- In case of malfunction, do not attempt to repair the appliance yourself. Contact qualified technical assistance.
3. Produto rematadoview
Familiarize yourself with the main components of your Indesit BWE91485XWSSPTN washing machine.
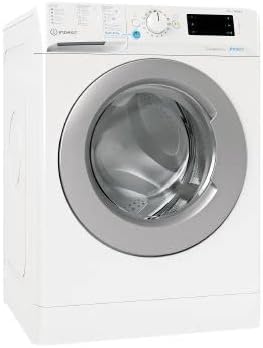
Figura 1: Fronte view of the Indesit BWE91485XWSSPTN washing machine. This image displays the main body of the washing machine, including the front-loading door, the control panel with a program selector knob and digital display, and the detergent dispenser drawer.
Compoñentes principais:
- A. Control Panel: Features the program selector knob, function buttons, and a digital display for cycle information.
- B. Detergent Dispenser Drawer: For adding detergent and fabric softener.
- C. Porthole Door: Front-loading door for loading and unloading laundry.
- D. Drum: Interior de aceiro inoxidable onde se lava a roupa.
- E. Filter/Drain Pump Access: Located at the bottom front, for maintenance.
4. Configuración e instalación
4.1 Unpacking and Leveling
- Retire todos os materiais de embalaxe.
- Remove the transport bolts located at the rear of the machine. These bolts secure the drum during transit and must be removed before use to prevent damage.
- Place the machine on a flat, stable floor.
- Adjust the adjustable feet to ensure the machine is perfectly level. Use a spirit level to verify. Proper leveling reduces vibration and noise during operation.
4.2 Conexión de auga
- Conecta a mangueira de entrada de auga a unha billa de auga fría cunha rosca de 3/4". Asegúrate de que a conexión estea ben axustada para evitar fugas.
- Coloque a mangueira de desaugadoiro nun tubo vertical ou sobre a beira dun lavabo, asegurándose de que estea fixada firmemente para evitar que se desprace durante a descarga. A altura da mangueira de desaugadoiro debe estar entre 65 cm e 100 cm do chan.
4.3 Conexión eléctrica
- Enchufe o cable de alimentación a unha toma eléctrica con conexión a terra adecuada.
- Asegurar o voltage e a frecuencia coinciden coas especificacións da placa de características do aparello.
4.4 First Wash Cycle
Before washing laundry, run an empty wash cycle to clean the drum and remove any manufacturing residues.
- Add a small amount of detergent to the main wash compartment of the dispenser drawer.
- Select a short program (e.g., "Rinse & Spin" or a quick wash program) without any laundry.
- Comeza o ciclo.
5. Instrucións de funcionamento
5.1 Preparación da roupa
- Clasifica a roupa por tipo de tecido, cor e grao de sucidade.
- Consulta as etiquetas da roupa para obter instrucións de lavado.
- Baleira os petos e pecha as cremalleiras e os botóns.
5.2 Carga da roupa
- Abre a porta do porto.
- Load laundry loosely into the drum, ensuring not to overload the machine. Overloading can lead to poor washing results and increased wear on the appliance.
- Close the porthole door firmly until it clicks shut.
5.3 Engadir deterxente e aditivos
Open the detergent dispenser drawer and add detergent and any additives to the appropriate compartments:
- Compartimento I: Pre-wash detergent (if applicable for selected program).
- Compartimento II: Main wash detergent.
- Compartment III (often marked with a flower symbol): Fabric softener. Do not exceed the 'MAX' level.
Refer to the detergent manufacturer's instructions for recommended dosages based on water hardness and laundry load.
5.4 Selección dun programa
- Turn the program selector knob to the desired wash program (e.g., Cotton, Synthetics, Delicates, Eco, Quick Wash).
- The display will show the default temperature and spin speed for the selected program.
- If available, use the corresponding buttons to adjust the temperature and spin speed according to your laundry needs.
- Select any additional functions (e.g., Extra Rinse, Easy Iron) if desired.
5.5 Inicio e pausa dun ciclo
- Press the "Start/Pause" button to begin the wash cycle. The indicator light will illuminate.
- To pause a running cycle, press the "Start/Pause" button again. The indicator light will flash.
- To resume, press the "Start/Pause" button once more.
5.6 Fin de ciclo
At the end of the cycle, the machine will stop, and the "End" indicator will light up. The porthole door will unlock automatically or after a short delay. Unload the laundry and leave the door slightly ajar to allow the drum to dry and prevent odors.
6. Mantemento e coidados
Un mantemento regular garante o funcionamento eficiente e prolonga a vida útil da túa lavadora.
6.1 Cleaning the Detergent Dispenser Drawer
- Pull out the drawer completely.
- Remove any removable inserts and rinse all parts under running water.
- Limpar a carcasa do caixón cun cepillo.
- Volva inserir os compoñentes e empurre o caixón de volta no seu lugar.
6.2 Limpeza do filtro da bomba de drenaxe
This filter collects lint and small objects. Clean it regularly (e.g., every 2-3 months).
- Asegúrese de que a máquina estea desenchufada.
- Open the cover at the bottom front of the machine.
- Place a shallow container beneath the filter to collect residual water.
- Desenrosque lentamente o filtro en sentido antihorario ata que a auga comece a drenar.
- Once all water has drained, fully unscrew and remove the filter.
- Clean the filter under running water and remove any debris.
- Atornille o filtro de novo no sentido das agullas do reloxo ata que estea ben axustado. Peche a tapa.
6.3 Limpeza do tambor e do exterior
- Run a "Drum Clean" program (if available) or a hot wash cycle with a washing machine cleaner or a cup of white vinegar periodically to prevent odors and limescale buildup.
- Limpe o exterior da máquina cun suave, damp pano. Non use produtos de limpeza ou disolventes abrasivos.
- Clean the rubber seal around the porthole door regularly to remove lint and residue.
6.4 Winter Care
If the machine is to be left in an unheated room for an extended period, drain all water from the hoses and pump to prevent freezing damage.
7 Solución de problemas
Antes de contactar co servizo de atención ao cliente, consulte esta sección para obter solucións a problemas comúns.
| Problema | Causa posible | Solución |
|---|---|---|
| A máquina non arranca | Cable de alimentación non conectado; porta non pechada correctamente; programa non seleccionado; botón "Inicio/Pausa" non premido. | Check power connection; ensure door is latched; select a program; press "Start/Pause". |
| Auga que non enche | Billa de auga pechada; mangueira de entrada dobrada ou bloqueada; presión da auga demasiado baixa. | Abrir a billa da auga; endereitar a mangueira; comprobar o subministro de auga. |
| A auga non drena | Manguera de drenaxe dobrada ou bloqueada; filtro da bomba de drenaxe atascado. | Straighten hose; clean drain pump filter (refer to Section 6.2). |
| Vibración / ruído excesivos | Machine not level; transport bolts not removed; laundry unevenly distributed. | Adjust feet to level machine; ensure transport bolts are removed; redistribute laundry. |
| Resultados de lavado pobres | Overloading; insufficient detergent; incorrect program selection; water temperature too low. | Reduce load; use correct detergent amount; select appropriate program; check temperature settings. |
If the problem persists after checking these points, please contact Indesit customer service.
8. Especificacións
| Marca | Indesit |
| Nome do modelo | BWE91485XWSSPTN |
| Número de modelo do fabricante | 8050147637937 |
| Dimensións (H x W x D) | 85 x 60 x 60 cm |
| Peso do produto | 50 kg |
| Material | Aceiro inoxidable (tambor) |
| Tipo de carga | Carga frontal |
| Velocidade de xiro máxima | 1000 RPM |
| Fabricante | INDESIT |
9. Garantía e soporte
Your Indesit washing machine comes with a manufacturer's warranty. Please refer to the warranty card provided with your appliance for specific terms and conditions, including warranty period and coverage details.
For technical assistance, spare parts, or further information, please contact Indesit customer service. You can usually find contact details on the Indesit official website or in the documentation supplied with your appliance. When contacting support, please have your appliance's model name (BWE91485XWSSPTN) and serial number ready.
For more information, you may visit the official Indesit store: Indesit Store on Amazon.es.


