1. Introdución
The Whadda WSI8055N is a versatile USB Experiment Interface Board designed for various applications requiring digital and analog input/output capabilities. This board features 5 digital input channels, 8 digital output channels, 2 analog input channels, and 2 analog output channels, all with 8-bit resolution. It connects to your PC via USB, allowing for easy integration into custom applications.
The communication routines for the WSI8055N are encapsulated within a Dynamic Link Library (DLL) named K8055D.DLL. This enables users to develop custom Windows applications using programming languages such as Delphi, Visual Basic, C++ Builder, Visual C++, Visual C#, and Excel, or any other 32-bit development tool compatible with DLL calls. Example source code is provided to assist with development.
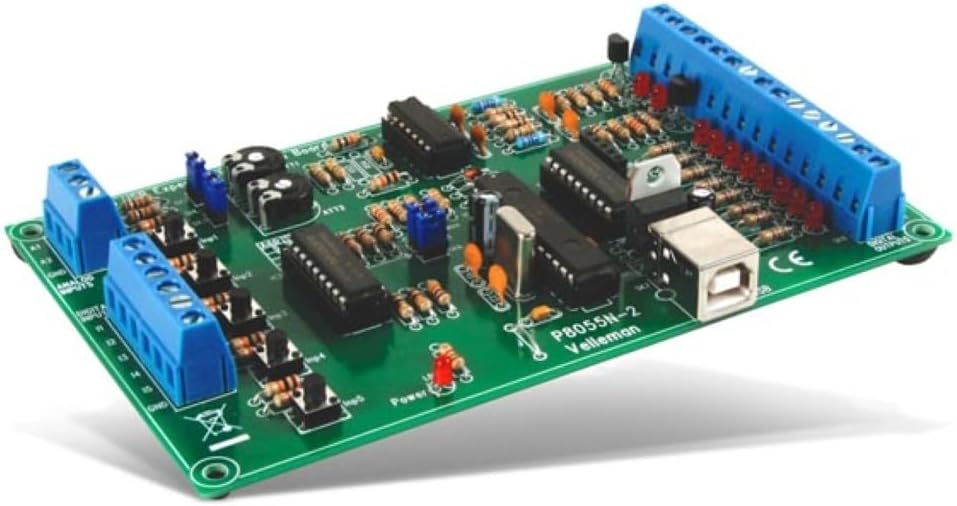
Figure 1: Assembled Whadda WSI8055N USB Experiment Interface Board. This image shows the compact green circuit board with various electronic components, including integrated circuits, resistors, capacitors, and blue screw terminals for connections, along with a USB Type-B port.
2. Configuración e instalación
2.1 Desembalaxe do kit
The WSI8055N is often supplied as a DIY soldering kit. Carefully unpack all components and verify against the included parts list (not provided in this manual). Ensure all components are present and undamaged before proceeding.
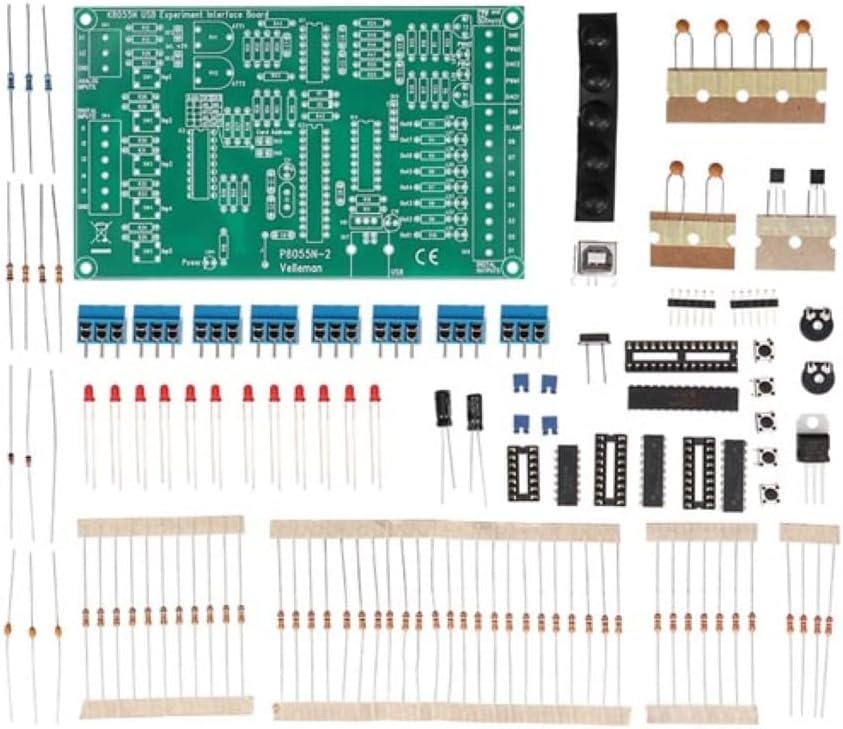
Figure 2: Components of the Whadda WSI8055N DIY kit. This image displays a green printed circuit board (PCB) and numerous individual electronic components such as resistors, capacitors, diodes, integrated circuits, and terminal blocks, laid out for assembly.
2.2 Assembly (if applicable)
If you have received a DIY kit, follow the detailed assembly instructions provided with your kit to solder all components onto the printed circuit board. Pay close attention to component orientation (e.g., polarized capacitors, ICs, diodes) and solder quality. Incorrect assembly can lead to malfunction.
2.3 Instalación de software
- Instalación de controladores: Connect the assembled WSI8055N board to your PC using a standard USB cable. Your operating system (Windows) should attempt to install the necessary drivers automatically. If not, refer to the driver installation guide provided with your product or download them from the official Whadda websitio.
- DLL Integration: The K8055D.DLL file, which contains all communication routines, must be placed in a location accessible by your development environment. Typically, this means placing it in the system directory (e.g., C:\Windows\System32 for 32-bit applications or C:\Windows\SysWOW64 for 64-bit applications) or in the same directory as your custom application executable.
- Example Software: Install the provided example software and source code for your preferred programming language. These examples demonstrate how to interact with the WSI8055N board and serve as a starting point for your own projects.
3. Operating the WSI8055N Board
The WSI8055N board provides a flexible interface for controlling and monitoring external devices through its digital and analog I/O channels. Interaction is primarily achieved through custom software applications that utilize the K8055D.DLL.
3.1 Digital Inputs (5 Channels)
The 5 digital input channels can be used to read the state of switches, sensors, or other digital signals. These inputs typically detect a high (ON) or low (OFF) state. Your custom application will call functions within the K8055D.DLL to read the current status of these inputs.
3.2 Digital Outputs (8 Channels)
The 8 digital output channels can be used to control external devices such as LEDs, relays, or motors (via appropriate driver circuits). Your application can set each output channel to a high (ON) or low (OFF) state by calling the relevant DLL functions.
3.3 Analog Inputs (2 Channels, 8-bit)
The 2 analog input channels allow you to measure analog voltages from sensors or other analog sources. With 8-bit resolution, these inputs can distinguish 256 different voltage levels. The DLL provides functions to read the digitized value from these inputs.
3.4 Analog Outputs (2 Channels, 8-bit)
The 2 analog output channels can generate analog voltage signals, useful for controlling devices that require variable voltage inputs. Similar to analog inputs, these outputs operate with 8-bit resolution, allowing for 256 distinct output voltage levels. Your application will use DLL functions to set the desired analog output value.
3.5 Expanding I/O Capabilities
You can expand the number of available inputs and outputs by connecting up to 4 WSI8055N boards to the USB ports of a single PC. The DLL supports addressing individual boards, allowing your application to manage multiple interfaces simultaneously.

Figure 3: Screenshot of the WSI8055N demo software interface. This image shows a graphical user interface with controls for digital inputs (checkboxes), digital outputs (checkboxes), analog inputs (sliders), and analog outputs (sliders), along with buttons for connection, setting values, and counter functions. It also displays the DLL version and card connection status.
4. Mantemento
The Whadda WSI8055N board is designed for durability and requires minimal maintenance. To ensure optimal performance and longevity:
- Manter limpo: Periodically clean the board with a soft, dry brush or compressed air to remove dust and debris. Avoid using liquids or harsh chemicals.
- Manipular con coidado: Avoid dropping the board or subjecting it to excessive physical shock.
- Descarga estática: Always handle the board in an environment free from static electricity. Use anti-static precautions (e.g., anti-static wrist strap) when touching the board, especially the exposed components.
- Condicións ambientais: Operate and store the board in a dry environment, away from extreme temperatures and humidity.
5 Solución de problemas
If you encounter issues with your WSI8055N board, consider the following troubleshooting steps:
- Placa non recoñecida polo PC:
- Ensure the USB cable is securely connected to both the board and the PC.
- Proba cun porto USB diferente no teu PC.
- Verify that the USB drivers are correctly installed. Check Device Manager in Windows for any unknown devices or driver errors. Reinstall drivers if necessary.
- If it's a DIY kit, double-check all solder joints for cold joints or bridges.
- Software Cannot Communicate with Board:
- Confirm that the K8055D.DLL file is correctly placed in an accessible directory (e.g., system directory or application directory).
- Ensure no other application is currently using the board, as only one application can access it at a time.
- Consulta o example software to see if it can communicate with the board. This helps determine if the issue is with your custom application or the board/driver setup.
- Incorrect I/O Readings/Outputs:
- Verify external wiring to the digital and analog I/O terminals. Ensure correct polarity and connections.
- Consulta o voltage levels of your external signals to ensure they are within the board's operating specifications.
- Review your application code for correct DLL function calls and logic.
6. Especificacións
| Número de modelo | WSI8055N |
| Marca | Vaia |
| Interface de hardware | USB |
| Canles de entrada dixital | 5 |
| Canles de saída dixital | 8 |
| Canles de entrada analóxica | 2 (8-bit resolution) |
| Analog Output Channels | 2 (8-bit resolution) |
| Ampliabilidade | Up to 4 cards per PC USB port |
| Dispositivos compatibles | Ordenador portátil, ordenador persoal |
| Peso do elemento | 0.17 quilogramos |
| Fabricante | Vaia |
| ASIN | B09W9BVZ2V |
7. Información da garantía
The Whadda WSI8055N USB Experiment Interface Board is covered by a Manufacturer Guarantee. Please refer to the specific warranty terms and conditions provided with your purchase for details regarding coverage duration, claims process, and limitations.
8. Apoio
For technical assistance, driver updates, additional documentation, or inquiries regarding the WSI8055N board, please visit the official Whadda website or contact their customer support. Ensure you have your product model number (WSI8055N) and any relevant purchase information ready when seeking support.


