Introdución
This manual provides comprehensive instructions for setting up and operating your PPLEE Alarm Clock. Please read it thoroughly to ensure proper use and to take full advantage de todas as características.

Image: The PPLEE Alarm Clock displaying "12:00" with a smartphone connected for charging.
Configuración
Power Source and Battery Backup
The PPLEE Alarm Clock is primarily powered by an AC outlet (100-240V). The included power adapter must be connected for all functions (digital display, phone charging, dimmer, etc.) to operate.

Imaxe: Traseira view of the alarm clock highlighting the power input and battery compartment.
For battery backup, install 2 AAA batteries (not included) into the designated compartment. These batteries are solely for memorizing time and alarm settings during a power outage. The display will go blank, but the alarm function will still work. No need to reset time when power is restored.

Image: What's in the box - Alarm clock, user manual, power adapter, and power cable.
Instrucións de funcionamento
Time Setting (12H/24H & DST)
To set the time, press the "TIME/DST" button. The hour display will start flickering. Use the "+" or "-" buttons to adjust the hour. Press "TIME/DST" again to confirm the hour and move to minute setting. Adjust minutes with "+" or "-" and press "TIME/DST" to save.
To switch between 12-hour and 24-hour formats, press the "12/24H" button.
The clock also supports Daylight Saving Time (DST). Press and hold the "TIME/DST" button to activate or deactivate DST.

Imaxe: Examples of 12H, 24H, and DST time displays.
Alarm Setting (Dual Alarms, Volume, Snooze)
This alarm clock features dual alarms (Alarm 1 and Alarm 2) for different schedules.
- To set Alarm 1, press the "ALARM 1" button. The hour display will flicker. Use "+" or "-" to set the hour, then press "ALARM 1" to confirm.
- The minute display will then flicker. Use "+" or "-" to set the minutes, then press "ALARM 1" to save.
- Repeat the process for Alarm 2 using the "ALARM 2" button.

Image: Visual representation of setting dual alarms for different wake-up times.
Axuste do volume da alarma
The alarm volume can be adjusted to 7 different levels, ranging from 50dB to 120dB. Rotate the volume knob (located on the side/rear) to increase or decrease the alarm sound.

Image: A visual scale indicating the 7 adjustable volume levels for the alarm.
Función de repetición
When the alarm sounds, lightly touch the large "SNOOZE/NIGHT LIGHT" button on top to activate the 9-minute snooze function. The alarm will temporarily pause and sound again after 9 minutes.
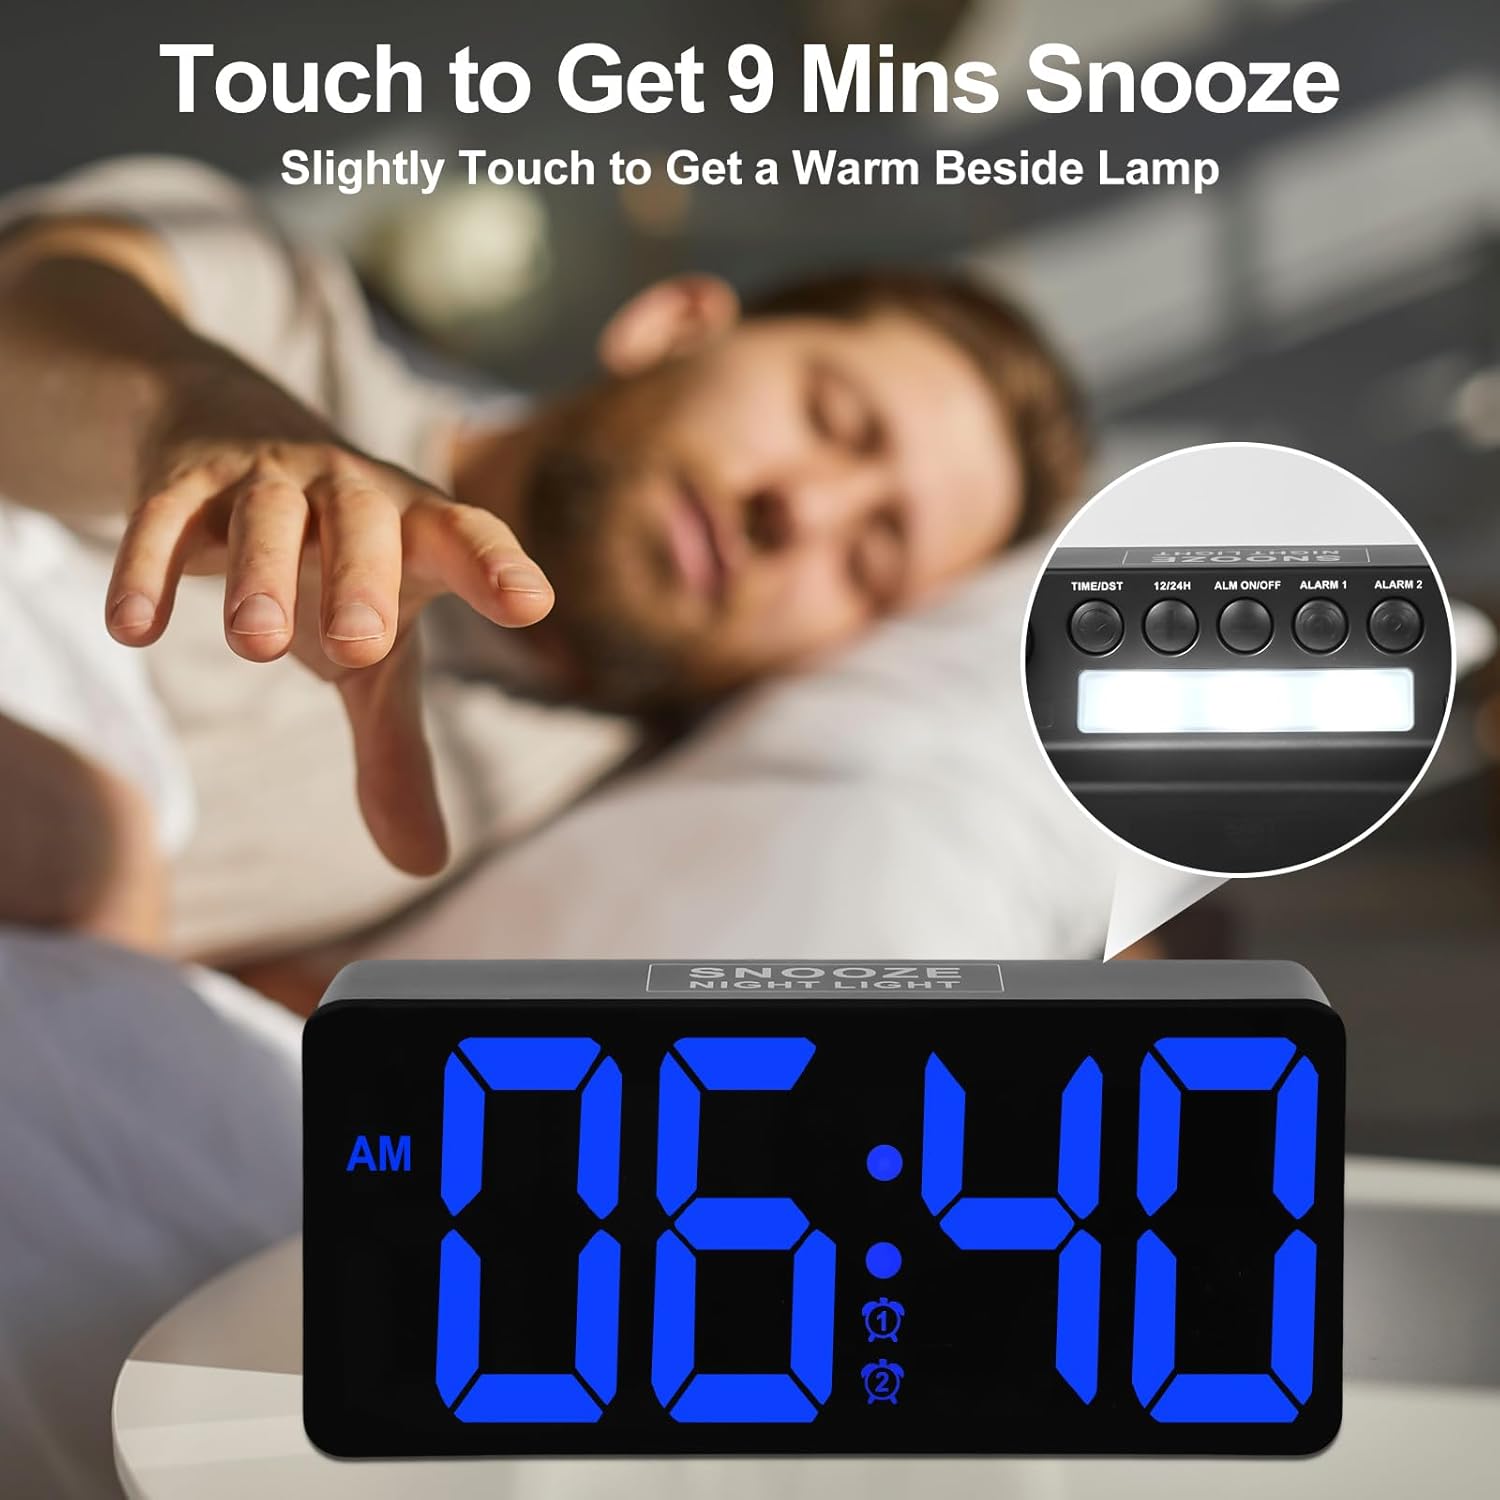
Image: Demonstrating the touch-sensitive snooze button on top of the clock.
Axuste de brillo
The LED display brightness is fully adjustable from 0-100%. Use the rotary dimmer switch (located on the side/rear) to set your preferred brightness level. This allows for comfortable viewde día ou de noite.

Image: The alarm clock display at different brightness settings, illustrating the full dimming range.
Luz nocturna
The alarm clock features a night light at the rear. To turn it on or off, lightly touch the "SNOOZE/NIGHT LIGHT" button on the top of the clock. This provides a soft, ambient light.
Portos de carga USB e tipo C
The alarm clock is equipped with both a USB (5V/1A) and a Type-C (5V/1A) output port. These ports allow you to conveniently charge two digital devices, such as your smartphone or smartwatch, simultaneously.

Image: The alarm clock providing power to a smartphone and a tablet via its integrated charging ports.
Mantemento
To clean the alarm clock, gently wipe the surface with a soft, dry cloth. Avoid using abrasive cleaners or solvents, as these may damage the finish. Keep the device away from excessive moisture and direct sunlight.
Resolución de problemas
| Problema | Solución |
|---|---|
| A pantalla está en branco. | Ensure the power adapter is securely plugged into both the clock and a working electrical outlet. If using battery backup, the display will be blank during a power outage, but the alarm function will still work. |
| Non soa a alarma. | Check if the alarm is activated (Alarm 1 or Alarm 2 indicator should be visible on the display). Verify the alarm volume is not set to the lowest level. Ensure the time is set correctly for AM/PM. |
| Non se pode axustar a hora/alarma. | Follow the time/alarm setting instructions carefully. Ensure you are pressing the correct buttons ("TIME/DST", "ALARM 1", "ALARM 2") and using the "+" or "-" buttons for adjustment. |
| Os portos de carga non funcionan. | Confirm the clock is connected to AC power. The charging ports require the main power supply to function. Check the charging cables for damage. |
Especificacións
| Característica | Detalle |
|---|---|
| Marca | PPLEE |
| Número de modelo | CR1023 |
| Tipo de visualización | LED |
| Fonte de enerxía | Corded Electric and Battery Backup |
| Copia de seguridade da batería | 2 x AAA (for settings memory only) |
| Portos de carga | 1 x USB 5V/1A, 1 x Type-C 5V/1A |
| Tipo de alarma | Alarmas duales |
| Volume de alarma | 7 Levels (50dB to 120dB) |
| Duración do adiamento | 9 minutos |
| Brillo da pantalla | 0-100% axustable |
| Dimensións | 1.77" de ancho x 3.03" de alto |
| Peso do elemento | 9.9 onzas |
Garantía e Soporte
PPLEE provides an 18-month warranty, 12-month replacement, and 3-month refund policy for this product. For any questions or technical support, please contact the seller directly.
Tamén podes consultar o manual de usuario oficial en PDF para obter información máis detallada:
Vídeos de produtos
PPLEE Digital Alarm clock with Big LED Number for Bedroom
Este vídeo ofrece un sobreview of the PPLEE Digital Alarm Clock, highlighting its large LED display and suitability for bedrooms.