1. Introdución
Thank you for choosing the SEVERIN KA 4850 FILKA Coffee Maker. This manual provides essential information for the safe and efficient operation, maintenance, and troubleshooting of your appliance. Please read these instructions carefully before first use and keep them for future reference.
2. Instrucións de seguridade
- Always connect the appliance to a properly installed and grounded power outlet.
- Non mergulle o aparello, o cable de alimentación nin o enchufe en auga ou outros líquidos.
- Manteña o aparello fóra do alcance dos nenos.
- Unplug the appliance from the power outlet when not in use, before cleaning, and during assembly or disassembly.
- Non faga funcionar o aparello se o cable de alimentación ou a clavija están danados, ou se o aparello funciona mal ou sufriu algún dano. Póñase en contacto co persoal de servizo autorizado.
- Use the appliance only for its intended purpose of brewing coffee.
- Evita o contacto con superficies quentes. Usa asas ou pomos.
- Ensure the water tank is filled only with fresh, cold water.
- Never open the filter holder or water tank lid during the brewing cycle.
3. Produto rematadoview
Familiarize yourself with the components of your SEVERIN KA 4850 FILKA coffee maker.
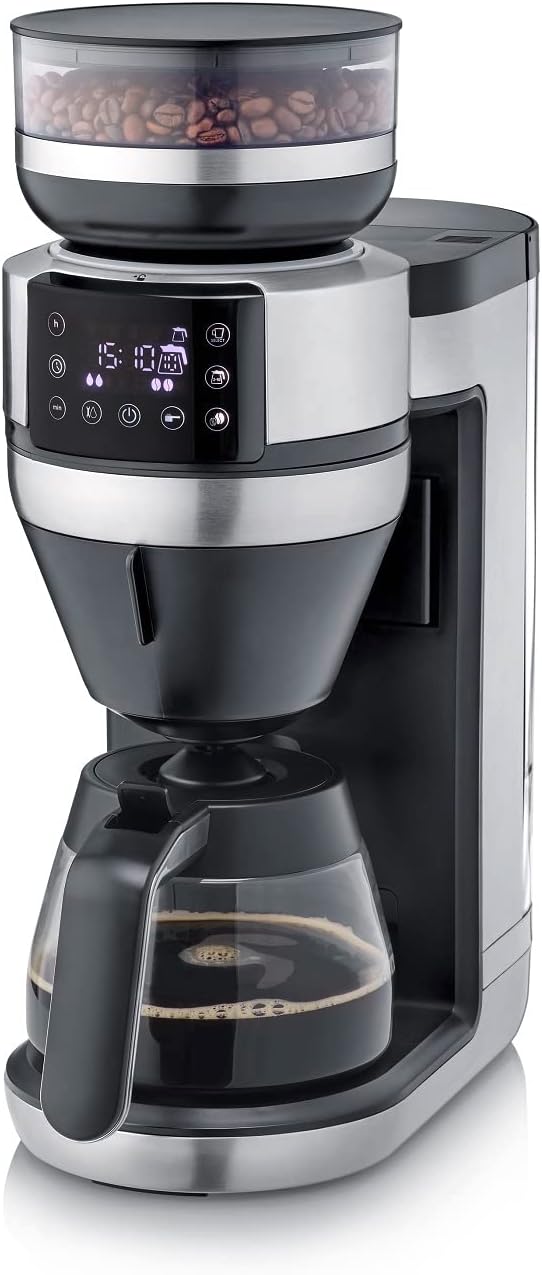
Figura 1: Fronte view of the SEVERIN KA 4850 FILKA Coffee Maker with glass carafe.

Figure 2: The coffee maker positioned on a kitchen counter, ready for use.

Figure 3: Detachable water tank being removed from the side of the coffee maker for easy filling and cleaning.

Figure 4: The transparent container for whole coffee beans, located at the top of the appliance.

Figure 5: Close-up of the digital control panel with various function buttons and a display showing time and settings.

Figure 6: The filter holder with a disposable paper filter and ground coffee inside.

Figure 7: The reusable gold-tone permanent filter placed in the filter holder, containing ground coffee.

Figure 8: The coffee maker displayed with its included accessories: glass carafe, gold-tone filter, and adjustable cup stand.
4. Configuración
4.1 Desembalaxe e limpeza inicial
- Retire todos os materiais de embalaxe e adhesivos.
- Clean the glass carafe, filter holder, and water tank with warm soapy water. Rinse thoroughly and dry.
- Limpe o exterior do aparello cun anuncioamp pano.
4.2 First Use (Rinsing Cycle)
- Fill the water tank with fresh, cold water up to the maximum level.
- Coloque a xerra de vidro baleira coa tapa sobre a placa de quecemento.
- Insert the empty filter holder (without coffee or filter paper).
- Enchufe o aparello nunha toma de corrente.
- Run a full brewing cycle without coffee to rinse the internal components. Discard the water.
- Repeat this process once or twice to ensure thorough cleaning.
5. Instrucións de funcionamento
5.1 Enchendo o depósito de auga
- Asegúrese de que o aparello estea desenchufado.
- Remove the detachable water tank (Figure 3).
- Fill the tank with the desired amount of fresh, cold water. The appliance features "Cup Control" which automatically draws the necessary water for your selected coffee quantity (100-350ml for single cups).
- Reinsert the water tank securely.
5.2 Engadir grans de café ou café moído
- Para fabas enteiras: Open the lid of the bean container (Figure 4) and fill with whole coffee beans. Close the lid firmly.
- Para café premoído: Open the filter holder. Insert either a paper filter (Figure 6) or the reusable gold-tone filter (Figure 7). Add the desired amount of pre-ground coffee. Close the filter holder.
5.3 Brewing Coffee (Carafe)
- Place the glass carafe with its lid on the warming plate.
- Select the desired number of cups on the control panel (Figure 5).
- Adjust coffee strength if available.
- Press the start button to begin brewing. The appliance will grind the beans (if selected) and brew the coffee.
5.4 Brewing Coffee (Single Cup / To-Go Mug)
The 5-in-1 compatibility allows brewing directly into small cups, large cups, or to-go mugs.
- Adjust the cup stand to the appropriate height for your chosen cup or mug (Figure 8).
- Place your cup or mug on the stand.
- Select the single-cup brewing option and desired volume (100-350ml) on the control panel.
- Press the start button. The appliance will automatically dispense the correct amount of water and brew your coffee.
5.5 Funcións programables
Refer to the control panel (Figure 5) for setting the timer and other programmable functions. This allows you to set a specific time for your coffee to start brewing automatically.
6. Mantemento e Limpeza
6.1 Limpeza diaria
- Desenchufe sempre o aparello antes de limpar.
- Wash the glass carafe, filter holder, and reusable gold-tone filter with warm soapy water after each use. These parts are often dishwasher-safe; refer to specific product markings.
- Limpe o exterior do aparello cun suave, damp pano. Non utilice produtos de limpeza abrasivos nin estropajos.
- Empty and clean the water tank regularly.
6.2 Cleaning the Bean Container and Grinder
- Ensure the bean container is empty.
- Carefully remove the bean container. Clean it with a dry brush or cloth.
- Use a small brush to clean any residual coffee grounds from the grinder mechanism. Do not use water directly on the grinder.
6.3 Descalcificación
Regular descaling is crucial for optimal performance and longevity of your coffee maker, especially in areas with hard water. The frequency depends on water hardness and usage.
- Use a commercially available descaling solution suitable for coffee makers, or a mixture of white vinegar and water (1:2 ratio).
- Fill the water tank with the descaling solution according to the manufacturer's instructions.
- Coloque a garrafa baleira no prato quentador.
- Run a brewing cycle. Stop the cycle halfway through and let the solution sit for about 15-30 minutes.
- Resume and complete the brewing cycle.
- After descaling, run at least two full cycles with fresh, clean water to rinse out any descaling residue.
7 Solución de problemas
| Problema | Causa posible | Solución |
|---|---|---|
| O café non se prepara. | No water in tank; appliance not plugged in; power outage; filter holder not correctly placed. | Fill water tank; check power connection; ensure filter holder is properly seated. |
| O café ten un sabor débil. | Too little coffee; coffee too coarsely ground; appliance needs descaling. | Add more coffee; adjust grinder to finer setting; descale the appliance. |
| Coffee tastes bitter or has sediment. | Coffee too finely ground; too much coffee; appliance needs cleaning. | Adjust grinder to coarser setting; use less coffee; clean the filter and filter holder thoroughly. |
| O aparello apágase inesperadamente. | Incorrect operation; safety feature activated. | Unplug, wait a few minutes, then plug back in and restart. Ensure all components are correctly assembled and settings are valid. |
| Grinder is noisy or not grinding. | Bean container empty; foreign object in grinder; grinder clogged. | Refill beans; check for and remove any foreign objects; clean the grinder. |
8. Especificacións
| Característica | Detalle |
|---|---|
| Marca | SEVERIN |
| Número de modelo | KA 4850 |
| Cor | Brushed, matte, black, silver |
| Dimensións (L x W x H) | 46 x 17 x 38.2 cm |
| Capacidade | 350 Milliliters (for single cup, carafe capacity not specified but typically larger) |
| Voltage | 230 voltios |
| Material | Aceiro inoxidable |
| Características especiais | Permanent filter, Programmable, Integrated grinder, 5-in-1 compatibility, Cup Control |
| Type of Coffee Maker | Cafetera eléctrica con filtro |
9. Garantía e soporte
This SEVERIN appliance comes with a manufacturer's warranty. Please refer to the warranty card included with your product for specific terms and conditions. For technical support, spare parts, or service inquiries, please contact SEVERIN customer service or visit the official SEVERIN websitio.
Garda o teu recibo de compra como xustificante de compra para reclamacións de garantía.


