Introdución
The MARTVSEN M7-RGM Camera Mount is a versatile and robust accessory designed for securely attaching action cameras, digital cameras, and other devices to various surfaces. Its enhanced stability, flexible adjustment options, and broad compatibility make it ideal for capturing dynamic footage en entornos diversos.
Características do produto
- Estabilidade mellorada: Features a larger metal frame and reinforced crab claw for secure attachment.
- Compatibilidade versátil: Designed to accommodate round and square tubes (0.39-1.96 inches / 1-5 cm).
- Easy Adjustment: Equipped with a 1/4-inch thread and a standard 1-inch ball head, allowing for 360-degree rotation and 180-degree tilt for multiple angles.
- Calidade Premium: Constructed from durable aluminum alloy with precision engineering.
- Aplicacións amplas: Suitable for cycling, motorcycling, mountain biking, outdoor sports, and travel photography.
Contido do paquete
Asegúrate de que estean presentes todos os compoñentes antes de continuar coa instalación:
- 1 x MARTVSEN M7-RGM Camera Mount (Crab Claw Clamp with Magic Arm)
- 1 x GoPro Adapter
- 1 x 1/4-inch Screw Anti-Slip Pad
Instrucións de configuración
1. Attaching the GoPro Adapter (if applicable)
If you are using a GoPro or a compatible action camera that requires a GoPro-style mount, attach the included GoPro adapter to the 1/4-inch screw on the magic arm. Ensure it is tightened securely.
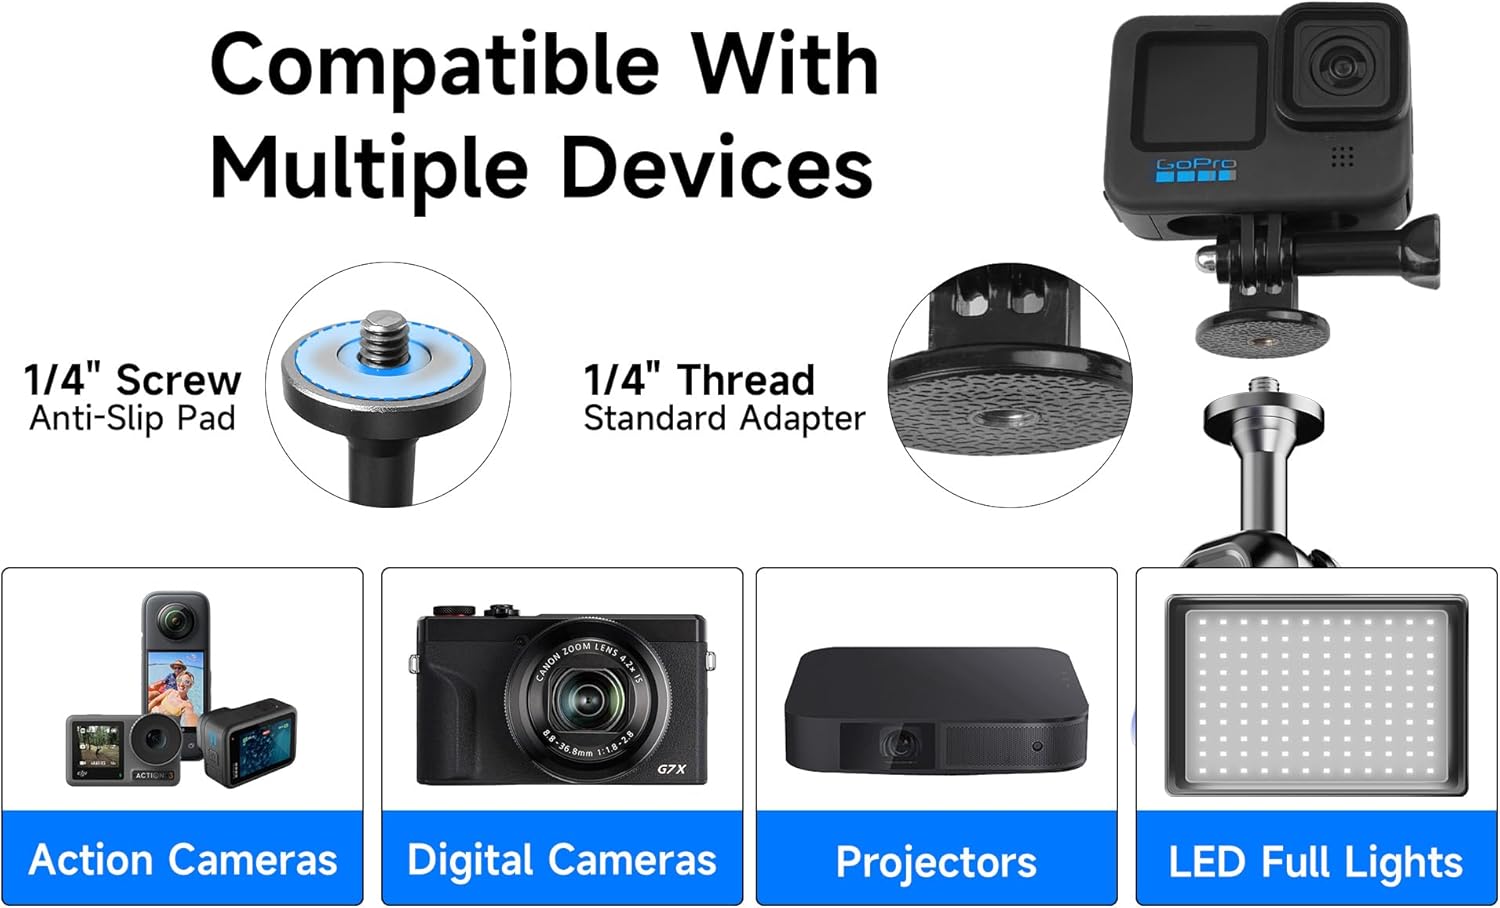
Image: The 1/4-inch screw with anti-slip pad and the standard GoPro adapter, demonstrating compatibility with various devices.
2. Mounting the Camera/Device
Attach your camera or device to the 1/4-inch screw or the GoPro adapter. Ensure the camera is firmly screwed onto the mount to prevent accidental detachment during use.
Video: This video demonstrates the secure attachment of an action camera to the mount, highlighting its robust design and ease of use for various activities.
3. Attaching the Mount to a Surface
The crab claw clamp is designed for secure attachment to round or square tubes. Open the clamp by turning the blue knob counter-clockwise. Position the clamp around the desired surface (e.g., motorcycle handlebar, bicycle frame, railing) and tighten the knob clockwise until the mount is firmly secured. The removable TPE pads provide extra grip and protect the mounting surface.
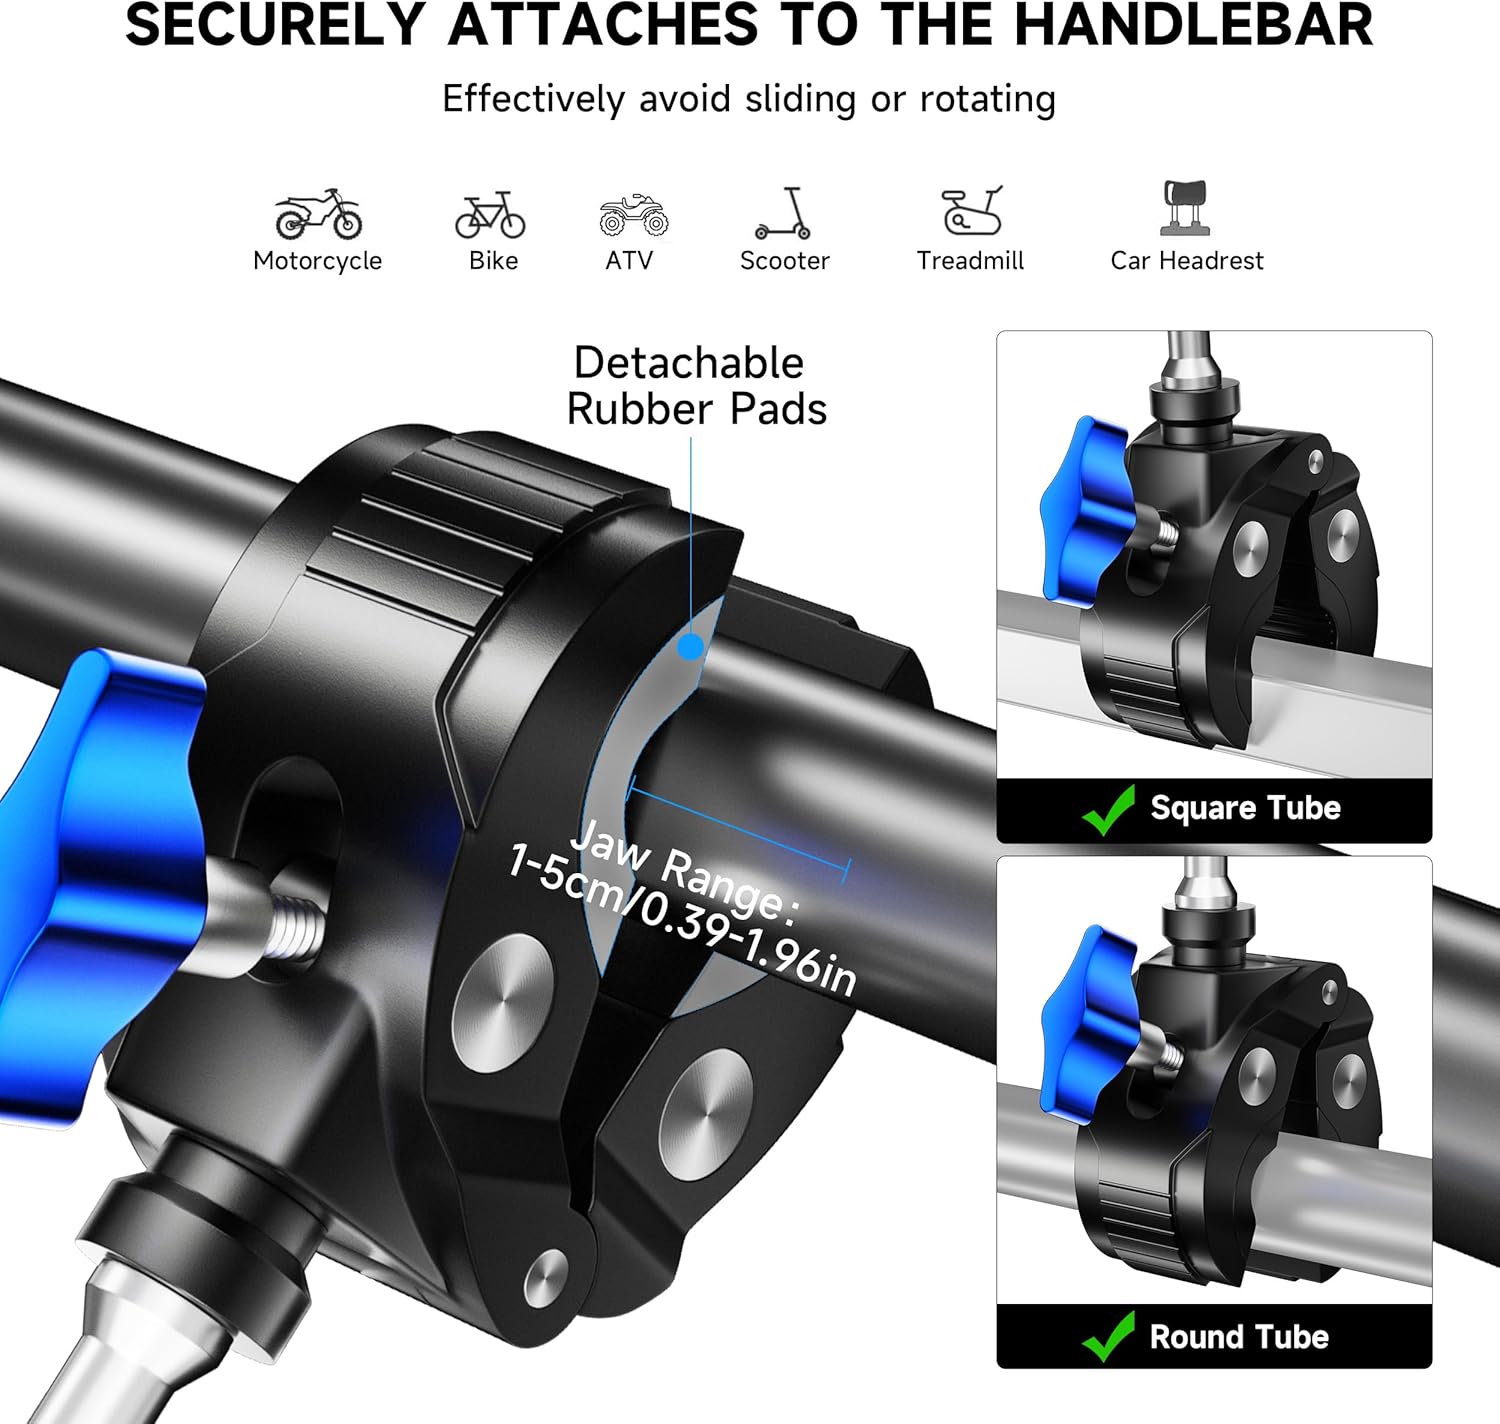
Image: The crab claw clamp features a jaw range of 0.39-1.96 inches (1-5 cm) and is suitable for both round and square tubes, ensuring a stable attachment.

Image: The versatile clamp can be fitted to round tubes, square tubes, and even rear mirror arms, accommodating a range of 0.4 to 2 inches (1-5 cm).
Instrucións de funcionamento
Adjusting the Magic Arm
The magic arm features dual ball heads that allow for 360-degree rotation and 180-degree tilt. Loosen the central blue knob on the magic arm to adjust the angle and position of your camera. Once the desired angle is achieved, tighten the knob firmly to lock the position. This allows for flexible camera placement to capture various perspectives.

Image: The jumbo bracket and magic arm allow for easy switching between horizontal and vertical orientations with 360-degree rotation and 180-degree tilt.
Video: This video showcases the mount's compatibility with Insta360 cameras and its flexible adjustment capabilities for optimal recording angles.
Mantemento
To ensure the longevity and optimal performance of your MARTVSEN M7-RGM Camera Mount, follow these maintenance guidelines:
- Limpeza: Limpa a montura cun pano suave eamp cloth to remove dust and dirt. Avoid using harsh chemicals or abrasive materials that could damage the finish.
- Inspección: Regularly check all screws and knobs for tightness. Ensure the crab claw clamp and ball joints operate smoothly.
- Almacenamento: Store the mount in a dry, cool place away from direct sunlight and extreme temperatures when not in use.
Resolución de problemas
If you encounter any issues with your camera mount, consider the following:
- Mount Slipping: Asegúrese de que o clamp knob is fully tightened. Verify that the TPE pads are correctly positioned to provide maximum grip on the mounting surface.
- Inestabilidade da cámara: Check that the 1/4-inch screw or GoPro adapter is securely fastened to your camera and the magic arm. Tighten the central knob on the magic arm to lock the ball joints.
- Dificultade de axuste: Loosen the central knob on the magic arm sufficiently to allow free movement of the ball joints. If movement is still stiff, ensure no debris is obstructing the joints.
Especificacións
| Característica | Detalle |
|---|---|
| Dimensións do produto | 9 x 3 x 1.26 polgadas |
| Peso do elemento | 11.2 onzas |
| Número de modelo do artigo | M7-RGM |
| Mountable Range | 0.39-1.96 polgadas / 1-5 cm |
| Carga máxima | 6.6 libras / 3 kg |
| Características especiais | 1" 360° Adjustable Double Metal Non-slip Ball Head, Fits Round & Square Tube, Al Alloy Universal Magic Arm, Larger & Thicker Crab Claw Clamp |
| Dispositivos compatibles | Cameras (GoPro Max Hero 12/11/10/9/8/7/6/5 Black/4/3+ Fusion Session, DJI Osmo Action 2 Pocket 2, Insta360 Go3/Go2/One R/One X2, All Camera Devices with 1/4 Inch Thread) |
| Tipo de montaxe | Handlebar/Seatpost/Pole/Rear-view Mirror/Headrest |

Image: This diagram illustrates the mount's dimensions, including its 9-inch (23 cm) total length, 3-inch (8 cm) width, 0.4-2 inch (1-5 cm) grip range, and 6.6 lbs (3 kg) maximum load.
Garantía e Soporte
For any product inquiries, technical support, or warranty claims, please contact MARTVSEN customer service through the retailer's platform or the official MARTVSEN websitio. Garde o comprobante de compra para validar a garantía.


