Introdución
This manual provides detailed instructions for the setup, operation, and maintenance of your ClocTeck Transparent Digital Alarm Clock. Please read this manual thoroughly before using the product to ensure proper function and longevity.
Información de seguridade
- Non expoñas o dispositivo a temperaturas extremas, luz solar directa nin humidade elevada.
- Evite deixar caer ou someter o dispositivo a fortes impactos.
- Manteña o dispositivo lonxe da auga e doutros líquidos.
- Non intente desmontar nin reparar o dispositivo vostede mesmo. Póñase en contacto con persoal cualificado para o servizo técnico.
- Use only the specified Type-C charging cable for power.
Contido do paquete
Comprobe o contido do paquete ao desembalar:
- ClocTeck Transparent Digital Alarm Clock (Gold)
- Cable de carga USB tipo C
- Manual de usuario (este documento)
Produto rematadoview
The ClocTeck Transparent Digital Alarm Clock features a clear LCD display that shows time, date, day of the week, temperature, humidity, and a weather icon. It is designed with a sleek aluminum alloy case.
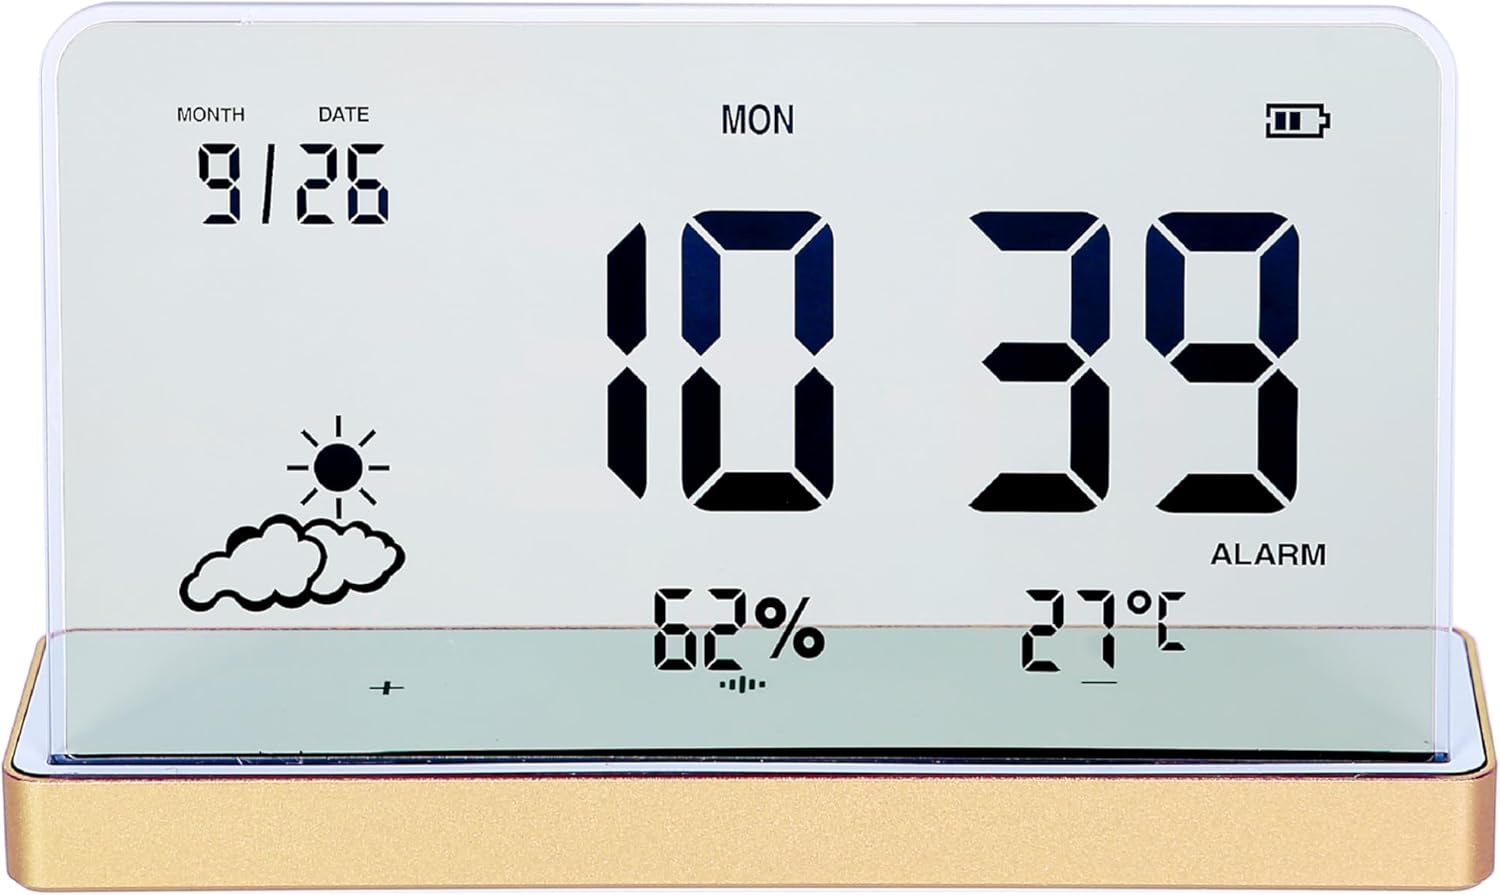
Figura 1: Fronte view of the ClocTeck Transparent Digital Alarm Clock. The display shows the current time (10:39), date (9/26), day (MON), humidity (62%), temperature (27°C), and a partly cloudy weather icon. A battery indicator is visible in the top right corner.
Características principais:
- Transparent LCD Display
- Time, Date, and Day Display
- Indoor Temperature and Humidity Monitoring
- Up to 3 Programmable Alarms
- Rechargeable Battery with long standby time
- Durable Aluminum Alloy Case
Configuración
1. Encendido e carga
The clock is powered by a built-in rechargeable battery. Before first use, or if the battery indicator is low, connect the provided Type-C USB charging cable to the charging port on the back or side of the clock and plug the other end into a standard USB power adapter (not included).
- A full charge provides approximately 75 days of operation.
- O indicador da batería na pantalla mostrará o estado de carga.
2. Colocación inicial
Place the clock on a stable, flat surface. For accurate temperature and humidity readings, avoid placing it near heat sources, direct sunlight, or in areas with extreme drafts.
Instrucións de funcionamento
The clock features several buttons, typically located on the back or bottom, for setting time, alarms, and other functions. Refer to the specific button labels on your device.
1. Axuste da hora e da data
- Preme o SET botón para entrar no modo de configuración da hora.
- Usa o UP e ABAIXO botóns para axustar a hora. Prema SET para confirmar e pasar aos minutos.
- Repita para minutos, ano, mes e data.
- Preme SET de novo para saír do modo de configuración.
2. Configuración de alarmas
The clock supports up to 3 independent alarms.
- Preme o ALARMA button to cycle through Alarm 1, Alarm 2, Alarm 3, and alarm off modes.
- When an alarm is selected, press and hold the ALARMA button to enter alarm setting mode for that specific alarm.
- Usa o UP e ABAIXO buttons to set the alarm hour and minutes. Press ALARMA to confirm each step.
- After setting the time, you may be prompted to set the alarm's activation days (e.g., weekdays, weekends, daily). Use UP/ABAIXO e ALARMA para seleccionar.
- To activate or deactivate an alarm, short press the ALARMA button until the alarm icon appears or disappears next to the corresponding alarm number on the display.
3. Visualización de temperatura e humidade
The clock continuously displays indoor temperature and humidity. The temperature range is -20°C to 65°C, and the humidity range is 10% to 99%.
- Temperature is displayed in Celsius (°C).
- Humidity is displayed as a percentage (%).
4. Función de repetición da alarma
When an alarm sounds, press any button (other than the alarm off button, if present) to activate the snooze function. The alarm will sound again after a short interval (typically 5-10 minutes).
5. Axuste de brillo da pantalla
The clock may feature automatic brightness adjustment or manual control. Consult the device's physical buttons for a dedicated brightness control button or a combination of buttons to adjust display intensity.
Mantemento
- To clean the display and casing, use a soft, dry cloth. Do not use abrasive cleaners or solvents.
- Asegúrate de que o porto de carga estea libre de po e residuos.
- Store the clock in a cool, dry place when not in use for extended periods.
Resolución de problemas
| Problema | Causa posible | Solución |
|---|---|---|
| A pantalla está en branco ou escura. | Low battery or power saving mode. | Charge the device using the Type-C cable. Check brightness settings. |
| Non soa a alarma. | A alarma non está activada ou o volume é demasiado baixo. | Ensure the alarm is set and activated (alarm icon visible). Check if there's a volume setting. |
| Lecturas incorrectas de temperatura/humidade. | Device placed in an unsuitable environment. | Relocate the clock away from direct heat, cold, or high drafts. Allow time for readings to stabilize. |
| Os botóns non responden. | Fallo temporal de software ou batería baixa. | Recharge the device. If issue persists, try a soft reset (refer to manual for reset procedure, if available, or let battery drain and recharge). |
Especificacións
- Modelo: ClocTeck-CL01
- Dimensións: Approximately 12.5 cm (Width) × 3.2 cm (Depth) × 8 cm (Height)
- Peso corporal: Aproximadamente 0.13 kg
- Material da caixa: Aliaxe de aluminio
- Tipo de visualización: Transparent LCD Digital Display
- Rango de temperatura: -20°C a 65°C
- Rango de humidade: 10% a 99%
- Fonte de enerxía: Batería recargable (carga USB tipo C)
- Duración da batería: Approximately 75 days on a full charge
- Alarmas: 3 alarmas programables

Figure 2: Dimensions of the ClocTeck Transparent Digital Alarm Clock. The image shows the clock with labels indicating a height of 8cm and a width of 12.5cm.
Garantía e Soporte
ClocTeck provides a 12-month refund and exchange guarantee desde a data de compra. Esta garantía cobre defectos de fabricación e problemas derivados do uso normal.
If you encounter any problems or have questions regarding your ClocTeck Transparent Digital Alarm Clock, please do not hesitate to contact our customer support team. We are committed to providing assistance and ensuring your satisfaction.
For support, please refer to the contact information provided on the product packaging or the seller's page where you purchased the item.


