Introdución
This manual provides comprehensive instructions for the safe and efficient operation, setup, maintenance, and troubleshooting of your SUNMAX RT120 Self-Propelled Commercial Floor Scrubber Machine. The RT120 is designed for high-efficiency cleaning of large floor areas, featuring a 34-inch brush cleaning width, a 38.8-inch squeegee width, and a working efficiency of 75,000 sqft/h. Its self-propelled design ensures effortless maneuverability, making it ideal for commercial spaces like warehouses, shopping malls, and airports. Equipped with a powerful 1.34 hp suction motor, dual brushes operating at 170 RPM, and up to 110 lbs of brush pressure, it guarantees efficient dirt removal and quick drying of floors. The machine is powered by a long-lasting rechargeable lead-acid battery, offering up to 4 hours of continuous operation.
Configuración e montaxe
Follow these steps to properly set up your RT120 floor scrubber:
1. Desembalaxe e Inspección Inicial
Carefully remove the retaining buckles and the top cover of the outer wooden packaging box. Take out all accessory fittings and then remove the non-packaging box. Finally, remove the protective packaging bag and any packaging pads. Gently remove the machine from the wooden pallet.

Image: The SUNMAX RT120 Floor Scrubber, freshly unboxed and ready for assembly.
2. Conexión da batería
Loosen the locks on the sewage tank cover and manually open it to access the battery compartment. Install the black end of the battery connector to the negative electrode of the battery. Then, install the red end of the connector to the positive electrode. When fastening the bolts, ensure the installation tool does not touch both positive and negative electrodes simultaneously to prevent damage. After tightening, install the protective sleeve on the battery connecting line on the bolt. Manually lower the lock of the sewage tank and close it securely. Verify that the handle of the sewage tank cover is fastened.

Imaxe: View of the battery compartment with connections being made.
3. Suction Squeegee Installation
Prepare the suction squeegee and manually lift it. Loosen the two handles on the suction strip. Grasp the two handles by hand and lift them together with the two flat pads to be installed on the fixing plate of the suction squeegee. Hand down the suction squeegee and tighten the handles on both sides. Insert the dirt suction hose into the suction pick joint. Adjust the height and angle of the suction squeegee for optimal performance.
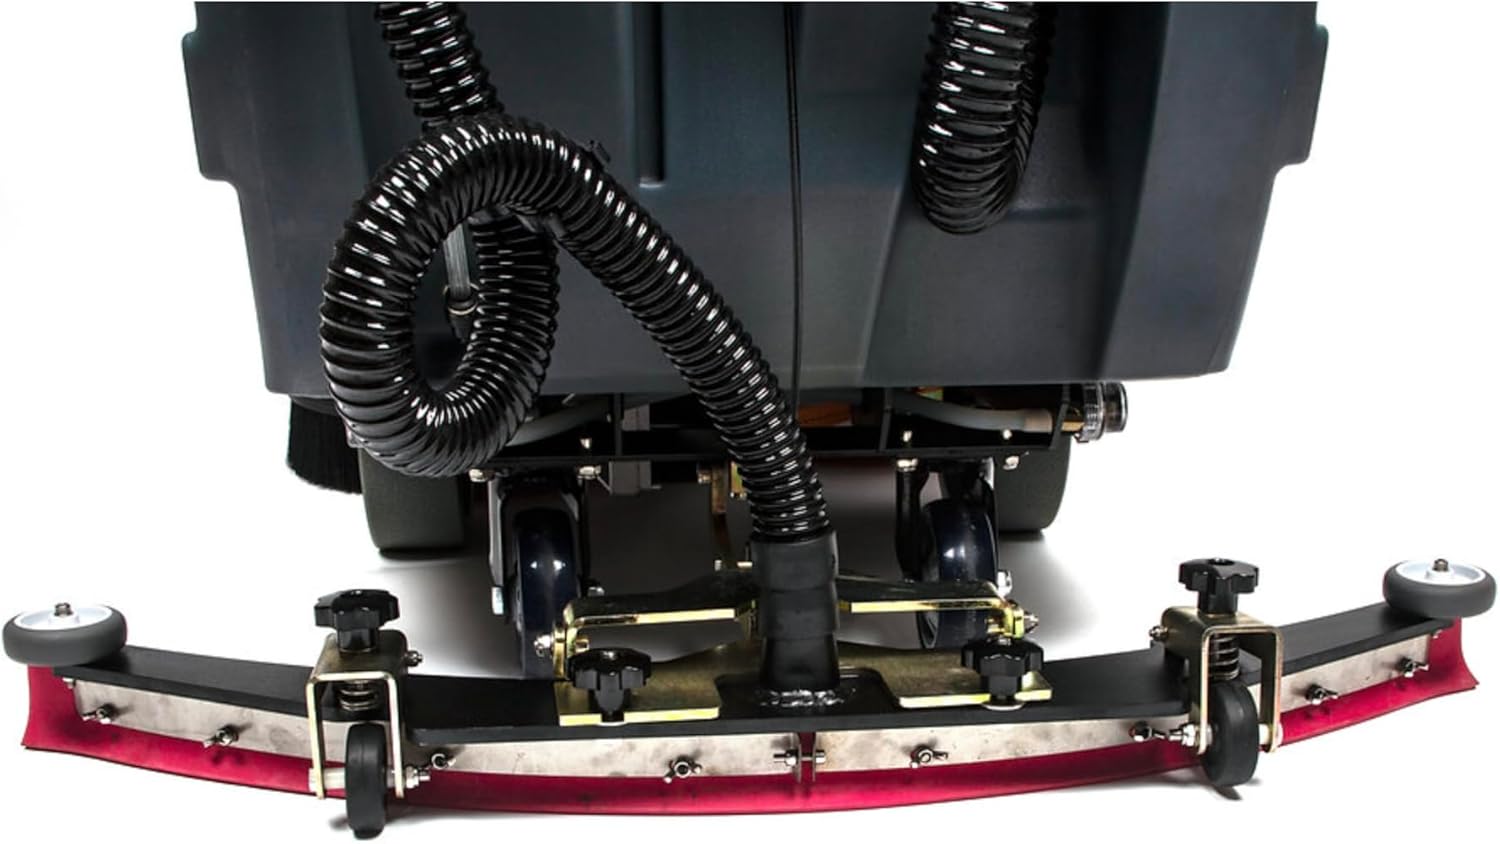
Image: The suction squeegee assembly, showing its connection points.
4. Brush Tray Installation
Place the two brush trays directly under the brush tray shield. Turn the speed knob on the control panel to the minimum gear. Press the "Load Brush" key (up brush key) and the brush plate cover will fall down. Check whether the brush tray is aligned. Press the "Load Brush" key again to automatically load the brush tray. After the brush tray is installed, the brush cover automatically rises. Verify that both brush trays are securely installed. If not installed correctly, repeat the steps until they are.

Image: The two brush trays and charger, ready for installation.
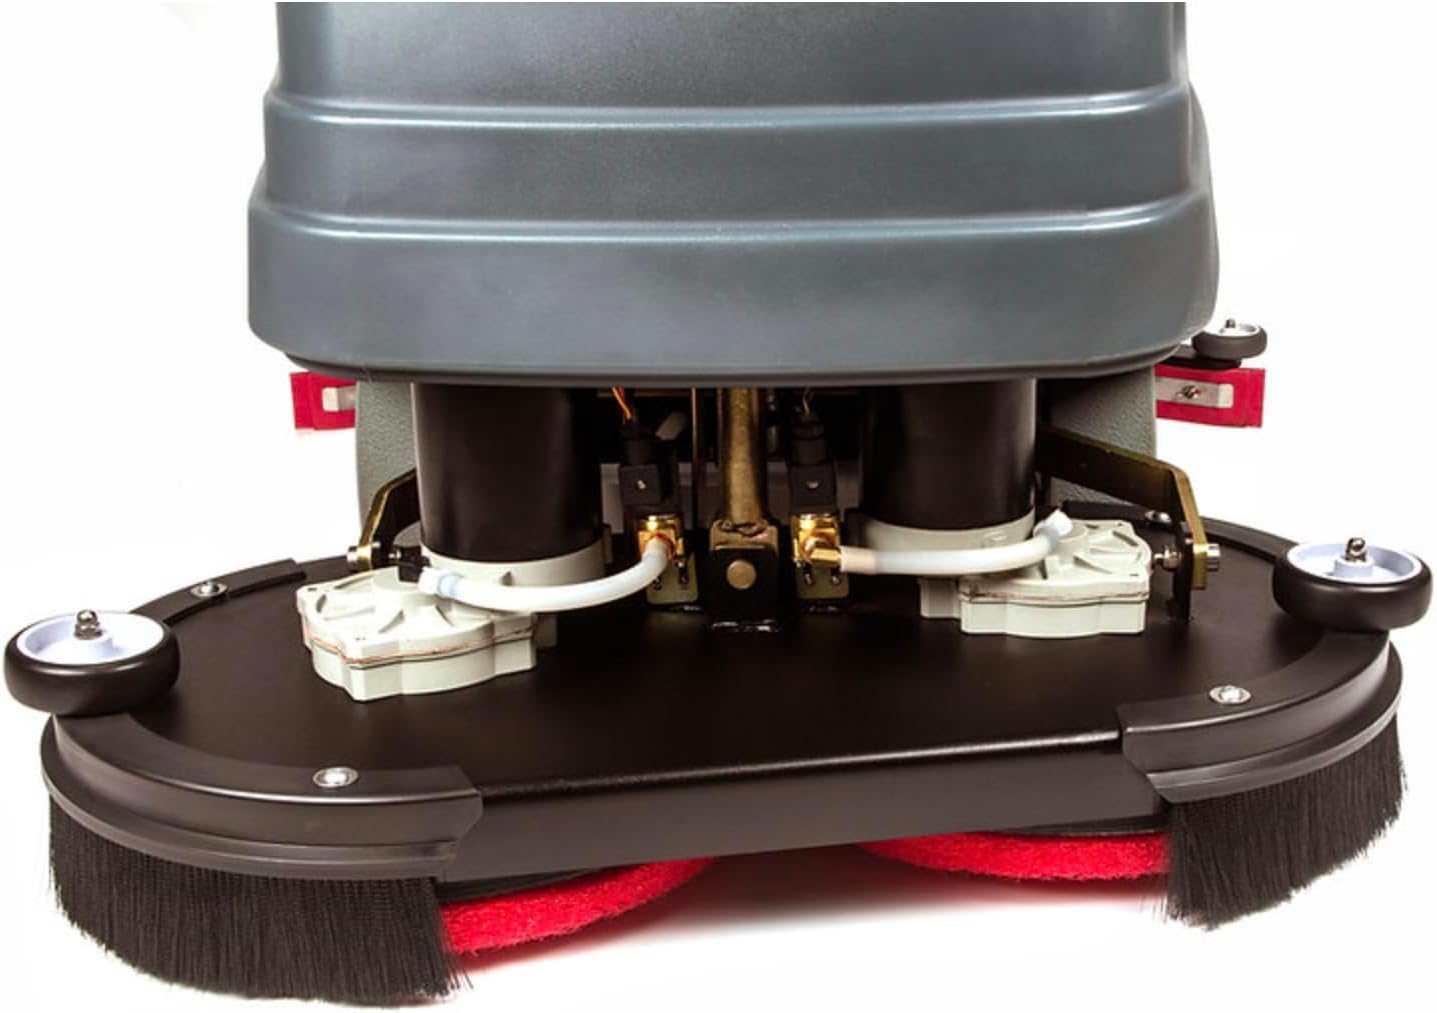
Imaxe: Parte inferior view of the scrubber, highlighting the dual brushes.
Guía de configuración de vídeo
Video: Official setup guide for the SUNMAX RT120 Floor Scrubber. This video demonstrates unboxing, battery connection, and squeegee/brush installation. (Duration: 6:07)
Instrucións de funcionamento
Familiarize yourself with the control panel and operating procedures for effective cleaning.
1. Panel de control rematadoview
The control panel features a key switch, emergency stop switch, and various function buttons:
- Comezo: Initiates cleaning operation.
- Water + / Water -: Adjusts water output.
- ECO: Activa o modo de aforro de enerxía.
- Load Brush / Remove Brush: Controls brush tray attachment and detachment.
- Baleiro: Activates the vacuum motor for water suction.
- D/R (Direction): Controla o movemento cara adiante e cara atrás.
- Botón de control de velocidade: Adjusts the machine's driving speed.

Imaxe: Detallada view of the SUNMAX RT120 control panel with all buttons and indicators.
2. Filling Water and Defoamer
Open the cover of the clear water tank. Add appropriate cleaning agent. Insert the water hose and start adding clear water. Check the water level pipe on the side of the water injection port to ensure the tank is filled. Cover the clean water tank cover. Open the upper cover of the sewage tank and add defoamer.
Important: We recommend using neutral pH low foam cleaning solution and adding defoamer into the sewage tank to protect the vacuum motor.
3. Machine Cleaning Operation
Turn on the key switch. Hand down the suction squeegee. Press the "Start" key (the indicator light will be always on). The brush tray will drop and automatically start to rotate. Adjust the water output using the "Water +" or "Water -" buttons. Adjust the speed control knob to your desired speed. Press the "Forward" key (D/R) and hold the key on the handle of the operation panel to start walking. Press and hold the keys on both sides of the handle to double the driving speed.

Image: The RT120 in operation, showing the brushes and squeegee in action.
4. Machine Suction Dry Operation
After cleaning, pull out the emergency stop switch. Turn on the key switch. Hand down the suction squeegee. Turn on the "Vacuum" key. Press the "Start" key (the indicator light will be off). The brush tray will be in a raised state and in a non-rotating state. The water nozzle will be in a state of no water outlet. Adjust the speed control knob. Press the "Forward" key (D/R) and hold the key on the handle of the operation panel to start walking. Press and hold the keys on both sides of the handle to double the driving speed to dry the floor.
5. Backward Running Operation
Manually lift the suction squeegee. Press the "Start" key (the indicator light will be off). The brush tray will be in a raised state. Adjust the speed control knob. Press the "Back" key (D/R) and there will always be a warning sound. Press and hold the key on the handle of the operation panel to start walking backward.
Operating Video Guide
Video: Official operating guide for the SUNMAX RT120 Floor Scrubber. This video demonstrates control panel functions, cleaning, and drying operations. (Duration: 6:07)
Mantemento
Regular maintenance ensures the longevity and optimal performance of your machine.
1. Discharging Sewage
Press and hold the key on the handle of the operation panel to start walking. Discharge sewage by lowering the sewage hose and unscrewing its cover. Empty the sewage and then screw the cover back on.
2. Cleaning Sewage Tank
Open the upper cover of the sewage tank. Clean the inside of the sewage tank thoroughly with water pipes. Once clean, install the upper cover of the sewage tank and tighten the two handle bolts.
3. Charging the Machine
Before charging, ensure the key switch is turned off and the emergency stop switch is pulled out. Connect the charger to the charging plug of the same color on the machine. Insert the plug at the machine end before inserting the socket at the power end. The machine will then start charging.

Imaxe: Lateral view of the RT120, showing the charging port location.
Guía de vídeo de mantemento
Video: Official maintenance guide for the SUNMAX RT120 Floor Scrubber. This video demonstrates sewage discharge, tank cleaning, and charging procedures. (Duration: 6:07)
Resolución de problemas
No specific troubleshooting steps were provided in the available product information. For any operational issues or malfunctions, please refer to the contact information in the "Warranty and Support" section for assistance.
Especificacións
| Característica | Detalle |
|---|---|
| Marca | SUNMAX |
| Nome do modelo | Self-Propelled Commercial Floor Scrubber Machine |
| Número de modelo do artigo | RT120 |
| Fonte de enerxía | Eléctrico |
| Tipo de batería | Rechargeable Lead-Acid Battery (2 x 12V included) |
| Peso da batería | 68.3 quilogramos |
| Contido de enerxía da batería de litio | 1440 vatios horas |
| Ancho de limpeza | 34 polgadas |
| Ancho da raspadora | 38.8 polgadas |
| Eficiencia de traballo | 75,000 sqft/h |
| Velocidade de avance máxima | 3.4 MPH |
| Motor de succión | 1.34 cv |
| RPM do cepillo | 170 RPM |
| Presión do cepillo | Ata 110 libras |
| Capacity (Tanks) | 33 litros |
| Peso do elemento | 713 libras |
| Dimensións do paquete | 61.8 x 50.6 x 36 polgadas |
| Material | Metal |
| Método de control | Toca |
| Requírese montaxe | Si |
Garantía e Soporte
Your SUNMAX RT120 Floor Scrubber Machine comes with a 30-day easy return policy. For any customer support needs, inquiries, or technical assistance, please contact SUNMAX International Supply Inc. directly. You can find their contact information through the official SUNMAX store on Amazon or by referring to the documentation included with your product.
- Devolucións: Devolucións fáciles en 30 días.
- Atención ao cliente: Contact SUNMAX International Supply Inc.
- Vendedor: SUNMAX International Supply Inc. (Vendedor profesionalfile)


