1. Introdución
This user manual provides detailed instructions for the Baseus 9-in-1 Laptop Docking Station and the Baseus 240W PD 3.1 USB-C to USB-C Charger Cable. This bundle is designed to enhance your connectivity and charging capabilities for various devices, including laptops, tablets, and smartphones.
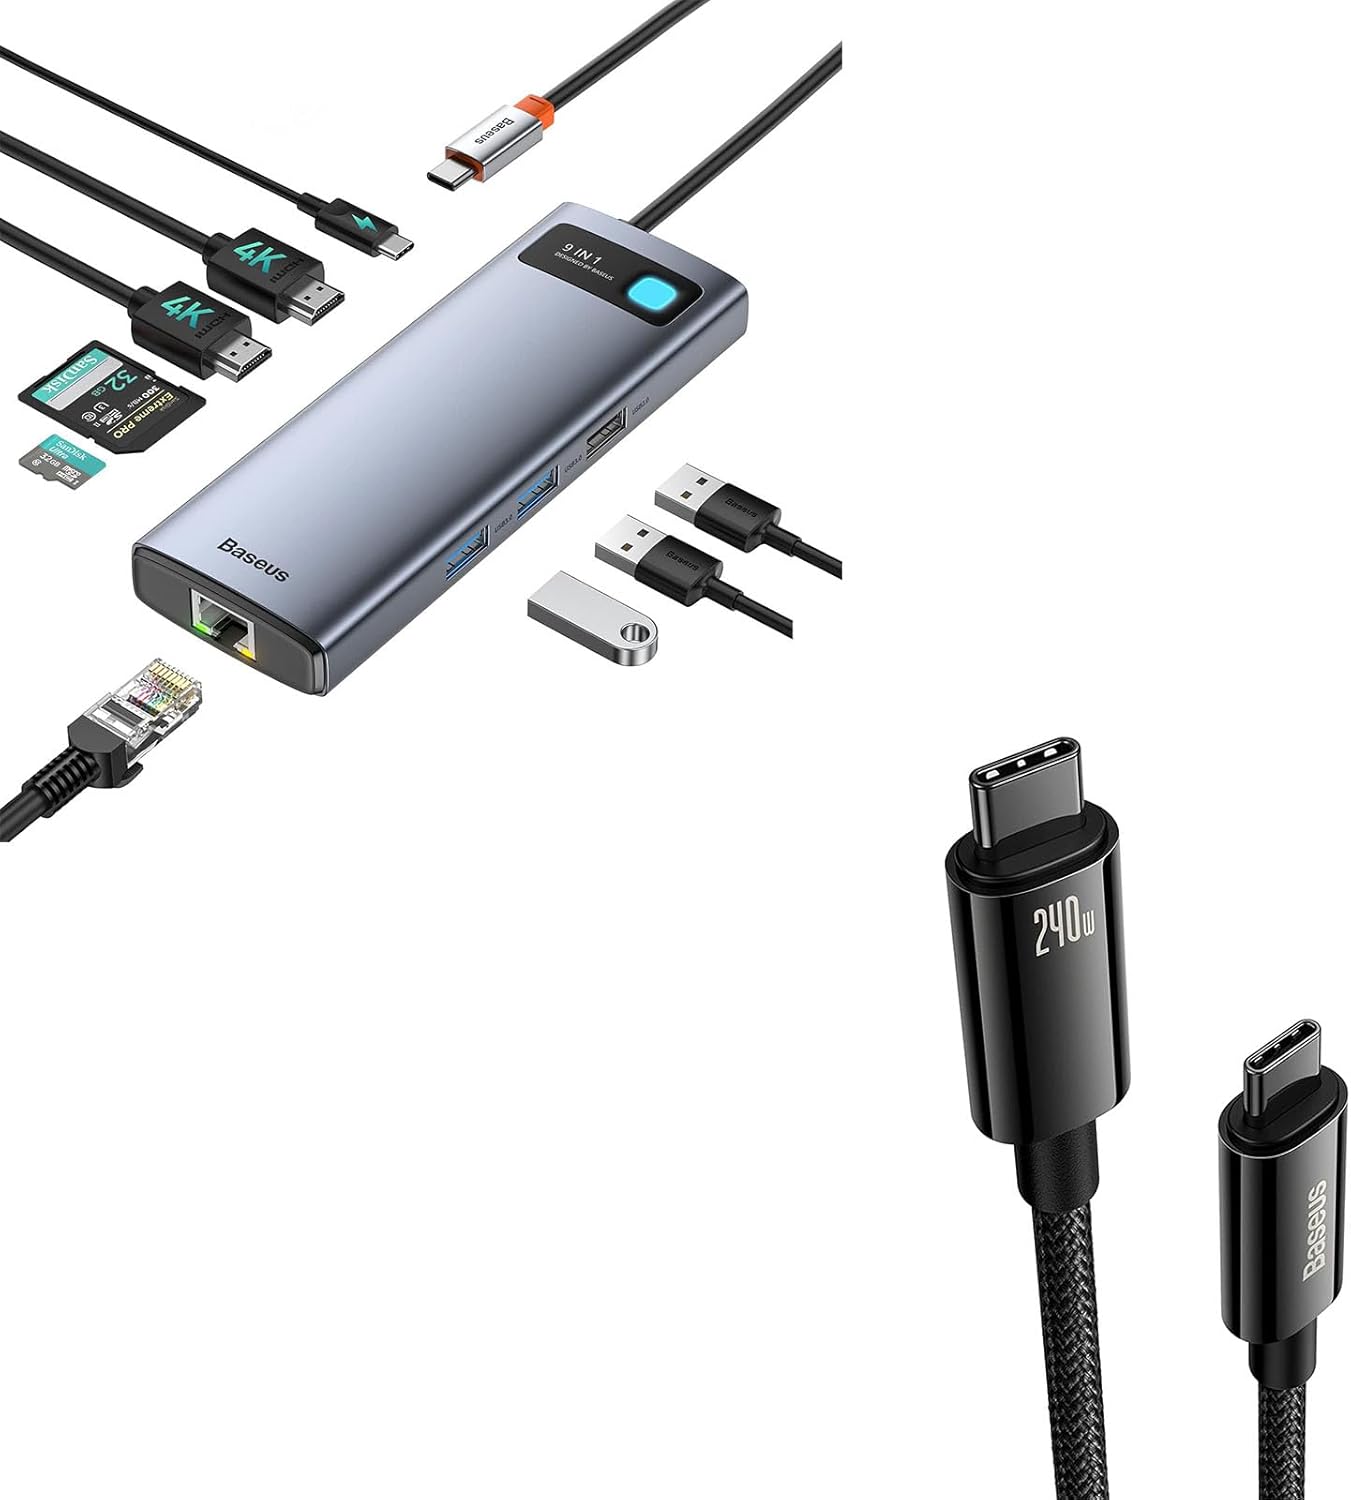
Figure 1: Baseus 9-in-1 Docking Station and 240W USB-C Cable Bundle. This image displays both the docking station with various ports and the USB-C to USB-C cable.
2. Características do produto
2.1 Baseus 9-in-1 Laptop Docking Station
- Dual Monitor 4K Output: Connect up to two external displays with HDMI ports, supporting resolutions up to 4K@120Hz (single display) or 4K@30Hz (dual display).
- Stable Gigabit Ethernet: Provides a reliable wired network connection up to 1000Mbps, ideal for stable internet access.
- Fast Power Delivery (PD): Equipped with a USB-C PD input port supporting up to 85W power delivery to charge your laptop while using the hub.
- Múltiples portos USB: Includes USB 3.0 ports (500MB/s) and USB 2.0 ports (60MB/s) for connecting peripherals and data transfer.
- Lectores de tarxetas SD/TF: Integrated slots for SD and TF (microSD) cards, supporting data transfer speeds up to 104MB/s.

Figura 2: Máisview of the Baseus 9-in-1 Docking Station's ports and capabilities. This image highlights the various ports including HDMI, USB, SD/TF card slots, and PD input.
2.2 Baseus 240W PD 3.1 USB-C Cable
- Potencia de saída de 240 W: Supports PD 3.1 for ultra-fast charging up to 240W, backward compatible with 140W, 100W, and 60W.
- E-marker Technology: Features an advanced E-marker chip for safe and efficient charging, regulating current and voltage to protect devices.
- Construción duradeira: Made with Zine Alloy connectors and a nylon braided cable for enhanced durability and longevity.

Figure 3: Baseus 240W USB-C Cable. This image emphasizes the cable's 240W power delivery capability.
3. Instrucións de configuración
3.1 Conexión da estación de acoplamento
- Conectar ao dispositivo anfitrión: Conecta o cable USB-C integrado da estación de acoplamento a un porto USB-C compatible do teu portátil, tableta ou teléfono intelixente.
- Entrega de enerxía (opcional): For optimal performance and to charge your host device, connect an external USB-C power adapter (not included) to the PD input port on the docking station.
- Pantallas externas: Connect your HDMI monitors to the HDMI 1 and HDMI 2 ports on the docking station using HDMI cables.
- Conexión de rede: For a wired internet connection, connect an Ethernet cable from your router or modem to the RJ45 Ethernet port on the docking station.
- Periféricos: Connect your USB devices (e.g., mouse, keyboard, external hard drive, USB flash drive) to the available USB 3.0 or USB 2.0 ports.
- Tarxetas de memoria: Insert SD or TF cards into their respective slots as needed.

Figure 4: Dual Monitor Setup with the Docking Station. This image illustrates a laptop connected to the docking station, which in turn is connected to two external monitors.
3.2 Using the 240W USB-C Cable
- Conectar ao adaptador de alimentación: Plug one end of the 240W USB-C cable into a compatible USB-C power adapter (e.g., a 240W, 140W, 100W, or 60W PD charger).
- Conectar ao dispositivo: Plug the other end of the USB-C cable into the charging port of your USB-C compatible device (e.g., laptop, tablet, smartphone).
- Transferencia de datos: The cable can also be used for high-speed data transfer between compatible USB-C devices.
4. Instrucións de funcionamento
4.1 Saída da pantalla
Once connected, your operating system should automatically detect the external displays. You can configure display settings (mirror, extend, primary display) through your computer's display settings. For Windows, right-click on the desktop and select "Display settings." For macOS, go to "System Settings" > "Displays."
- Pantalla única: Supports up to 4K@120Hz.
- Pantalla dual: Supports up to 4K@30Hz on both HDMI ports simultaneously.
4.2 Conexión de rede
The Gigabit Ethernet port provides a stable and fast wired network connection. Once the Ethernet cable is connected to the docking station and your network, your device should automatically establish a connection. Verify network status in your operating system's network settings.

Figure 5: Stable Gigabit Ethernet Connection. This image shows the docking station with an active Ethernet connection, indicating high-speed network capability.
4.3 USB Ports and Card Readers
The USB 3.0 ports offer high-speed data transfer for devices like external hard drives and USB flash drives. The USB 2.0 ports are suitable for peripherals such as keyboards, mice, and printers. The SD and TF card readers allow for quick access to data on memory cards.
4.4 Entrega de enerxía
When an external power adapter is connected to the PD input port, the docking station can deliver up to 85W of power to your connected laptop, ensuring it remains charged during use. The 240W USB-C cable supports PD 3.1, enabling rapid charging for compatible devices when paired with a suitable power adapter.

Figure 6: Max 100W Power Input to Docking Station. This image illustrates the docking station receiving power input, capable of delivering up to 85W to the connected laptop.

Figure 7: Charging Speed Comparison (PD3.0 vs. PD3.1). This image visually compares the charging efficiency of PD3.0 and PD3.1, highlighting the faster charging capability of PD3.1 supported by the 240W cable.
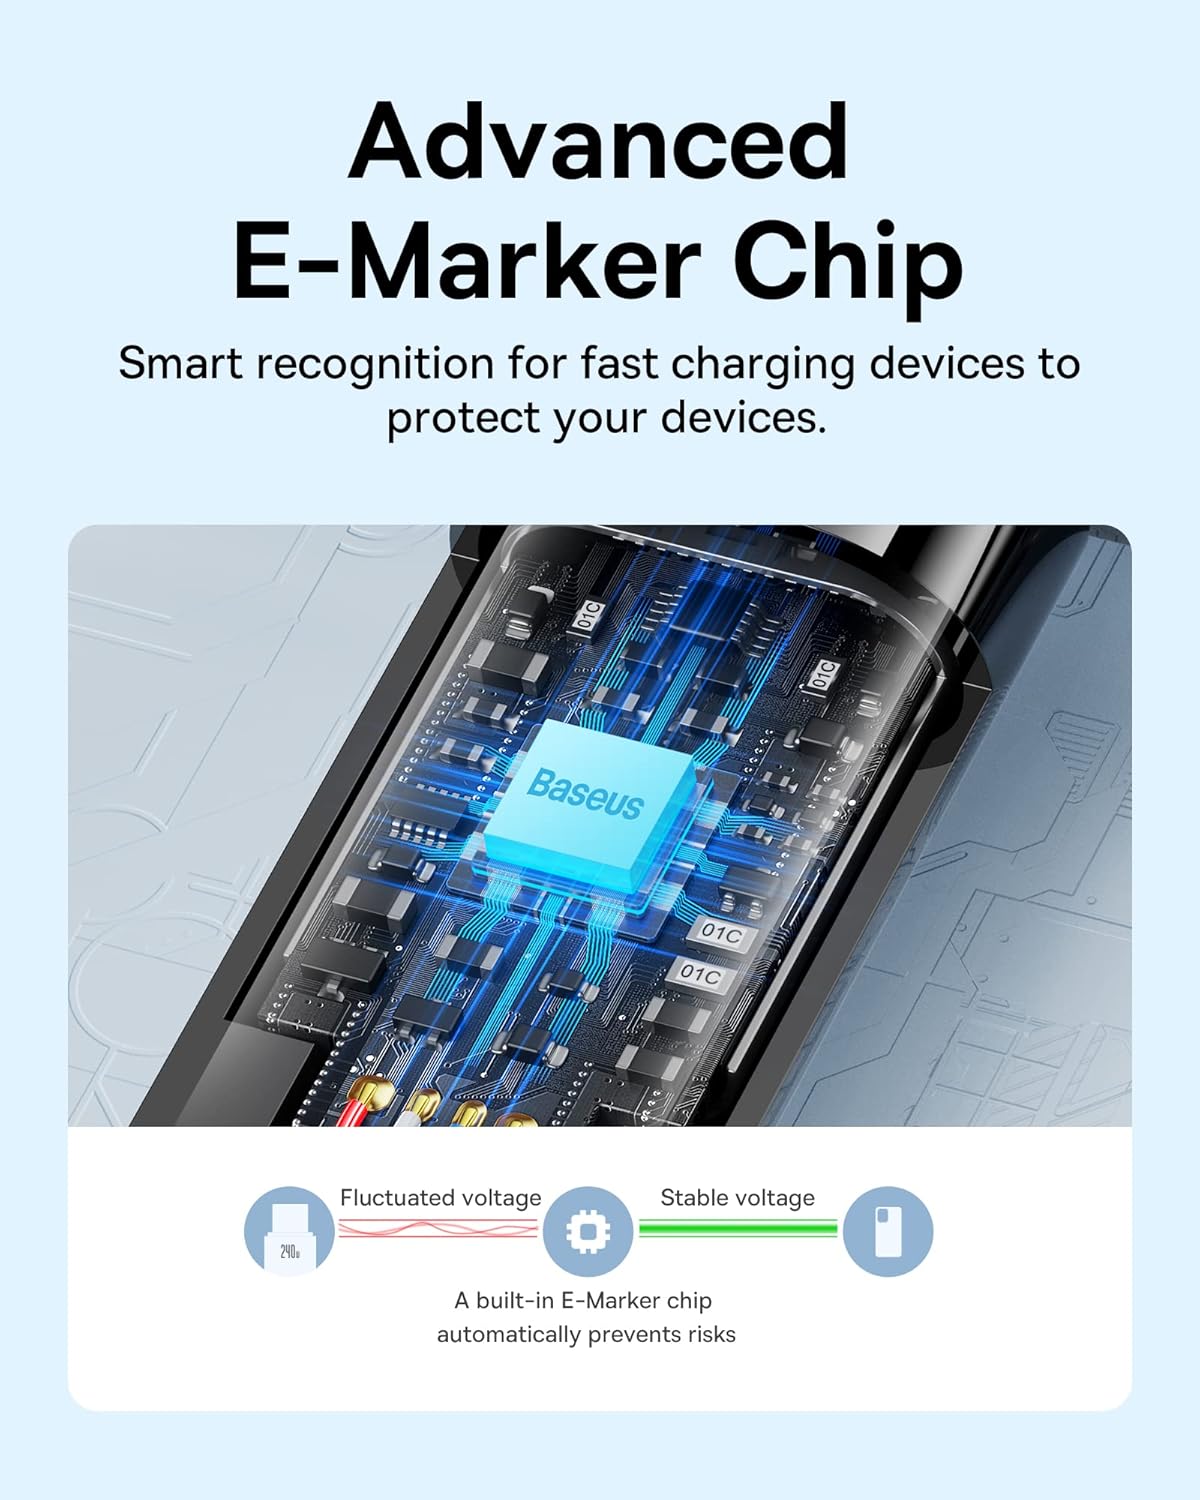
Figure 8: Advanced E-Marker Chip in USB-C Cable. This image provides a detailed view of the E-marker chip within the USB-C cable, which ensures safe and efficient power delivery.
5. Mantemento
- Limpeza: Use a soft, dry cloth to clean the surfaces of the docking station and cable. Avoid using liquid cleaners or abrasive materials.
- Almacenamento: Garde os dispositivos nun lugar fresco e seco, lonxe da luz solar directa e de temperaturas extremas.
- Manexo: Avoid dropping or subjecting the devices to strong impacts. Do not bend the cable excessively, especially near the connectors.
- Atención portuaria: Ensure ports are free of dust and debris before connecting cables.

Figure 9: Premium Texture and Durable Connector of USB-C Cable. This image highlights the quality and durability of the cable's zinc alloy connector and nylon braided texture.
6 Solución de problemas
| Problema | Causa posible | Solución |
|---|---|---|
| Non se mostra no monitor externo. | Incorrect display settings, incompatible device, loose cable connection. |
|
| Ethernet connection is unstable or not working. | Loose cable, driver issue, network configuration. |
|
| Dispositivos USB non recoñecidos. | Insufficient power, driver issue, faulty device. |
|
| Device not charging or charging slowly with 240W cable. | Incompatible power adapter, device limitation, cable issue. |
|
7. Especificacións
| Característica | Detalle |
|---|---|
| Marca | Baseus |
| Modelo | 9-in-1 Docking Station & 240W USB-C Cable Bundle |
| Interface de hardware | USB, USB Type C, HDMI, Ethernet, SD/TF Card Slots |
| Total de portos USB | 9 (on docking station) |
| Saída HDMI | Up to 4K@120Hz (single), 4K@30Hz (dual) |
| Velocidade Ethernet | 1000 Mbps (Gigabit) |
| Power Delivery (Dock) | Up to 85W to host device (via PD input) |
| USB-C Cable Power Output | Ata 240 W (PD 3.1) |
| Dispositivos compatibles | Smartphones, Tablets, Laptops, Desktops with USB-C |
8. Garantía e soporte
Baseus products are designed with quality and reliability in mind. For warranty information or technical support, please contact Baseus Official Store directly through your purchase platform or visit the official Baseus websitio. Garde o comprobante de compra para reclamacións de garantía.
Baseus Official Store: Visita a tenda Baseus en Amazon


