1. Introdución
Thank you for choosing the Cherry KW 7100 Mini Multi-Device Compact Keyboard. This manual provides essential information for setting up, operating, and maintaining your new keyboard. Designed for versatility and portability, this keyboard offers seamless connectivity across multiple devices.
2. Que hai na caixa
- Cherry KW 7100 Mini Multi-Device Compact Keyboard
- USB-C to USB-A Charging/Connection Cable
- 2 pilas AAA
- 2.4 GHz Wireless Nano Receiver (stored magnetically in the keyboard)
- Maletín de transporte
- Manual de instrucións

Figura 1: De arriba abaixo view of the Cherry KW 7100 Mini Keyboard.
3. Configuración
3.1. Instalación da batería
- Localiza o compartimento da batería na parte inferior do teclado.
- Deslice a tapa do compartimento da batería.
- Introduza as dúas pilas AAA, asegurándose de manter a polaridade correcta (+/-).
- Pecha a tapa do compartimento da batería de forma segura.
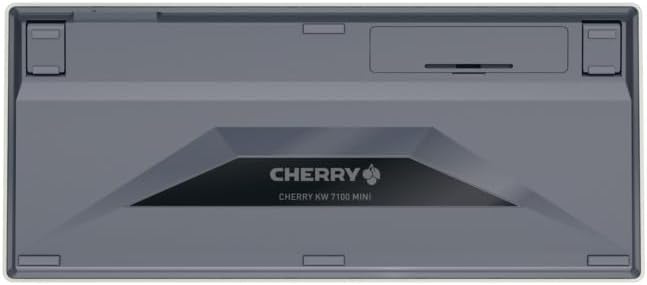
Figure 2: Underside of the keyboard with the battery compartment.
3.2. Conectando o teclado
The Cherry KW 7100 Mini supports three connection methods: Bluetooth, 2.4 GHz Wireless, and Wired USB-C.
3.2.1. Conexión Bluetooth (ata 3 dispositivos)
- Acende o teclado usando o interruptor de acendido situado no lateral.
- Press and hold one of the Bluetooth channel keys (F1, F2, or F3) for 3-5 seconds until the corresponding LED indicator blinks rapidly. This indicates pairing mode.
- On your device (laptop, smartphone, tablet), navigate to Bluetooth settings and search for available devices.
- Select "Cherry KW 7100" from the list to pair. The LED will stop blinking and remain solid for a few seconds upon successful connection.
- Repeat for up to two additional devices using the other Bluetooth channel keys (F1, F2, or F3).
3.2.2. Conexión sen fíos de 2.4 GHz
- Locate the 2.4 GHz wireless nano receiver, typically stored magnetically in a slot on the underside of the keyboard.
- Insert the nano receiver into an available USB-A port on your computer.
- Acenda o teclado usando o interruptor de alimentación. O teclado debería conectarse automaticamente ao receptor.
3.2.3. Conexión USB-C con cable
- Connect one end of the provided USB-C cable to the USB-C port on the keyboard.
- Conecta o outro extremo do cable USB-C a un porto USB-A dispoñible do teu ordenador.
- The keyboard will function as a wired keyboard.
Video 1: Demonstrating the setup and typing experience of the Cherry KW 7100 Mini Keyboard.
4. Uso do teclado
4.1. Cambio entre dispositivos conectados
To switch between paired Bluetooth devices, simply press the corresponding Bluetooth channel key (F1, F2, or F3) that your device is paired to. The keyboard will automatically connect to the selected device.
4.2. Teclas de función (FN)
The keyboard features a dedicated FN key, typically located near the right Shift key. This key, in combination with other keys, activates secondary functions such as media controls, screen brightness, and other system commands. Refer to the keycap legends for specific FN key combinations.
4.3. Indicadores LED
LED indicators on the keyboard provide information about its status:
- Bluetooth Channel LEDs (F1, F2, F3): Indicate the currently active Bluetooth connection or pairing mode.
- LED de bloqueo de maiúsculas: Ilumínase cando o Bloq Maiús está activo.
- LED de estado da batería: Indica o nivel de batería baixo.
4.4. Pés axustables
The keyboard is equipped with stable, fold-out feet on the underside. These allow you to adjust the typing angle for improved ergonomics and comfort.
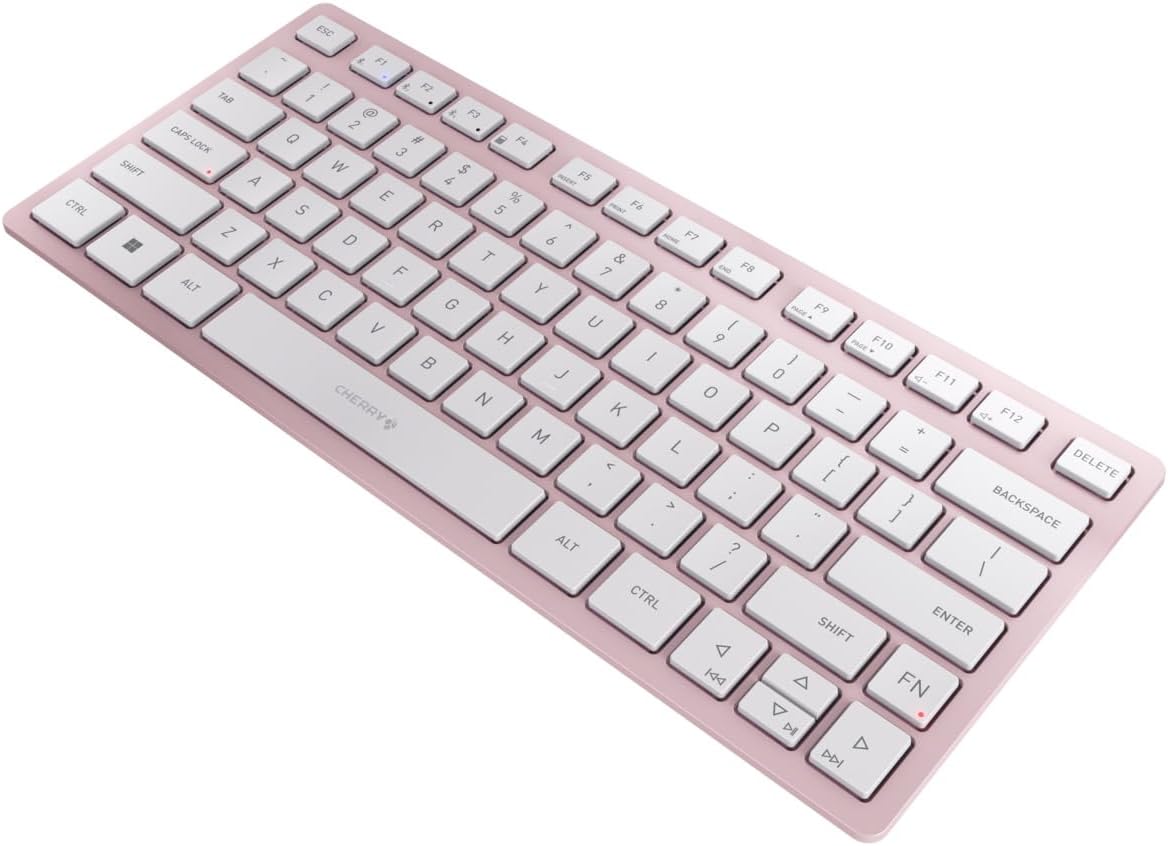
Figura 3: En ángulo view of the keyboard, highlighting its slim profile.

Figura 4: Lateral view showing the adjustable feet extended for an ergonomic typing angle.
5. Mantemento
5.1. Limpeza
To clean your keyboard, gently wipe the keycaps and surface with a soft, lint-free cloth. For stubborn dirt, slightly dampen the cloth with water or a mild, non-abrasive cleaning solution. Avoid excessive moisture and do not spray cleaners directly onto the keyboard.
5.2. Almacenamento
When not in use, especially during travel, store the keyboard in its included carrying case to protect it from dust, scratches, and minor impacts.

Figure 5: The keyboard stored in its protective carrying case.
6 Solución de problemas
6.1. O teclado non se conecta
- Asegúrate de que o teclado estea acendido.
- Comprobe as pilas e substitúeas se é necesario.
- For Bluetooth, ensure the correct channel (F1, F2, or F3) is selected and the keyboard is in pairing mode (blinking LED).
- For 2.4 GHz wireless, ensure the nano receiver is securely plugged into a USB-A port.
- Try connecting via the USB-C cable to rule out wireless issues.
- Reinicia o dispositivo e tenta vincular de novo.
6.2. As teclas non responden
- Comprobe a conexión como se describe arriba.
- Asegúrate de que non haxa residuos aloxados debaixo das teclas.
- Se usas unha conexión con cable, proba cun porto ou cable USB diferente.
6.3. Duración curta da batería
- Asegúrate de usar pilas AAA novas e de alta calidade.
- Turn off the keyboard when not in use to conserve battery power.
7. Especificacións
| Característica | Especificación |
|---|---|
| Nome do modelo | Semana 7100 |
| Número de modelo do artigo | JK-7100US-19 |
| Marca | Cereixa |
| Tecnoloxía de conectividade | Bluetooth 5.1 (3 channels), 2.4 GHz Wireless, USB-C Wired |
| Dispositivos compatibles | portátil, teléfono intelixente, tableta |
| Descrición do teclado | Compact, Multi-Device |
| Mecanismo clave | Mecanismo de tesoiras CHERRY SX |
| Fonte de enerxía | 2 pilas AAA |
| Cifrado | AES-128 |
| Dimensións do produto | 11.6 x 5.1 x 0.6 polgadas |
| Peso do elemento | 1.4 libras |
| Material | Metal, Plástico |
| Cor | Cerdeira en flor |
8. Garantía e soporte
This product is covered by Cherry's standard manufacturer warranty. For detailed warranty information, technical support, or service inquiries, please visit the official Cherry websitio web ou póñase en contacto directamente co servizo de atención ao cliente.
Fabricante: Cereixa
Websitio: www.cherry.de