1. Introdución
This manual provides detailed instructions for the ROVE R3 Dash Cam and its accompanying Circular Polarizer Lens (CPL) Filter. The ROVE R3 is a 3-channel touch screen dash camera designed for comprehensive vehicle recording, capturing front, cabin, and rear views. The CPL filter enhances video quality by reducing glare and reflections.

Image 1.1: ROVE R3 Dash Cam with CPL Filter and smartphone app interface.
2. Contido do paquete
Verifique que todos os elementos que se indican a continuación estean incluídos no seu paquete:
- ROVE R3 Primary Dash Cam (Front & Cabin)
- ROVE R3 Rear Dash Cam
- 360° Windshield Suction Mount
- Windshield 3M Sticky Mount
- 4.8 AMP Dual USB FAST Car Charger
- 6M Type-C USB Rear Camera Cable
- 12 FT Type-C USB Power Cable for Front Dash Cam
- 1M Type-C USB Data Cable
- Spare 3M Sticky Tapes & 5x Cable Clips
- 4x Electrostatic Films
- 2x Wet Cleaning Pads & Car Wiring Tools
- User Manual (English) & Quick Start Guide
- CPL Filter for ROVE R3
- Pano de limpeza de microfibra
Note: A MicroSD Memory Card is NOT included and must be purchased separately for camera operation.
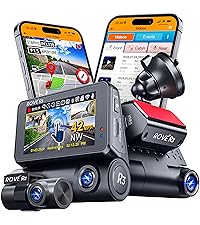
Image 2.1: Contents of the ROVE R3 Dash Cam package.
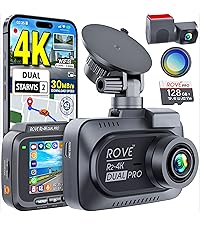
Image 2.2: Contents of the ROVE CPL Filter package.
3. Produto rematadoview
The ROVE R3 Dash Cam features a compact design with a 3-inch IPS touch screen. It integrates three cameras for comprehensive coverage: a front camera, a cabin camera, and a rear camera. The device also includes a supercapacitor for enhanced durability and safety, and supports USB Type-C connectivity.
3.1 Compoñentes clave
- Cámara frontal: Records the road ahead.
- Cabin Camera: Rexistra o interior do vehículo.
- Cámara traseira: Rexistra o view detrás do vehículo.
- Pantalla táctil IPS de 3 polgadas: For navigation and settings adjustment.
- Porto USB tipo C: Para a transferencia de enerxía e datos.
- Ranura para tarxetas MicroSD: For storage of recordings.
- Supercondensador: Provides power stability and extends product lifespan.
- Filtro CPL: Reduces glare and reflections from the windshield.

Imaxe 3.1: Acabadoview of the ROVE R3's 3-channel recording capabilities.

Image 3.2: Illustration of the supercapacitor used in the ROVE R3 for durability.

Image 3.3: USB Type-C port on the ROVE R3 for power and data.
4. Configuración
4.1 Instalación da tarxeta MicroSD
- Asegúrate de que a cámara do salpicadero estea apagada.
- Locate the MicroSD card slot on the side of the dash cam.
- Insira a tarxeta MicroSD cos contactos dourados cara á parte frontal da cámara ata que encaixe no seu lugar.
- Para retirala, empurre suavemente a tarxeta ata que salte cara a fóra.
Recommendation: Use a ROVE Ultimate MicroSD Card (supports up to 512GB) for optimal performance.
4.2 Montaxe da cámara para o salpicadero
- Limpa ben a zona escollida do parabrisas.
- Attach an electrostatic film to the windshield first, then apply the mount to the film.
- Choose between the suction mount or the 3M sticky mount.
- Secure the dash cam to the chosen mount. Position the camera to ensure a clear view da estrada e da cabana.
- Install the rear camera in a suitable location on your rear windshield, ensuring a clear view.
4.3 Conexión de enerxía
- Connect the 12 FT Type-C USB Power Cable to the dash cam's USB Type-C port.
- Route the cable neatly along the windshield and dashboard using the provided cable clips.
- Plug the car charger into your vehicle's 12V power outlet.
- Connect the 6M Type-C USB Rear Camera Cable from the main dash cam unit to the rear camera.
4.4 Installing the CPL Filter
The CPL filter is designed to reduce glare and reflections from the windshield, improving video clarity and color saturation.
- Align the CPL filter with the front lens of the ROVE R3 Dash Cam.
- Gently push and twist the filter onto the lens until it is securely attached.
- Once installed, you can rotate the outer ring of the CPL filter to adjust the polarization effect and minimize glare.

Image 4.1: Demonstrates how to attach the CPL filter to the dash cam lens.
4.5 Configuración inicial
- Acenda a cámara do salpicadero.
- Follow the on-screen prompts to set the correct date and time.
- It is crucial to format the MicroSD card within the dash cam before first use and periodically thereafter to ensure stable recording. Navigate to the settings menu and select 'Format SD Card'.
5. Funcionamento
5.1 Basic Recording (Loop Recording)
The ROVE R3 automatically begins recording when powered on. It utilizes loop recording, continuously recording in segments (1, 3, 5, or 10 minutes) and overwriting the oldest unlocked files when the MicroSD card is full.

Image 5.1: Explanation of the seamless loop recording function.
5.2 Interface de pantalla táctil
The 3-inch IPS touch screen allows for intuitive navigation through menus and settings. Tap icons to access different functions, view vivir footage, or playback recorded videos.

Image 5.2: The responsive 3-inch IPS touch screen for camera control.
5.3 ROVE App & Wi-Fi Connectivity
Connect your ROVE R3 to your smartphone via the ROVE App (available for iOS and Android) using the built-in dual-band 5.0 GHz and 2.4 GHz Wi-Fi. This enables live preview, video download, settings management, and sharing of footage.

Image 5.3: Features of the ROVE R3's dual-band Wi-Fi connectivity.

Image 5.4: The ROVE Dash Cam App interface for smartphone control.
5.4 Funcionalidade do GPS
The built-in GPS module records your driving speed, compass direction, and location data. This information can be viewed during video playback on the dash cam or through the free ROVE Dash Cam GPS Player software on your PC/Mac.

Image 5.5: The ROVE Dash Cam GPS Player software for reviewing GPS data.
5.5 Monitor de estacionamento
When activated, the 24-hour Auto Trigger Parking Monitor detects impacts or motion while your vehicle is parked. If an event occurs, the camera will automatically turn on and record, locking the video evidence. This feature requires the ROVE Ultimate Type-C 3-Lead Hardwire Kit (sold separately).

Image 5.6: Explanation of the 24-hour Auto Trigger Parking Monitor.
5.6 Voice Guidance
The ROVE R3 provides proprietary fail-safe voice guidance, alerting you to important statuses such as parking mode activation or if the camera is not recording. This ensures you are always aware of the camera's operational status.

Image 5.7: The ROVE R3's voice guidance system providing alerts.
5.7 Visión nocturna
Equipped with advanced sensors and 4 hidden IR LEDs for the cabin camera, the ROVE R3 provides clear image capture in low-light conditions, including complete darkness inside the car cabin.

Image 5.8: Demonstration of the Super Night Vision capability.
5.8 Rango dinámico amplo (WDR)
WDR technology ensures optimal exposure balance, capturing clear details in both very bright and very dark areas of the footage, even in challenging lighting conditions.

Image 5.9: Comparison showing the effectiveness of Wide Dynamic Range (WDR).
5.9 Time-Lapse Recording
The integrated time-lapse feature, especially useful with parking mode, allows for long-duration recording at a reduced frame rate, saving storage space while capturing important events over extended periods.
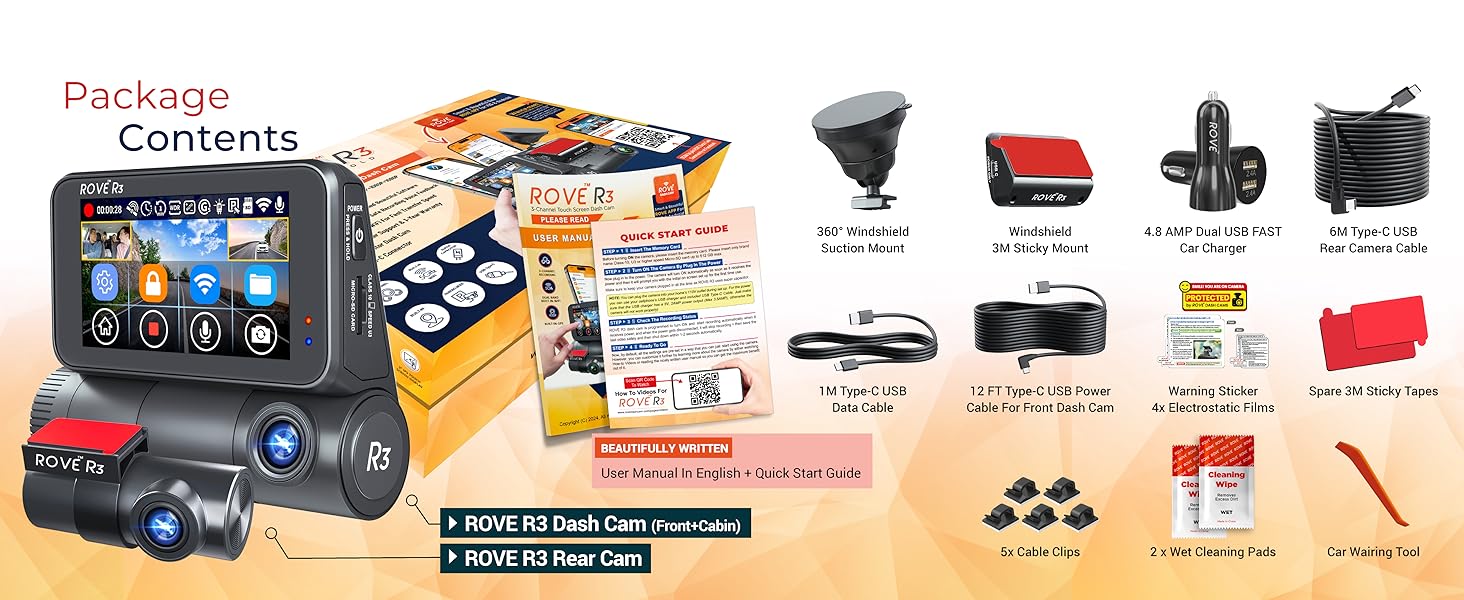
Image 5.10: Illustration of the Time-Lapse Video recording feature.
6. Mantemento
6.1 Coidado da tarxeta MicroSD
- Regularly format the MicroSD card (at least once a month) to prevent data corruption and ensure optimal performance.
- Use high-quality, reputable MicroSD cards designed for dash cam use.
- Replace the MicroSD card every 6-12 months, depending on usage, as they have a limited lifespan due to continuous writing cycles.
6.2 Limpeza do dispositivo
- Use the provided microfiber cleaning cloth to gently wipe the camera lenses and touch screen.
- Avoid using harsh chemicals or abrasive materials that could scratch the lenses or screen.
- Ensure the device is powered off and disconnected from power before cleaning.
6.3 Actualizacións de firmware
ROVE regularly releases firmware updates to improve performance and add new features. You can update your dash cam's firmware wirelessly via the ROVE App.
- Connect your dash cam to the ROVE App via Wi-Fi.
- The app will notify you if a new firmware update is available.
- Follow the on-screen instructions in the app to download and install the update. Ensure the dash cam remains powered during the entire update process.

Image 6.1: Steps for performing an Over-The-Air firmware update via the ROVE App.
7 Solución de problemas
7.1 A cámara non grava
- Check if the MicroSD card is properly inserted and formatted.
- Asegúrate de que a cámara estea a recibir enerxía.
- If the card is full, ensure loop recording is enabled or format the card.
- The voice guidance system will alert you if the camera is not recording.
7.2 Mala calidade de vídeo
- Limpar as lentes da cámara e o parabrisas.
- Ensure the CPL filter is correctly installed and adjusted to minimize glare.
- Comproba a configuración da resolución de vídeo no menú.
7.3 Problemas de conexión Wi-Fi
- Ensure the ROVE App is updated to the latest version.
- Reinicia tanto a cámara do salpicadero como o teu teléfono intelixente.
- Verify that Wi-Fi is enabled on the dash cam and your phone.
7.4 Dash Cam Freezes or Restarts
- Format the MicroSD card. A corrupted card can cause instability.
- Asegúrese de que a conexión de alimentación é estable.
- Perform a factory reset via the settings menu if issues persist.
8. Especificacións
| Característica | Especificación |
|---|---|
| Nome do modelo | R3 |
| Resolución de captura de vídeo | Front: 4K (3840x2160p) @30fps (Single Channel Mode); Front + Cabin + Rear: 1440p + 1080p + 1080p @30fps |
| Campo de View | 130 Degrees (Front) |
| Tecnoloxía de conectividade | USB, Dual-band Wi-Fi (5.0 GHz & 2.4 GHz) |
| Método de control | Touch Screen, Remote (via App) |
| Tipo de montaxe | Suction Mount, 3M Sticky Mount |
| Almacenamento | Supports MicroSDXC Card up to 512GB (Class 10, U3 recommended) |
| Fonte de enerxía | Supercondensador |
| Cor | Negro |
| Compoñentes incluídos | Dash Cam, Rear Cam, Suction Mount, CPL Filter, Cables, Car Charger, Cleaning Tools |
9. Garantía e soporte
ROVE products are designed for reliability and performance. For specific warranty details, please refer to the warranty card included in your product packaging or visit the official ROVE websitio.
9.1 Atención ao cliente
If you encounter any issues or have questions regarding your ROVE R3 Dash Cam or CPL Filter, please contact ROVE customer support. Support contact information can typically be found in the Quick Start Guide, on the ROVE official website, or through the ROVE App.
Para obter a información e os recursos de asistencia máis recentes, visite: www.rovedashcam.com


