1. Introdución
This manual provides essential instructions for the safe and efficient operation of your LOEFME 12L/Day Digital Dehumidifier. Please read this manual thoroughly before using the appliance and retain it for future reference. This dehumidifier is designed to reduce humidity levels in indoor environments, contributing to a more comfortable and healthier living space.
2. Instrucións de seguridade
Observe as seguintes precaucións de seguridade para evitar lesións ou danos no aparello:
- Asegúrese de que a fonte de alimentación coincida co voltage especificado na etiqueta de clasificación.
- Non faga funcionar o deshumidificador cun cable de alimentación ou unha ficha danados.
- Keep the appliance away from heat sources, flammable materials, and direct sunlight.
- Non bloquee a entrada nin a saída de aire. Manteña unha distancia mínima de 20 cm arredor da unidade.
- Coloque sempre o deshumidificador sobre unha superficie estable e nivelada para evitar derrames de auga.
- Desconecte a unidade antes de limpala, realizando mantemento ou cando non a use durante períodos prolongados.
- Non introduza obxectos nas ventilacións.
- Este aparello non está destinado ao uso por parte de persoas con capacidades físicas, sensoriais ou mentais reducidas, ou con falta de experiencia e coñecementos, a menos que reciban a supervisión ou instrucións sobre o uso do aparello por parte dunha persoa responsable da súa seguridade.
- Os nenos deben ser supervisados para asegurarse de que non xogan co aparello.
3. Produto rematadoview
Familiarize yourself with the main components of your LOEFME Dehumidifier.

Figura 3.1: Fronte view of the LOEFME 12L/Day Digital Dehumidifier. This image shows the compact design and the digital display on the top panel.
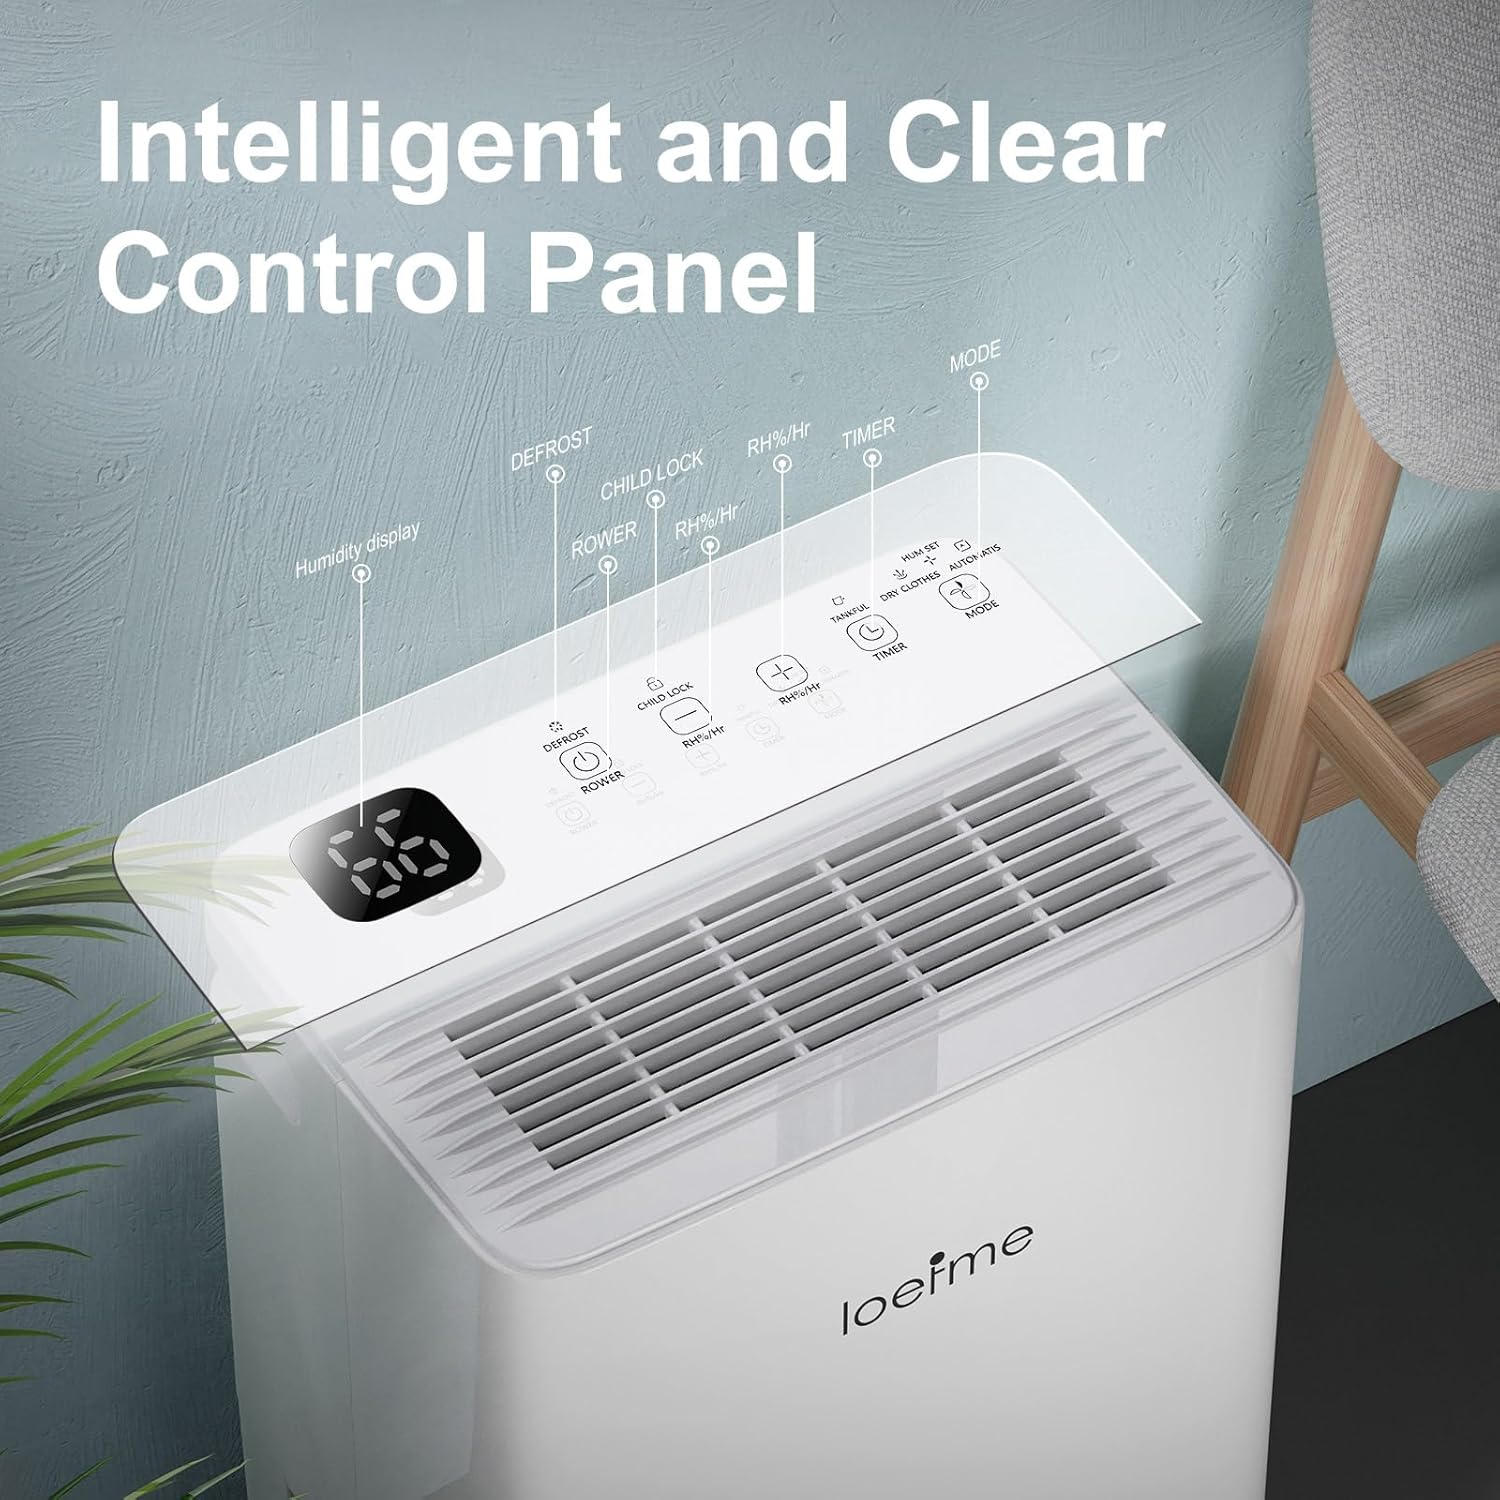
Figura 3.2: Close-up of the intelligent control panel. Key functions include Humidity Display, Defrost indicator, Child Lock, Power button, RH%/Hr (humidity/timer setting), Timer, and Mode selection.
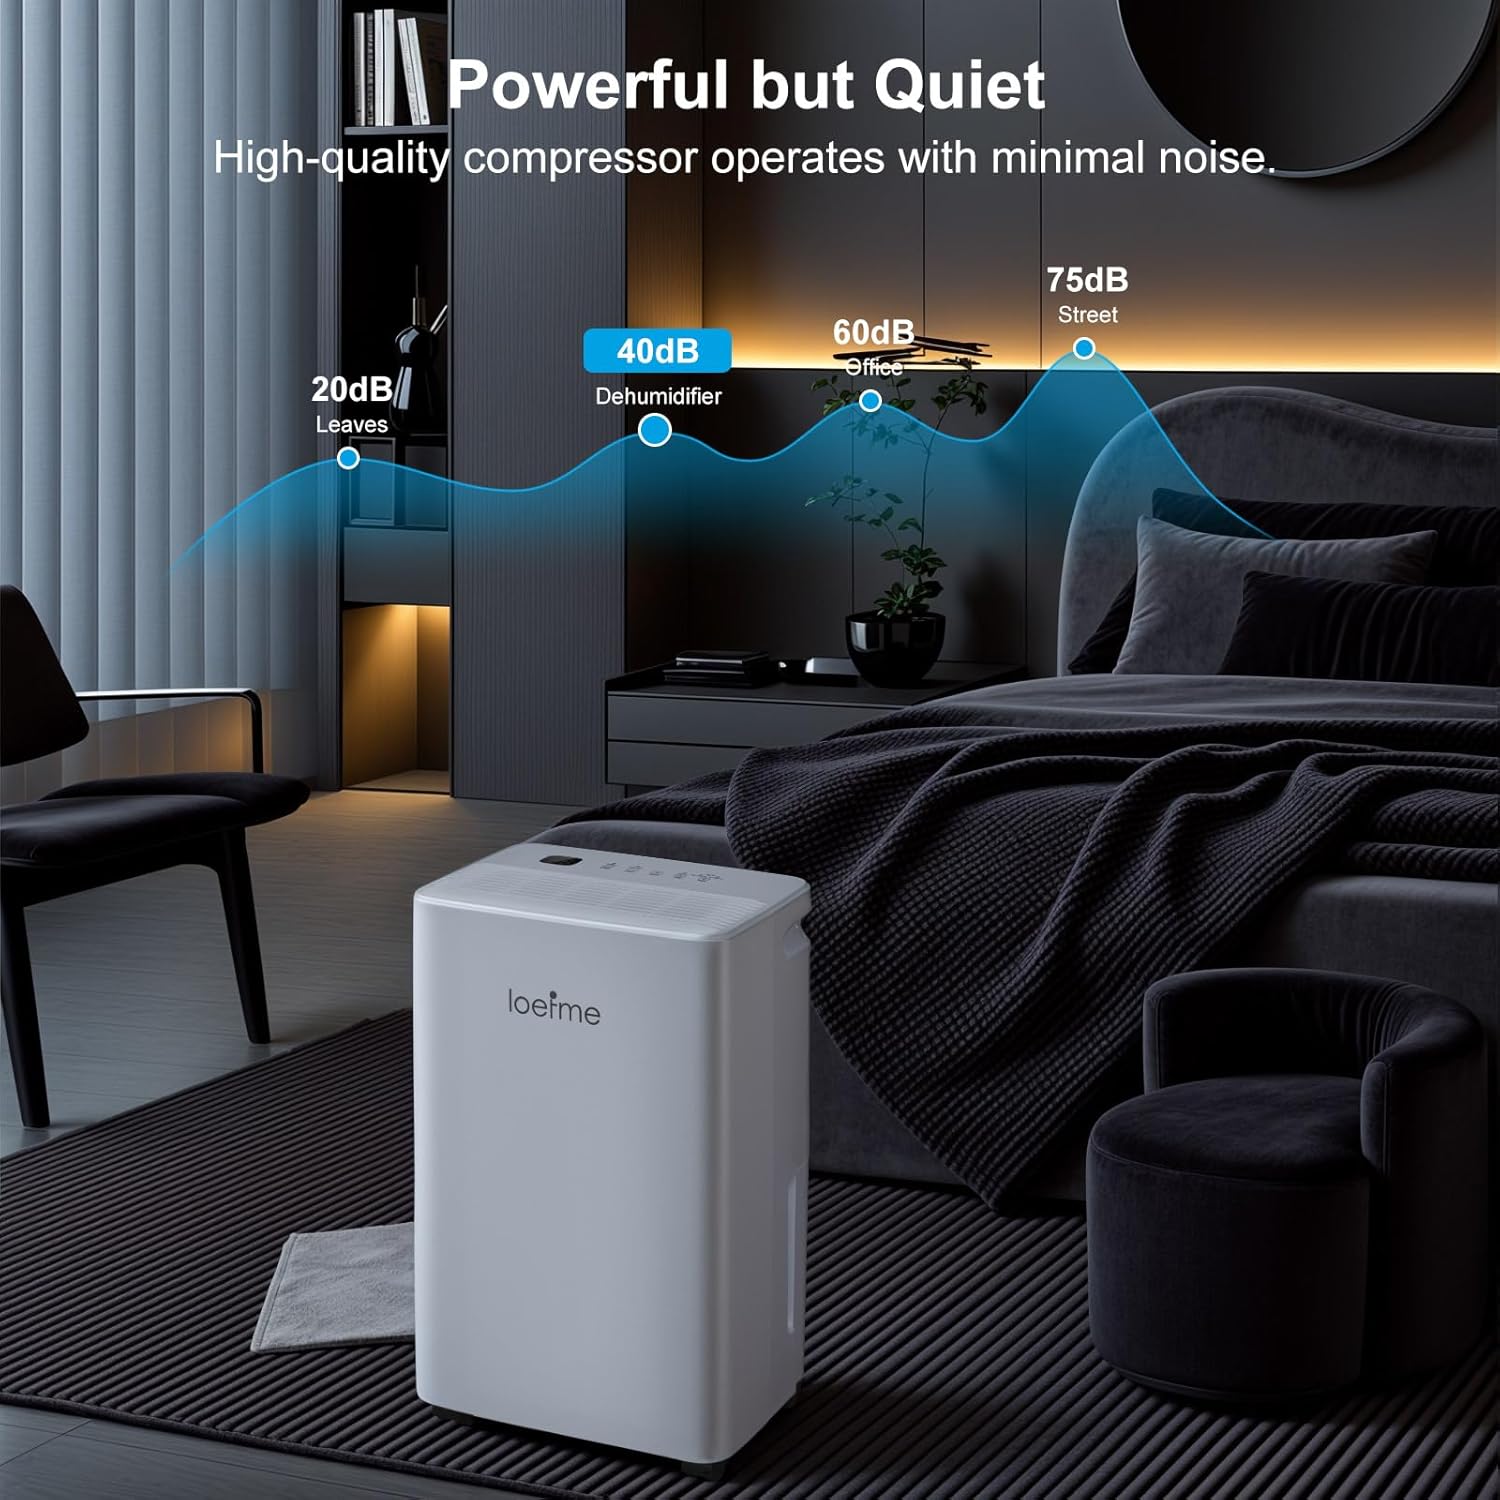
Figura 3.3: Illustration of the two drainage options: the removable 2-liter water tank and the continuous drainage outlet with an attached hose.

Figura 3.4: Diagram illustrating the Nano-level filter, designed to capture dust and inhalable particles, improving air quality.
4. Configuración
- Desembalaxe: Retire con coidado o deshumidificador da súa embalaxe. Garde os materiais de embalaxe para o seu almacenamento ou transporte futuros.
- Colocación: Place the unit upright on a firm, level surface. Ensure there is at least 20 cm (8 inches) of clear space around the air inlet and outlet to allow for proper airflow. Avoid placing it in direct sunlight or near heat sources.
- Conexión de alimentación: Enchufe o cable de alimentación a unha toma eléctrica conectada a terra.
- Uso inicial: For optimal performance, allow the unit to stand upright for at least 2 hours before plugging it in and turning it on, especially if it was transported horizontally.
5. Instrucións de funcionamento
5.1 Funcións do panel de control
The digital control panel allows for easy operation and setting adjustments.
- Botón de encendido: Prema para encender ou apagar o deshumidificador.
- Botón de modo: Cycles through the available operating modes: Dehumidify, Powerful, and Custom.
- RH%/Hr Button:
- In Dehumidify or Custom mode, press to set the target humidity level (e.g., 40% to 80%).
- Press and hold to set the timer for automatic ON/OFF operation.
- Bloqueo para nenos: Press and hold the Child Lock button to activate or deactivate. This prevents accidental changes to settings.
- Indicador de desconxelación: Illuminates when the unit is performing an automatic defrost cycle. This is normal operation in low temperatures.
- Visualización de humidade: Shows the current ambient humidity level or the set target humidity.
5.2 Modos de funcionamento
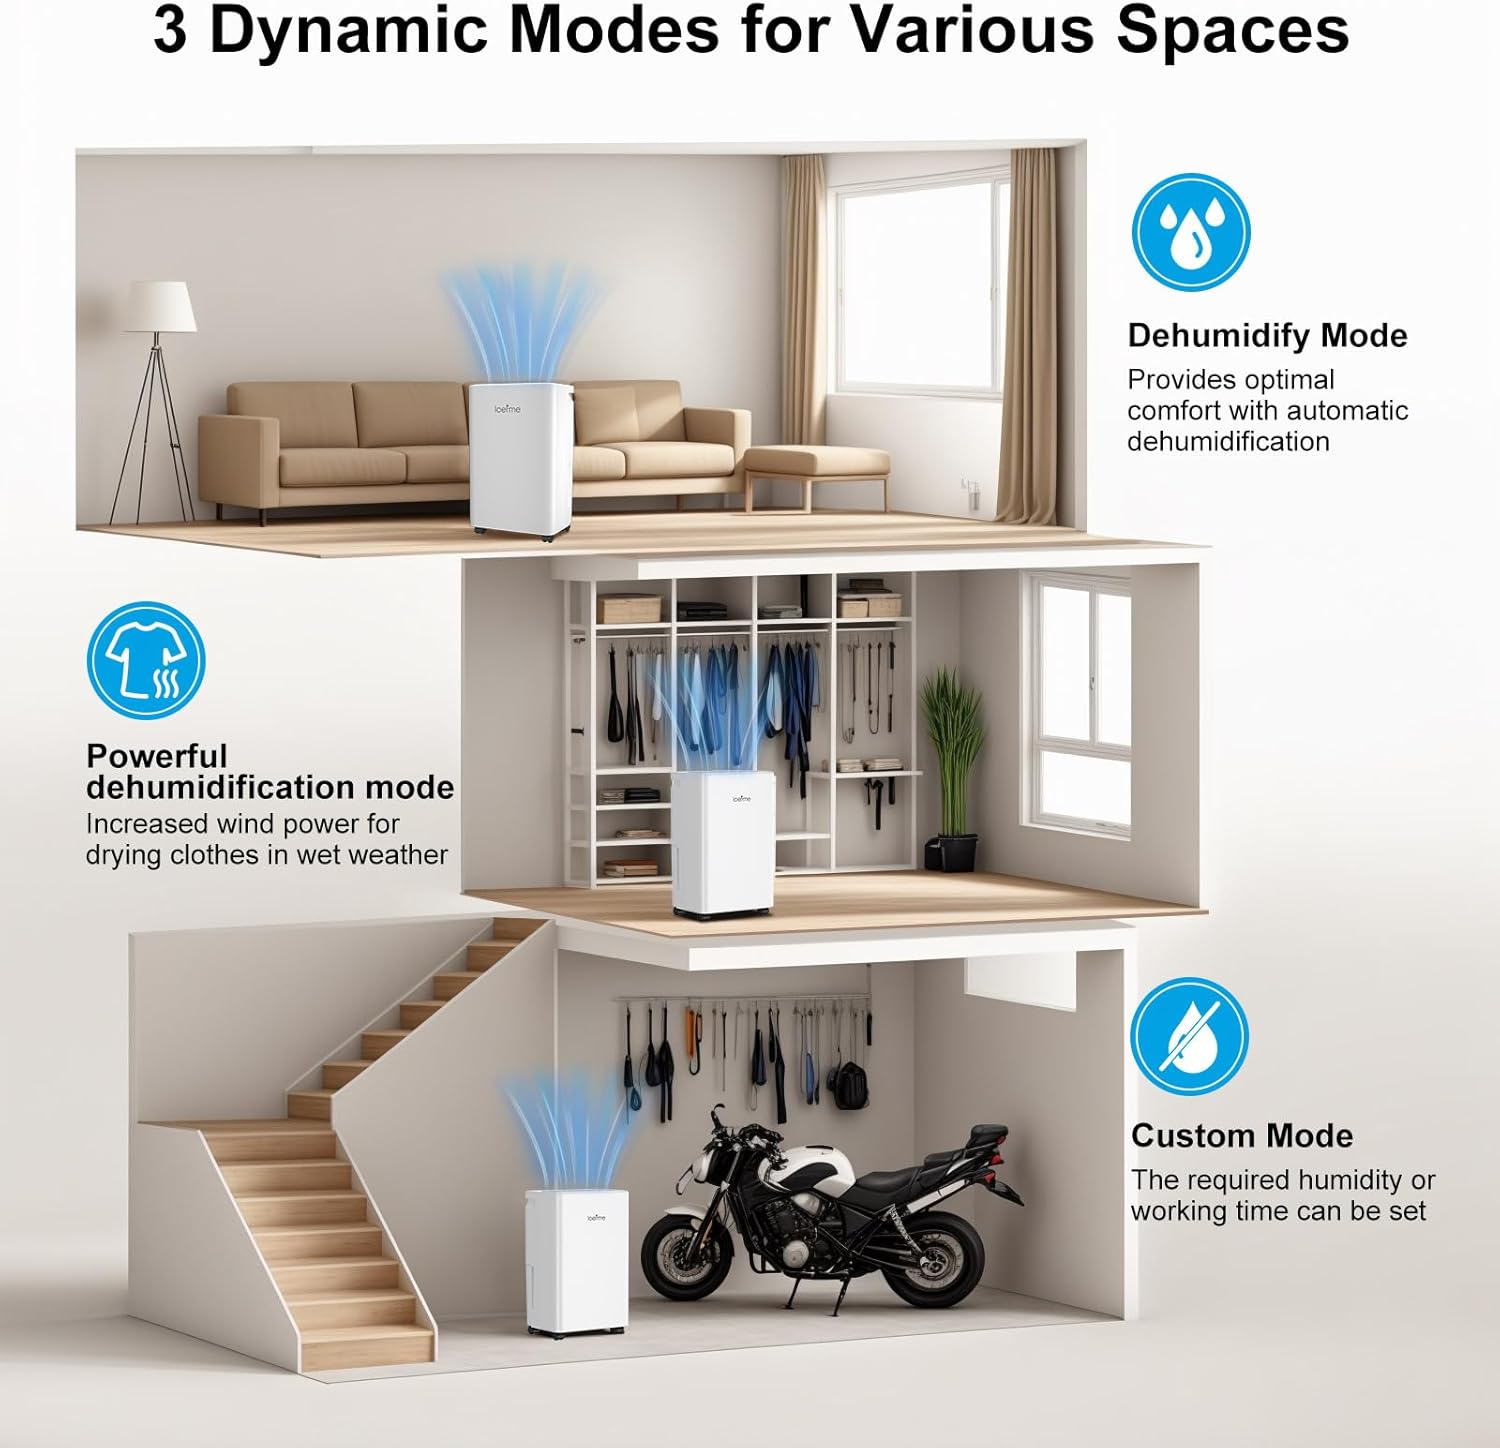
Figura 5.1: Visual representation of the three dynamic operating modes for various spaces.
- Modo de deshumidificación: Provides optimal comfort by automatically maintaining a healthy humidity level. The unit will operate to keep humidity between 40% and 80%.
- Powerful Dehumidification Mode: Increases fan speed and dehumidification power for faster moisture removal, ideal for drying clothes indoors or in very damp condicións.
- Modo personalizado: Allows you to set a specific target humidity level or a working time according to your preference.
5.3 Opcións de drenaxe
O seu deshumidificador ofrece dous métodos para eliminar a auga:
- Drenaxe do tanque de auga:
The dehumidifier collects water in its internal 2-liter water tank. When the tank is full, the unit will automatically shut off and an indicator light will illuminate. Carefully remove the tank, empty the collected water, and reinsert it securely. The unit will resume operation.
- Drenaxe continua:
For continuous operation without needing to empty the tank, connect the provided drainage hose to the continuous drainage outlet on the back of the unit. Ensure the hose is sloped downwards to allow gravity to drain the water into a suitable drain or container. Do not allow the hose to be kinked or blocked.
6. Mantemento
Un mantemento regular garante un rendemento óptimo e prolonga a vida útil do seu deshumidificador.
6.1 Limpeza do filtro de aire
- O filtro de aire debe limparse cada dúas semanas ou con máis frecuencia dependendo do uso e da calidade do aire.
- Apague e desenchufe o deshumidificador.
- Localiza e retira o filtro de aire (normalmente está na parte traseira ou lateral da unidade).
- Lave o filtro con auga limpa (non a máis de 40 °C) e un deterxente suave.
- Enxágüe ben e deixe secar completamente ao aire antes de volvelo inserir. Non o expoña á luz solar directa.
6.2 Limpeza do depósito de auga
- Baleirar o depósito de auga regularmente.
- Clean the tank with a mild detergent and water to prevent mold and mildew growth.
- Enxágüe ben e seque antes de volvelo colocar na unidade.
6.3 Limpeza externa
- Limpe o exterior da unidade cun suave, damp pano.
- Non use produtos de limpeza ou disolventes abrasivos.
6.4 Almacenamento
- Se garda a unidade durante un período prolongado, asegúrese de que o depósito de auga estea baleiro e limpo, e que o filtro estea limpo e seco.
- Garde o deshumidificador en posición vertical nun lugar fresco e seco, preferiblemente na súa embalaxe orixinal.
7 Solución de problemas
Consulta esta sección para ver os problemas comúns e as súas solucións.
| Problema | Causa posible | Solución |
|---|---|---|
| O deshumidificador non se acende. | Sen fonte de alimentación. O depósito de auga está cheo ou inserido incorrectamente. | Comprobe a conexión do cable de alimentación e a toma de corrente. Baleirar e volver colocar o depósito de auga correctamente. |
| Non se recolleu auga. | A humidade ambiental é demasiado baixa. O filtro de aire está obstruído. A temperatura é demasiado baixa. Unit is in continuous drainage mode. | Dehumidifier may not be needed. Limpar o filtro de aire. Operating temperature range is typically 5-35°C. Check if the continuous drainage hose is connected and functioning. |
| A unidade é ruidosa. | A unidade non está sobre unha superficie nivelada. O filtro de aire está obstruído. | Coloque a unidade sobre unha superficie plana e estable. Limpar o filtro de aire. |
| Dehumidification is slow. | O tamaño da habitación é demasiado grande. As portas/fiestras están abertas. O filtro de aire está obstruído. | Asegúrate de que a unidade sexa axeitada para o tamaño da habitación. Pechar portas e fiestras. Limpar o filtro de aire. |
8. Especificacións
| Característica | Especificación |
|---|---|
| Marca | LOEFME |
| Modelo | LOEFME Dehumidifier |
| Capacidade de deshumidificación | 12 litros/día (a 30 °C, 80 % de humidade relativa) |
| Capacidade do depósito de auga | 2 litros |
| Consumo de enerxía | 220 vatios |
| Nivel de ruído | Aproximadamente 38 dB |
| Dimensións do produto (L x W x H) | 27.5 x 19.5 x 44.5 cm |
| Peso do elemento | 8.8 quilogramos |
| Apagado automático | Si (cando o depósito de auga está cheo) |
| Rango de control de humidade | 40% - 80% |
9. Garantía e soporte
For warranty information or technical support, please refer to the warranty card included with your product or contact LOEFME customer service through the retailer where the product was purchased. Please have your purchase receipt and product model information ready when contacting support.


