1. Introdución
This user manual provides essential information for the safe and efficient installation, operation, and maintenance of your Ledvion 2M LED Track Lighting System with 4 Dimmable GU10 Track Spotlights. Please read this manual thoroughly before installation and retain it for future reference.
The Ledvion track lighting system offers a modern and flexible lighting solution, allowing you to customize your illumination. It is designed for use with GU10 LED bulbs (not included), providing energy efficiency and the option for dimming with a compatible external dimmer.
2. Información de seguridade
WARNING: Electrical installation should only be performed by a qualified electrician in accordance with local electrical codes and regulations.
- Always disconnect power at the circuit breaker before installation, maintenance, or bulb replacement.
- Asegurar o voltage supply matches the product specifications (230 Volts).
- Non exceda a potencia máximatage for GU10 bulbs specified for the spotlights.
- Avoid direct contact with hot bulbs or fixtures.
- Este produto está deseñado só para uso en interiores.
- Manter os materiais de embalaxe fóra do alcance dos nenos.
3. Contido do paquete
Comprobe que todos os compoñentes estean presentes antes de comezar a instalación:
- 1x Ledvion 2M Track Rail (Black)
- 4x Ledvion Track Spotlights (Black, GU10 Fitting)
- Ferramentas de montaxe (parafusos, ancoraxes)
- Manual de usuario
Nota: GU10 LED bulbs are not included and must be purchased separately. An external dimmer is required for dimming functionality.

Imaxe 1: Acabadoview of the Ledvion 2M LED Track Lighting System with four spotlights.
4. Configuración e instalación
Follow these steps for proper installation of your track lighting system:
4.1. Planificación e preparación
- Escolla localización: Select a suitable location on your ceiling or wall. Ensure the surface can support the weight of the track and spotlights.
- Desconexión de alimentación: Desconecte a alimentación principal no disyuntor antes de comezar calquera traballo eléctrico.
- Marcación: Hold the track rail against the desired mounting surface and mark the drilling points for the mounting brackets.
4.2. Mounting the Track Rail
- Drill pilot holes at the marked locations. Insert appropriate wall anchors if necessary.
- Secure the track rail to the surface using the provided screws. Ensure it is firmly attached and level.
4.3. Conexión eléctrica
- Connect the electrical wiring from your power source to the track rail's power feeder. Ensure correct polarity (Live, Neutral, Ground).
- Comprobe dúas veces todas as conexións para garantir a seguridade e o illamento axeitado.
4.4. Installing Spotlights
The system features an easy plug-and-play locking system for spotlights.
- Insert the GU10 LED bulb into each spotlight fixture by twisting it into place.
- Align the spotlight connector with the track rail slot.
- Push the spotlight firmly into the track until it clicks into place.
- Rotate the locking mechanism on the spotlight connector to secure it.

Image 2: Illustration of the plug-and-play installation process for securing spotlights onto the track rail.

Image 3: Detailed dimensions of the track rail (2000mm length) and individual spotlights (175mm total height, 140mm spotlight body, 52mm diameter).
5. Instrucións de funcionamento
5.1. Acendido
Once installation is complete and all connections are secure, restore power at the circuit breaker. The lights should turn on.
5.2. Adjusting Spotlights
Each spotlight can be independently adjusted to direct light where needed:
- Rotación: The spotlight can rotate 350 degrees horizontally along the track.
- Inclinación: The spotlight head can be tilted up to 90 degrees vertically.
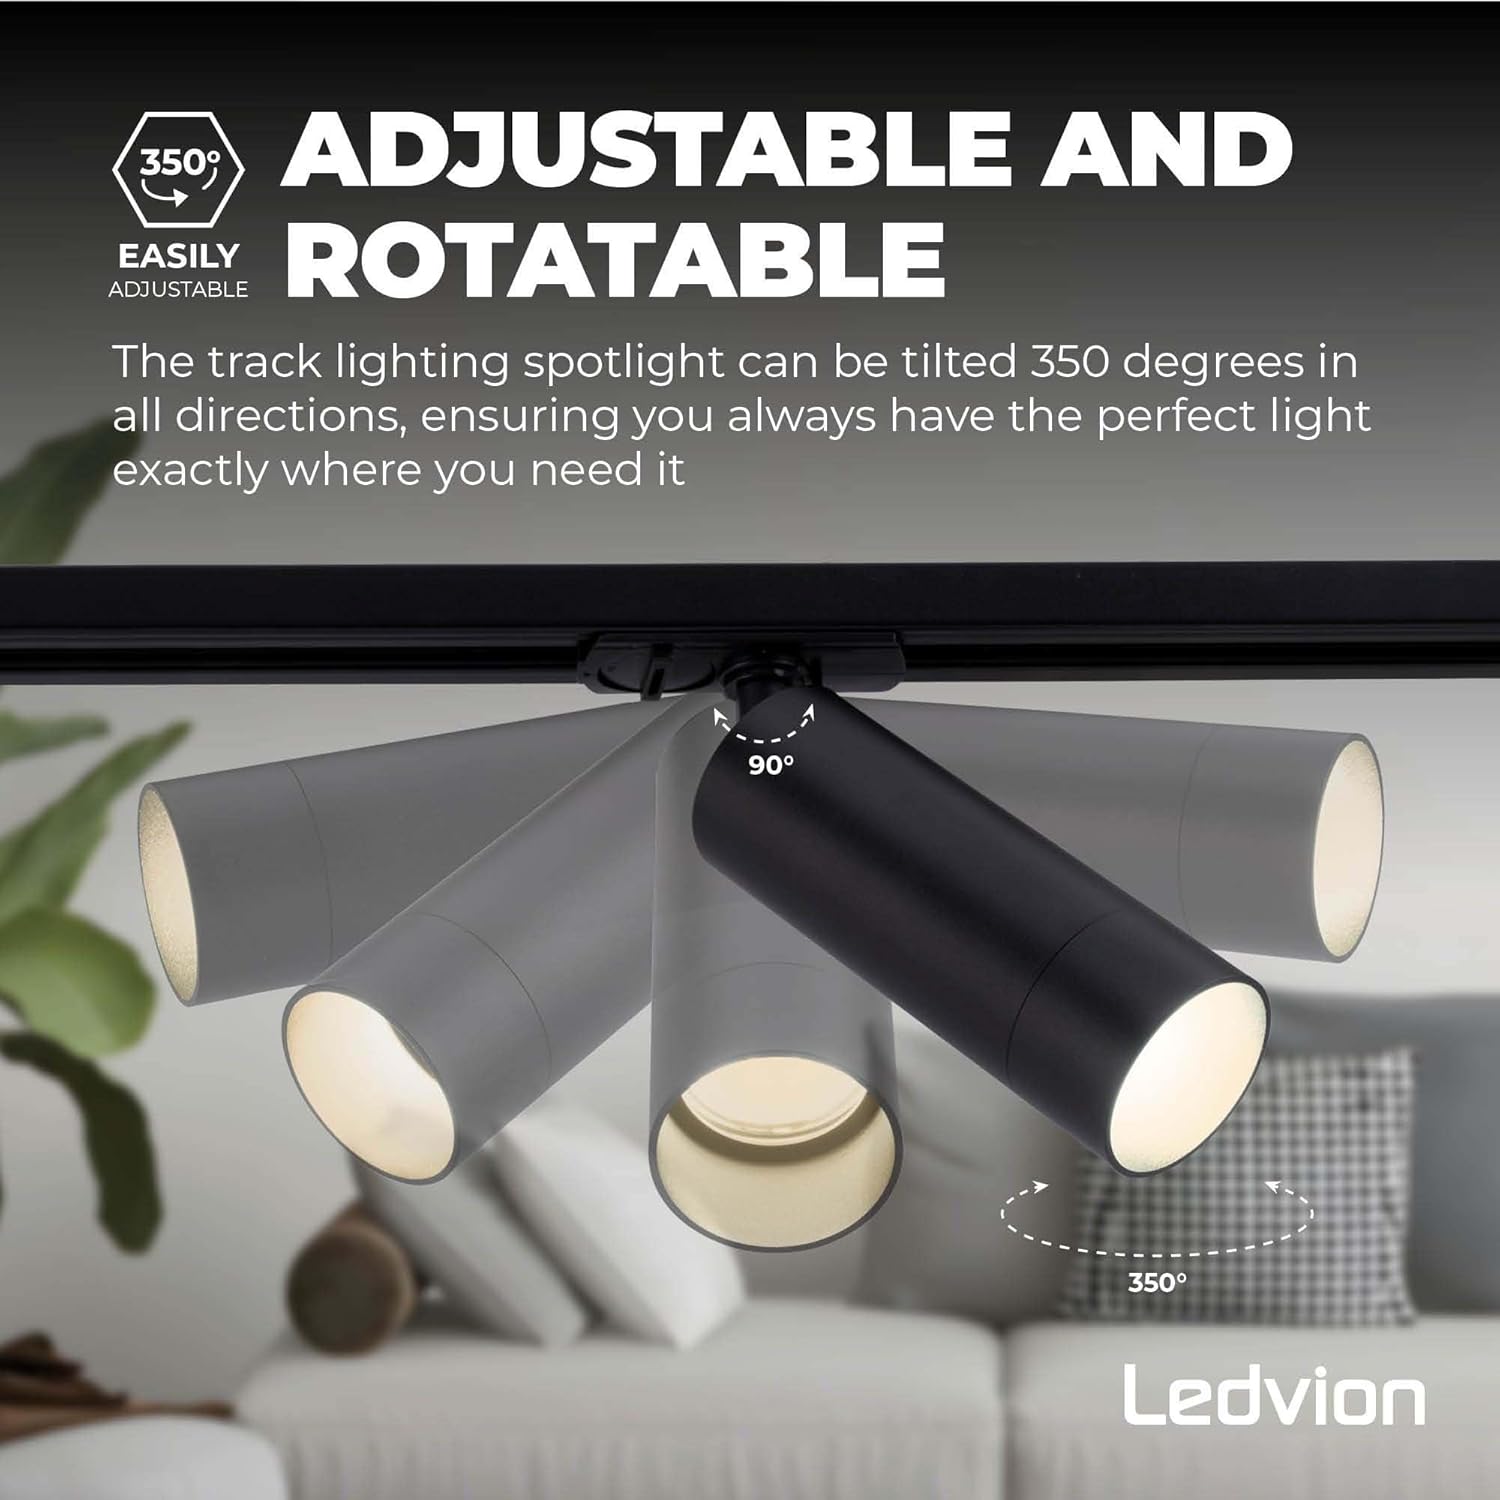
Image 4: Demonstration of the 350-degree rotation and 90-degree tilt capabilities of the track spotlights.
5.3. Funcionalidade de atenuación
If you have installed dimmable GU10 LED bulbs and connected the system to a compatible external dimmer, you can adjust the light intensity using the dimmer control.
5.4. Optional Anti-Glare Grid
An optional anti-glare grid can be added to the spotlights to reduce glare. This grid is easy to attach and remove.

Image 5: Illustration of how to install or remove the optional anti-glare grid from the spotlight fixture.
6. Mantemento
- Limpeza: Ensure power is off before cleaning. Wipe the track and spotlights with a soft, dry cloth. Do not use abrasive cleaners or solvents.
- Substitución da lámpada: Disconnect power before replacing GU10 bulbs. Allow bulbs to cool completely before handling. Twist the old bulb out and insert the new one.
- Inspección: Periodically check all connections and mounting points for security.
7 Solución de problemas
| Problema | Causa posible | Solución |
|---|---|---|
| As luces non se acenden. |
|
|
| As luces parpadean. |
|
|
| Spotlight does not stay in position. |
|
|
8. Especificacións
| Marca: | Ledvión |
| Número de modelo: | LVT10003_2m4s |
| Lonxitude da pista: | 2M (2000mm) |
| Peso do artigo: | 2 quilogramos |
| Cor: | Black (4 Railspots) |
| Voltage: | 230 voltios |
| Tipo de lámpada: | GU10 (LED recommended, not included) |
| Regulable: | Yes (with compatible external dimmer and dimmable GU10 bulbs) |
| Número de elementos: | 1 (includes track and 4 spotlights) |
| País de orixe: | China |
9. Accesorios opcionais
You can expand your Ledvion track system with the following optional accessories (sold separately):
- Powerfeeder with Coverplate (SKU: LVT10019)
- Powerfeeder with I-Connector (SKU: LVT10021)
- X-Connector (SKU: LVT10017)
- T-Connector (SKU: LVT10015)
- Pendant Spot Adjustable Cord (SKU: LVT10005)

Image 6: Various optional accessories for expanding the Ledvion track lighting system, including different connectors and a pendant spot.
10. Garantía e soporte
For warranty information, technical support, or inquiries regarding spare parts, please contact Ledvion customer service directly. Refer to your purchase documentation for specific warranty terms and contact details.
Information regarding software updates and spare parts availability is not provided at this time.