1. Introdución
This manual provides comprehensive instructions for the Magnasonic FS70ST01 25MP Film Scanner. It details the setup, operation, maintenance, and specifications of the device, enabling users to convert various film and slide formats into high-resolution digital images.
2. Que está incluído
Desembala a caixa con coidado e asegúrate de que estean presentes todos os elementos:
- Magnasonic FS70 Film Scanner
- Cable USB-A a USB-C
- Long Tray 35mm Negative Film Holder (Set of 3)
- Super 8/8 mm Film Insert
- Cepillo de limpeza
- 110 Inserto de película
- Adaptador de diapositivas
- Adaptador de película negativa
- 110 Inserción de diapositivas

This image displays all the components included with your Magnasonic FS70ST01 Film Scanner, ensuring you have everything needed for operation.
3. Configuración
3.1 Conexión de alimentación
Connect the scanner to a power source using the provided USB-A to USB-C cable. You can use a USB port on a computer or a 5V 1A USB wall adapter (not included).
3.2 SD Card Insertion (Optional)
For storing a large number of images, insert an SD card (up to 128GB, not included) into the SD card slot on the scanner.

This image highlights the connectivity options on the scanner, including the USB, SD card, and HDMI ports.
3.3 Turning On the Device
Press and hold the power button on the scanner for approximately 3 seconds to turn it on. The Magnasonic logo will appear on the 5-inch TFT color display.

The image shows the scanner's 5-inch TFT color display, which is used for viewimaxes e navegar polos menús.
3.4 Video Guide: Setting Up and Scanning
For a visual guide on setting up and scanning with your FS70 Film Scanner, please watch the official video below:
This video demonstrates the complete process of setting up the Magnasonic FS70 Film Scanner and performing scans of slides and negatives.
4. Instrucións de funcionamento
4.1 Selecting Film Type
Upon powering on, the scanner will display the 'FILM TYPE' menu. Press 'OK' to select. You will then choose between 'Negatives', 'Slides', or 'B&W' (Black & White) film. After selecting the film type, choose the size of the image on the film (e.g., 35mm, 110, 126).

This diagram illustrates the different film and slide formats compatible with the scanner, including 35mm, 126, 110, and Super 8 film, as well as 135, 126, and 110 slides.
4.2 Inserting Film or Slides
Insert your film or slides into the appropriate film or slide adapter. For 110, 8mm, and Super 8 film, an insert is required to properly feed them into the adapter. Close the adapter securely.
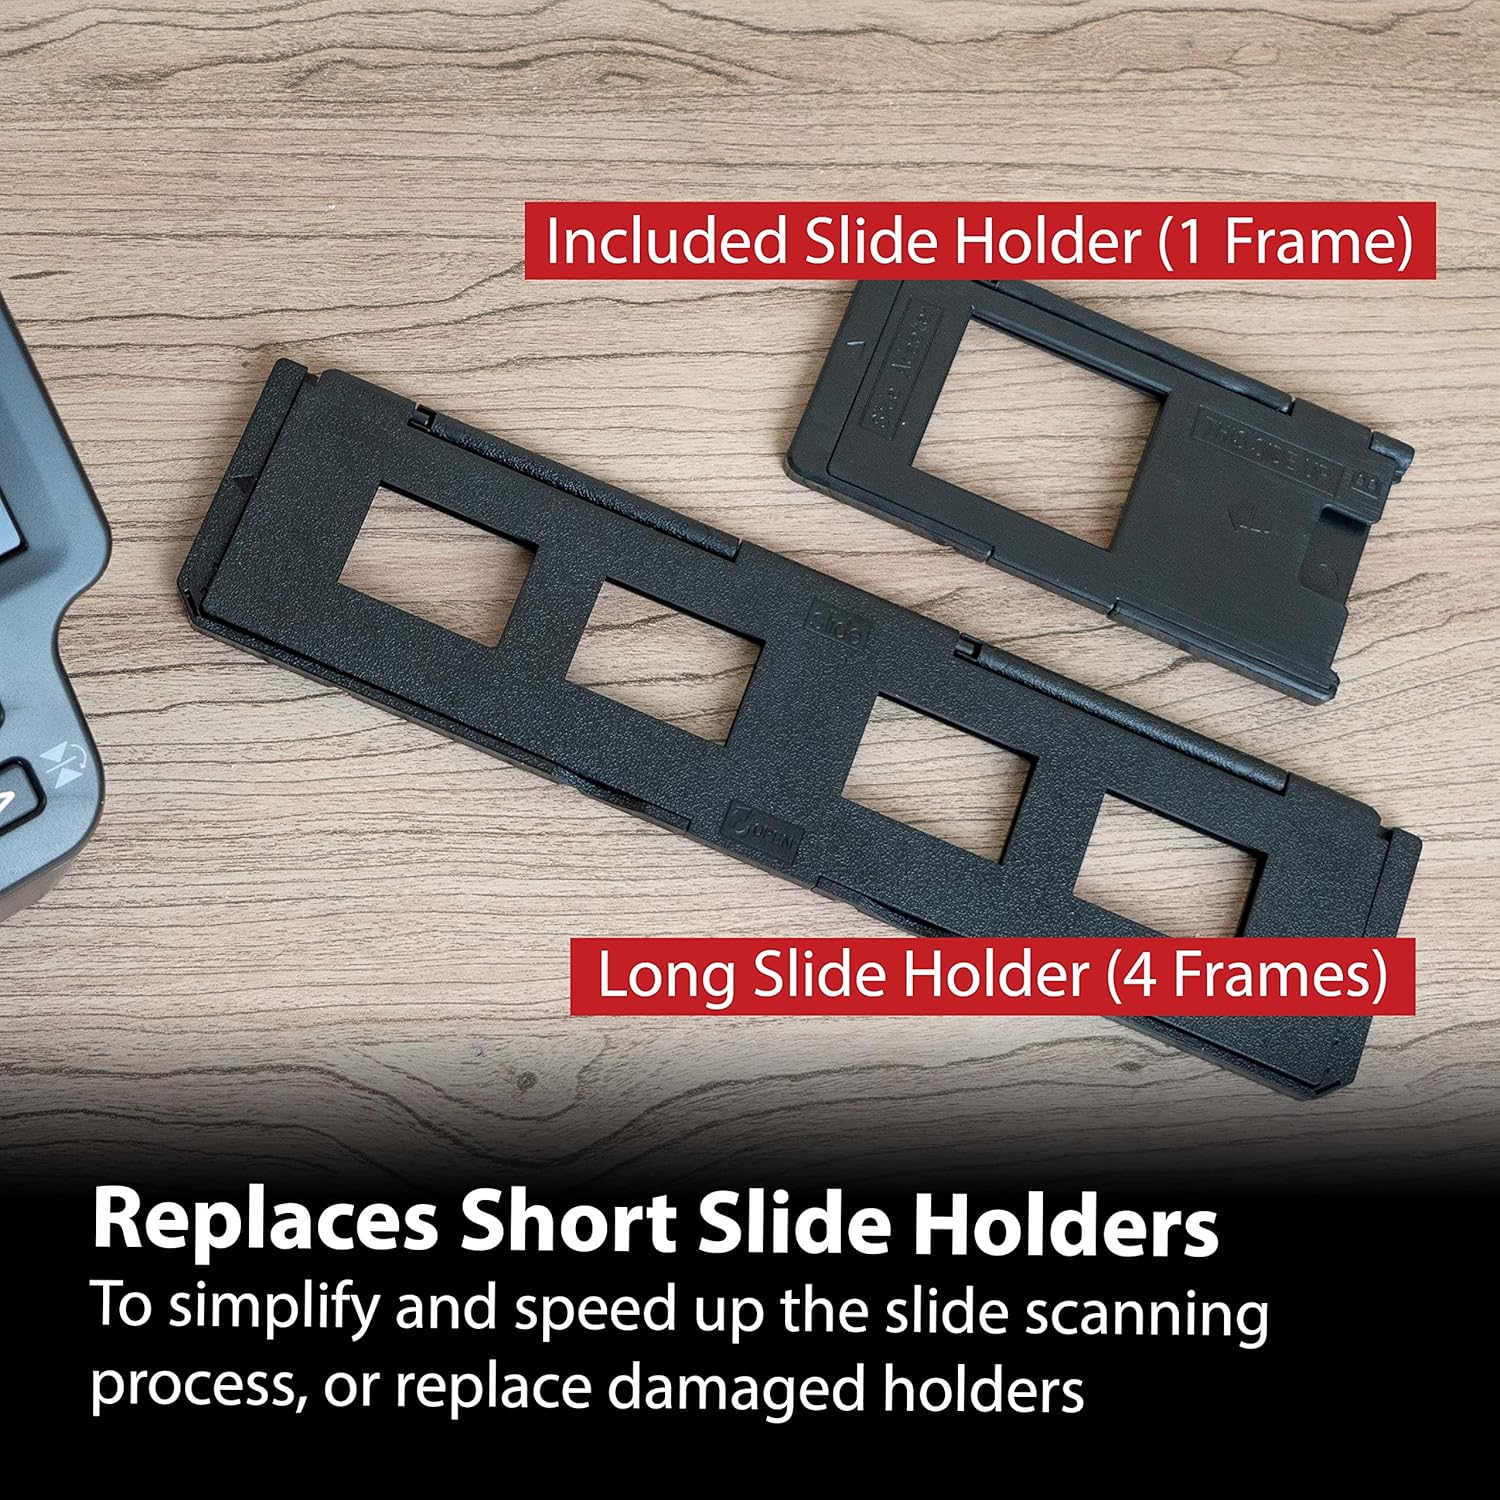
The image displays the various slide holders provided, including a single-frame holder and a long tray holder for multiple slides, designed to simplify and speed up the scanning process.
4.3 Adjusting Image Orientation
Before scanning, you can adjust the image orientation. Use the arrow buttons on the scanner to flip or mirror the image as needed.
4.4 Adjusting EV and Color Settings
Press the 'OK' button before scanning to access the 'EV and Color setting' menu. Here, you can adjust the Exposure Value (EV) for brightness and individual Red (R), Green (G), and Blue (B) color levels. Use the left and right arrow buttons to navigate between settings and press 'OK' to select a setting to adjust. Use the arrow buttons to modify the value and press 'OK' to confirm changes.
This image shows the scanner's user-friendly interface, allowing for easy selection of film types and access to settings.
4.5 Scanning and Saving Images
Once the film is inserted and settings are adjusted, press the 'SCAN' button to capture the image. The image will be saved to the internal memory or the inserted SD card.

The image displays a high-quality scanned photo on the scanner's screen, demonstrating the clarity and detail of the digital conversion.
4.6 Transferring Images to a Computer
To transfer scanned images to a computer, connect the scanner to your computer using the USB cable. Turn on the scanner and select 'USB UPLOAD' from the main menu. The scanner will appear as a new storage device on your computer, allowing you to copy the images.
5. Mantemento
5.1 Cleaning the Scanner and Film
If dust or debris appears in the image preview, remove the film or slide. Use the included cleaning brush to gently clean the film/slide and the scanner's film slot. Regular cleaning ensures optimal scan quality.
6 Solución de problemas
6.1 Inverted Colors or Black & White Preview
If the image preview shows inverted colors or appears in black and white when it should be color, you may need to adjust the film type setting. Navigate to the 'FILM TYPE' menu and ensure the correct option (Negatives, Slides, or B&W) is selected for the film you are scanning.
6.2 Blurry or Unclear Scans
Ensure the film or slide is clean and free of dust. Use the provided cleaning brush to remove any particles. Also, verify that the film or slide is correctly seated in its adapter and inserted properly into the scanner.
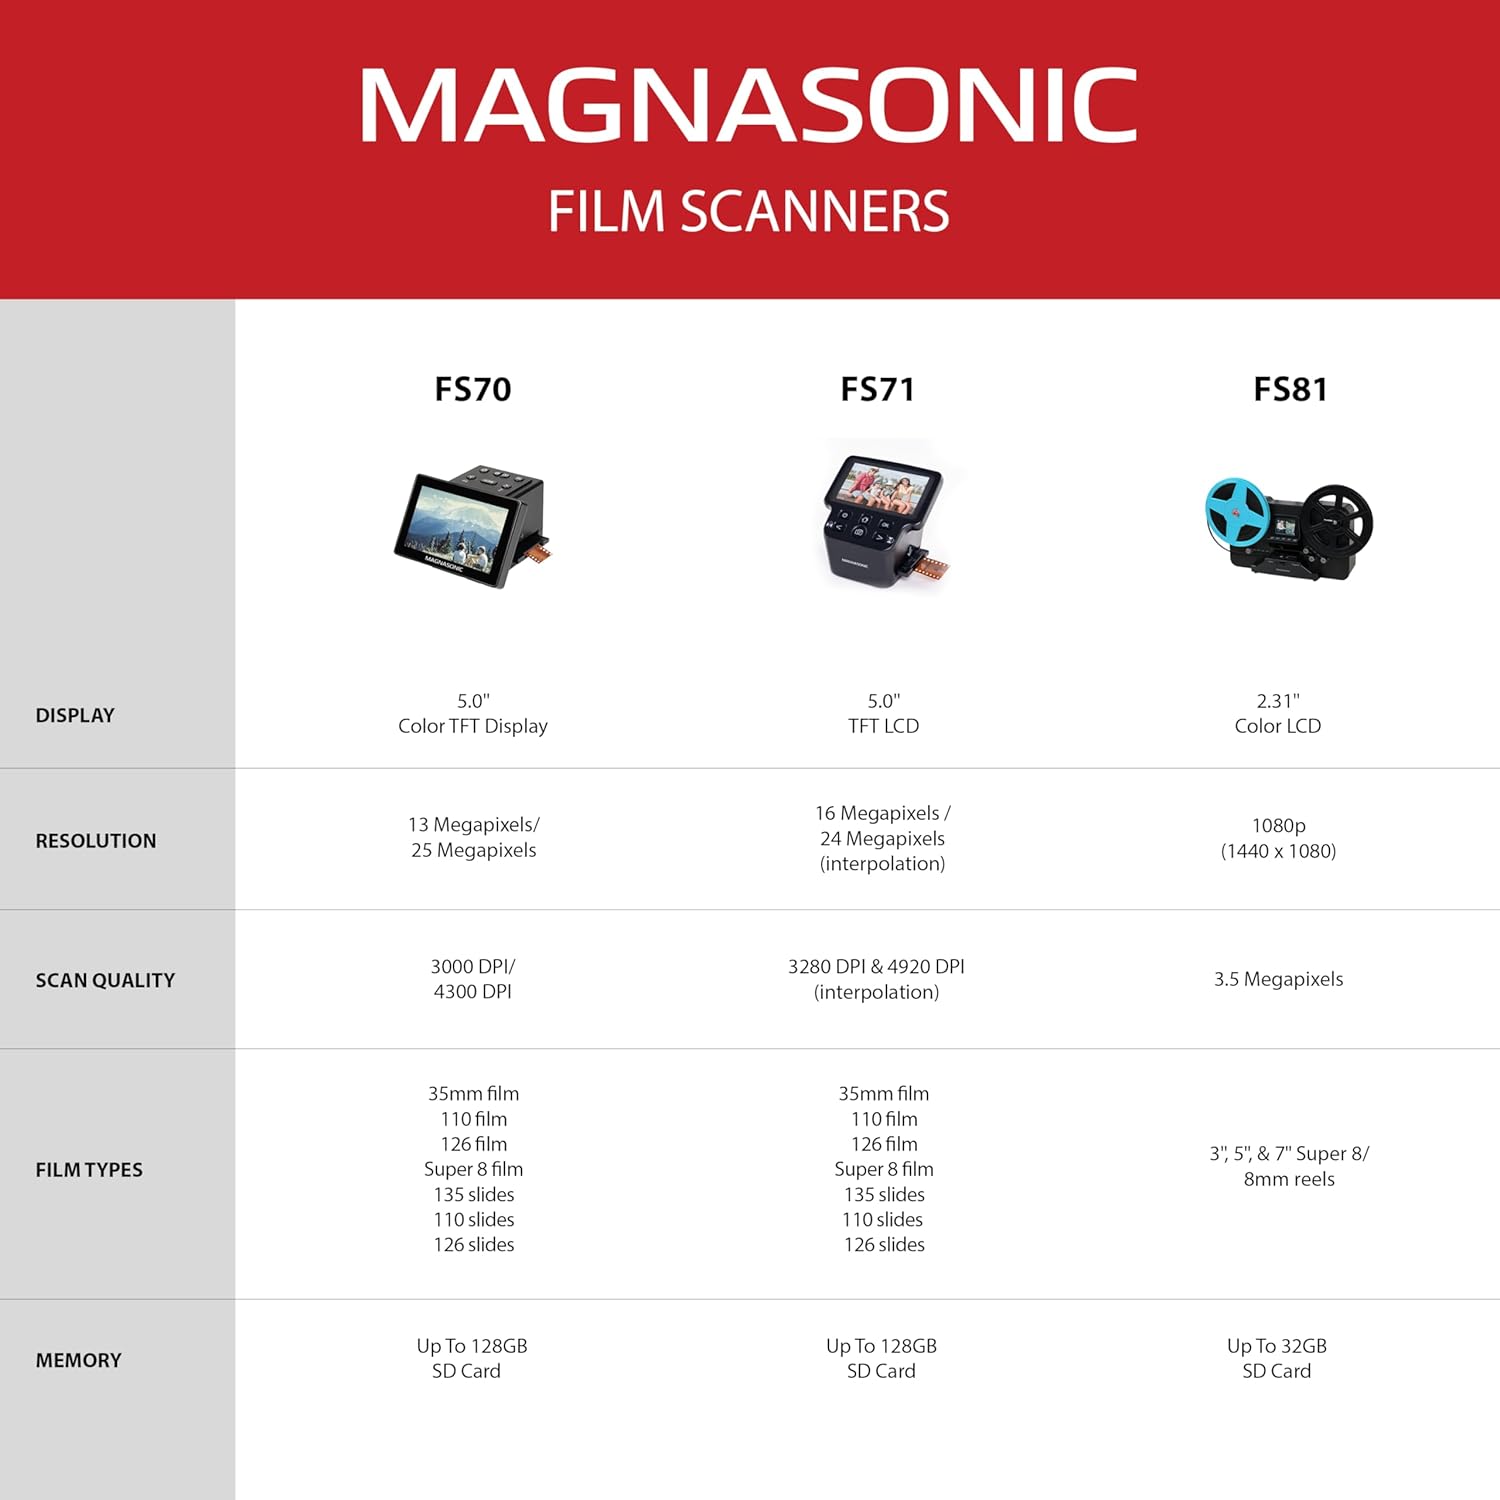
7. Especificacións
| Característica | Especificación |
|---|---|
| Número de modelo | FS70ST01 |
| Resolución | 13 Megapixels / 25 Megapixels (Interpolated) |
| Mostrar | 5.0" Color TFT Display |
| Tipos de películas compatibles | 35mm film, 110 film, 126 film, Super 8 film, 135 slides, 126 slides, 110 slides |
| Conectividade | HDMI, USB |
| Memoria | 128MB Built-in, expandable up to 128GB via SD card |
| Dimensións do produto | 15.71 x 5.35 x 3.82 polgadas |
| Peso do elemento | 1.46 libras |
| Wattage | 5 vatios |
| Tecnoloxía de sensores ópticos | CMOS |
| Requisitos mínimos do sistema | Windows 7 |

This image provides a visual representation of the scanner's physical dimensions.
8. Garantía e soporte
For warranty information or technical support, please refer to the official Magnasonic websitio web ou póñase en contacto co servizo de atención ao cliente. Garde o recibo de compra para reclamacións de garantía.


