1. Introdución
Thank you for choosing the INKBIRD Professional Vacuum Sealer Machine. This manual provides essential information for the safe and efficient operation, maintenance, and troubleshooting of your new appliance. Please read this manual thoroughly before first use and keep it for future reference.

Image: The INKBIRD Professional Vacuum Sealer Machine, Model B0DRP114SK, shown with various food items, highlighting its versatility for food preservation.
2. Instrucións de seguridade
- Le todas as instrucións antes de usar o aparello.
- Non mergullo o cable de alimentación, o enchufe ou o aparello en auga ou outros líquidos.
- É necesaria unha estreita supervisión cando o aparello é usado por nenos ou preto de eles.
- Desenchufe da toma cando non estea en uso e antes de limpalo.
- Non faga funcionar ningún aparello cun cable ou enchufe danados, ou despois de que o aparello funcione mal ou teña dano dalgún xeito.
- Use o aparello só para o seu uso doméstico.
- Non use ao aire libre.
- Asegúrese sempre de que a tapa estea ben pechada e bloqueada antes de operar.
- Evite o contacto coas pezas móbiles.
3. Produto rematadoview
3.1 Compoñentes
The INKBIRD Professional Vacuum Sealer Machine is designed for efficient food preservation. Key components include the control panel, sealing bar, vacuum chamber, and integrated roll storage with cutter.

Imaxe: De arriba abaixo view of the INKBIRD Professional Vacuum Sealer Machine, showcasinpolo seu elegante deseño e panel de control.
3.2 Panel de control e modos
The machine features an intuitive control panel with various modes to suit different food types and sealing requirements.

Image: The control panel displaying six food modes: Dry, Moist, Liquid, Gentle, Normal, Pulse, Seal Only, and External Vacuum. This allows for precise sealing based on food consistency.
4. Configuración
4.1 Desembalaxe e contido
Carefully remove all components from the packaging. Verify that all items listed below are included:
- INKBIRD Vacuum Sealer Machine
- 5 x Vacuum Bags (20x30cm)
- 1 x Vacuum Roll (28x500cm)
- 1 mangueira de succión de aire
- 1 x Replacement Foam Gasket
- 1 x Manual de usuario
- 1 x cable de alimentación
- Etiquetas autoadhesivas

Image: A visual representation of all items included in the package: the vacuum sealer, various bags and rolls, an air suction hose, a replacement gasket, user manual, power cord, and labels.
4.2 Colocación inicial e conexión á alimentación
- Coloque a seladora ao baleiro sobre unha superficie plana, estable e seca.
- Asegúrese de que hai espazo suficiente arredor da máquina para unha ventilación adecuada.
- Enchufe o cable de alimentación nunha toma eléctrica adecuada.
4.3 Using the Integrated Roll Storage and Cutter
The machine features a convenient storage compartment for vacuum sealer rolls and an integrated cutter to create custom-sized bags.
- Abra a tapa da seladora ao baleiro.
- Place a vacuum sealer roll into the designated storage area. The machine can accommodate rolls up to 6 meters long and 30cm wide.
- Tire do material da bolsa a lonxitude desexada.
- Use the integrated cutter to cut the bag to your preferred size.
- Seal one end of the cut bag using the 'Seal Only' function (refer to Operating Instructions).

Image: The vacuum sealer with its lid open, showing the integrated compartment for storing a vacuum roll and the sliding cutter mechanism for creating custom-sized bags.
5. Instrucións de funcionamento
5.1 Basic Vacuum Sealing (Dry Food)
- Place the food item into a vacuum sealer bag, leaving at least 7-10 cm of space between the food and the top edge of the bag.
- Asegúrate de que o extremo aberto da bolsa estea limpo e seco.
- Place the open end of the bag into the vacuum chamber. Ensure it lies flat across the sealing bar.
- Close the lid of the vacuum sealer. The machine features an automatic locking mechanism for one-hand operation.
- Select the 'Dry' food mode on the control panel.
- Press the 'Vac&Seal' button. The machine will automatically remove air from the bag and then seal it.
- Unha vez finalizado o proceso, a luz indicadora apagarase. Abra a tapa e retire a bolsa selada.

Image: A hand operating the INKBIRD Vacuum Sealer, demonstrating the automatic locking feature that allows for convenient one-hand sealing of food items like meat.
5.2 Using Different Modes
The INKBIRD vacuum sealer offers multiple modes for optimal preservation of various food types:
- Modo seco: Ideal for solid, dry foods like nuts, cereals, and dried fruits.
- Modo húmido: Suitable for foods with some moisture, such as raw or marinated meats and vegetables.
- Modo líquido: Designed for foods with significant liquid content, like soups or stews. Use with caution and ensure sufficient headspace.
- Modo suave: Reduces vacuum pressure for delicate foods that might be crushed under full vacuum.
- Modo normal: Presión de baleiro estándar para a maioría dos alimentos.
- Modo de pulso: Allows manual control over the vacuum process. Press and hold to vacuum, release to stop, then press 'Seal' to seal. Useful for very delicate items or when precise vacuum control is needed.
- Só selo: Seals bags without vacuuming. Useful for making bags from rolls or sealing delicate items after manual air removal.
- External Vacuum: Connect the included hose to the external vacuum port to vacuum seal canisters or wine stoppers.

Imaxe: Unha detallada view of the INKBIRD Vacuum Sealer's control panel, illustrating the six distinct operating modes (Dry, Moist, Liquid, External Vacuum, Pulse, Seal Only) and exampmenos tipos de alimentos axeitados para cada modo.
5.3 Variable Settings
The machine allows adjustment of vacuum force and sealing time for optimal results.
- Vacuum Force Control: Choose between 'Gentle' or 'Normal' vacuum pressure depending on the food's fragility.
- Control do tempo de selado: Adjust the sealing time from level 1 to 5 based on the bag's thickness. Level 3 is the default. Thicker bags may require a longer sealing time.
- Conta atrás de selado: The LED screen displays a countdown during the sealing process.

Image: The control panel highlighting the variable settings for vacuum force (Gentle/Normal) and sealing time (levels 1-5), along with a digital countdown display for the sealing process.
6. Mantemento e Limpeza
6.1 Cleaning the Vacuum Chamber
The vacuum chamber is designed to be detachable for easy cleaning, preventing liquid buildup and ensuring hygiene.
- Asegúrese de que o aparello estea desenchufado antes de limpar.
- Carefully detach the vacuum chamber component.
- Wash the detachable part with warm, soapy water. It can hold up to 300ml of liquid, reducing the need for frequent cleaning.
- Rinse thoroughly and dry completely before reattaching to the main unit.
- Limpe o exterior da máquina cun anuncioamp pano. Non use produtos de limpeza abrasivos.
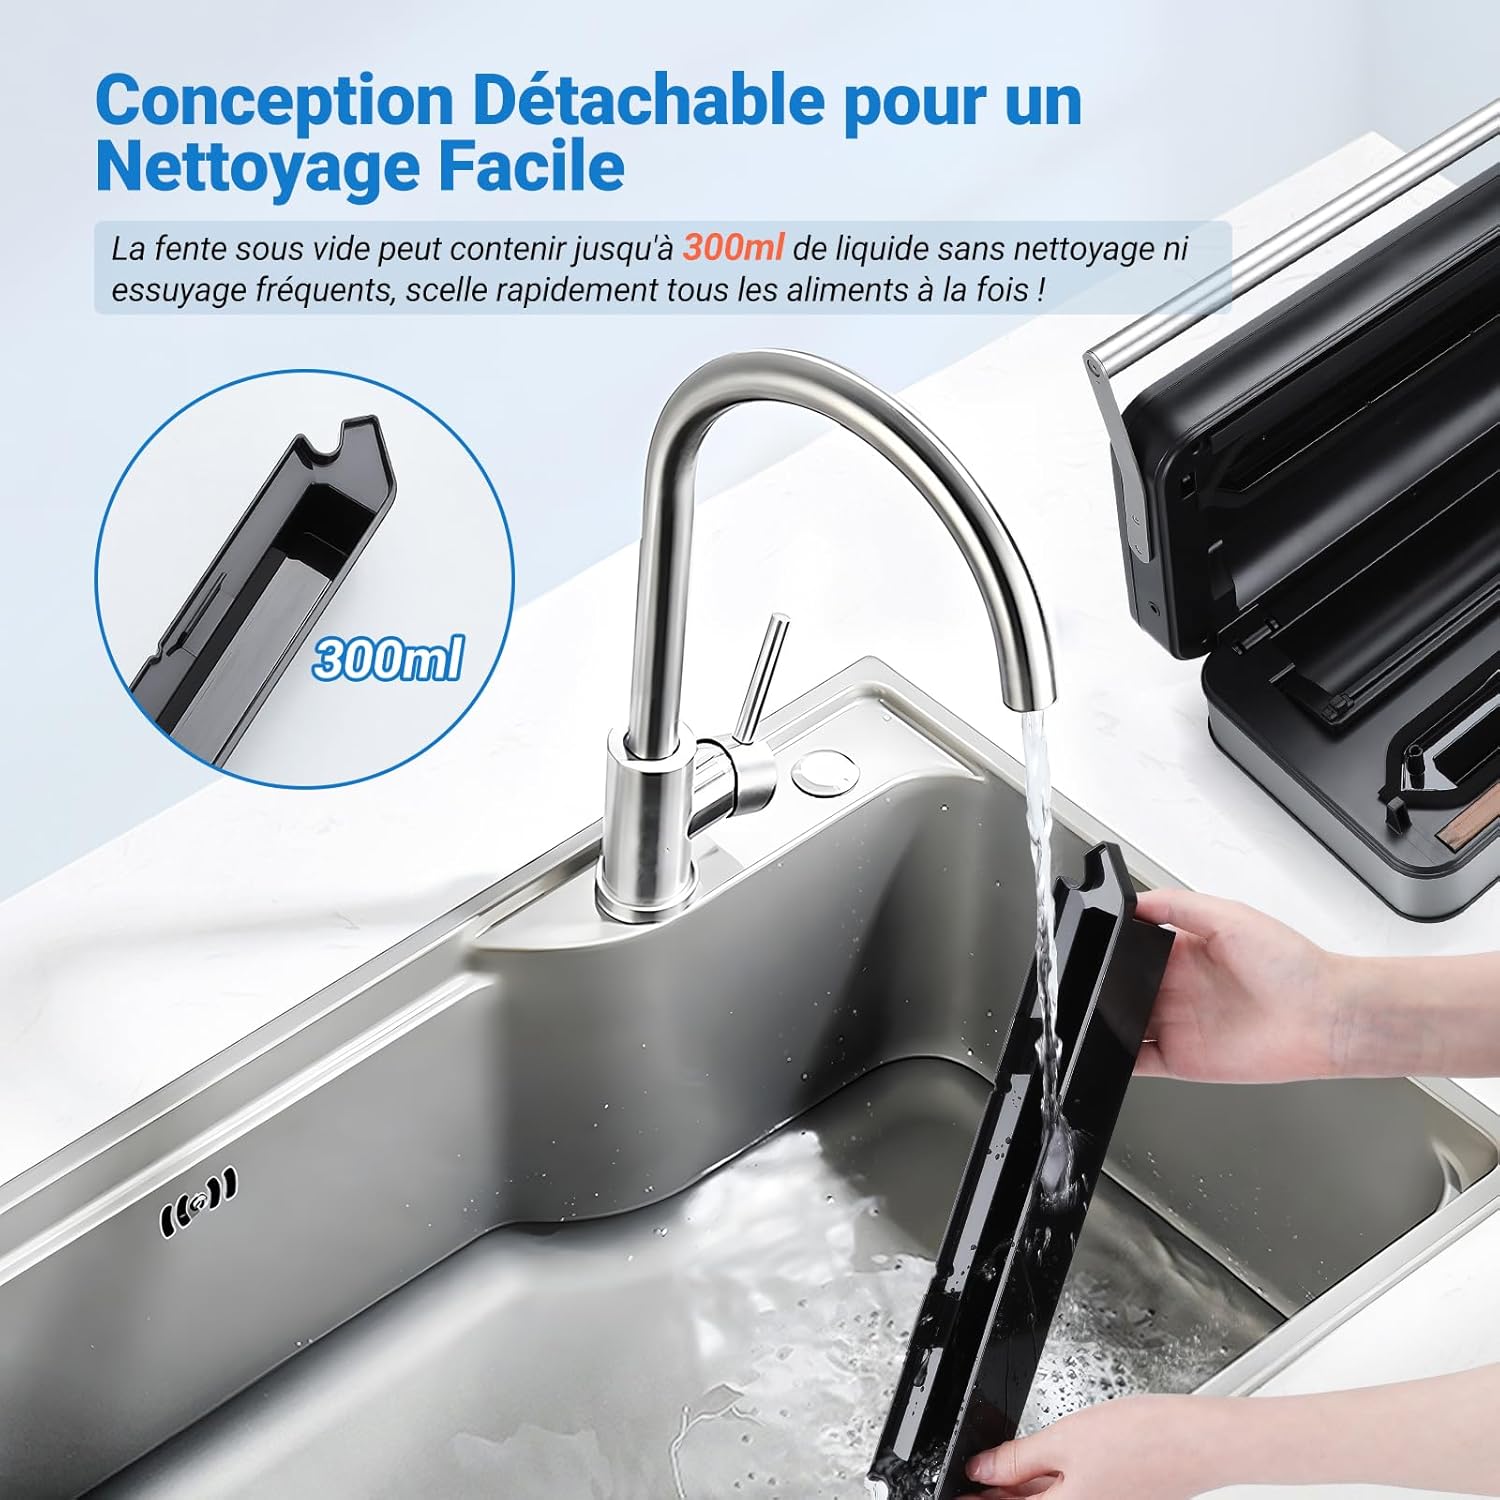
Image: The detachable vacuum slot of the INKBIRD Vacuum Sealer being cleaned under running water, illustrating its easy-to-clean design which can hold up to 300ml of liquid.
6.2 Replacing the Sealing Strip
The sealing strip is a wear-and-tear part. If seals become inconsistent, the strip may need replacement. A replacement foam gasket is included with your purchase.
- Ensure the machine is unplugged and cooled down.
- Carefully peel off the old sealing strip from the sealing bar.
- Clean the area where the strip was located.
- Align the new sealing strip and press it firmly into place along the sealing bar.
7 Solución de problemas
| Problema | Causa posible | Solución |
|---|---|---|
| A máquina non se acende | Sen fonte de alimentación | Comprobe se o cable de alimentación está ben conectado á toma de corrente e á máquina. Probe a toma de corrente con outro electrodoméstico. |
| Machine vacuums but does not seal | Bag not positioned correctly; Sealing strip worn out; Sealing time too short | Ensure the bag opening is flat and within the vacuum chamber. Replace the sealing strip if worn. Increase the sealing time setting. |
| Machine does not vacuum properly | Lid not closed/locked; Bag opening not clean/dry; Foam gasket damaged; Bag has holes | Ensure the lid is fully closed and locked. Clean and dry the bag opening. Inspect and replace the foam gasket if damaged. Use a new bag. |
| Protección contra sobrecalentamento activada | Uso continuo durante demasiado tempo | Allow the machine to cool down for 15-30 minutes before resuming operation. The machine is designed for 24 hours of continuous work, but excessive rapid use might trigger protection. |
8. Especificacións
| Característica | Especificación |
|---|---|
| Marca | Inkbird |
| Modelo | B0DRP114SK |
| Cor | Prata |
| Dimensións do produto (L x W x H) | 39.6 x 24 x 11.5 cm |
| Peso do elemento | 3.68 quilogramos |
| Fonte de enerxía | Eléctrico con cable |
| Modo de funcionamento | Manual (button-controlled) |
| Poder | 160 vatios |
| Velocidade do baleiro | 20 l/min |
| Presión ao baleiro | 80 Kpa |
| Ancho de selado | 5 mm |
| Lonxitude máxima de selado | 32 cm |
| Voltage | 110-120 V / 220-240 V (Universal) |
| Funcionamento continuo | Ata 24 horas |
9. Garantía e soporte
INKBIRD products are manufactured to high-quality standards. For warranty information, technical support, or service inquiries, please refer to the contact information provided on the official INKBIRD websitio web ou a documentación da súa compra. Conserve o comprobante de compra para reclamacións de garantía.