1. Introdución
This user manual provides detailed instructions for the GKU D900JP Dual Dash Cam. Please read this manual thoroughly before using the product to ensure proper operation and to maximize its features. Keep this manual for future reference.
The GKU D900JP is designed to record driving footage in high definition, offering both front and rear camera views. It incorporates advanced features such as a Sony IMX335 STARVIS sensor, 5GHz WiFi connectivity, integrated GPS, High Dynamic Range (HDR) for improved image clarity, 24-hour parking monitoring, G-sensor emergency recording, and continuous loop recording.
2. Produto rematadoview
2.1. Contido do paquete
Verifique que todos os elementos que se indican a continuación estean incluídos no seu paquete:
- GKU D900JP Main Unit
- Cámara traseira
- Manual de usuario
- Tarxeta de garantía
- Charging Cable (Cigarette Lighter Power Cable)
- Tarxeta SD de 64 GB
- Cinta de doble cara 3M
- Electrostatic Protection Film
- Wiring Removal Tool
- Wiring Clips

2.2. Características do produto
- Gravación de alta resolución: Front 4K (800W pixels) and Rear 2.5K Full HD simultaneous recording.
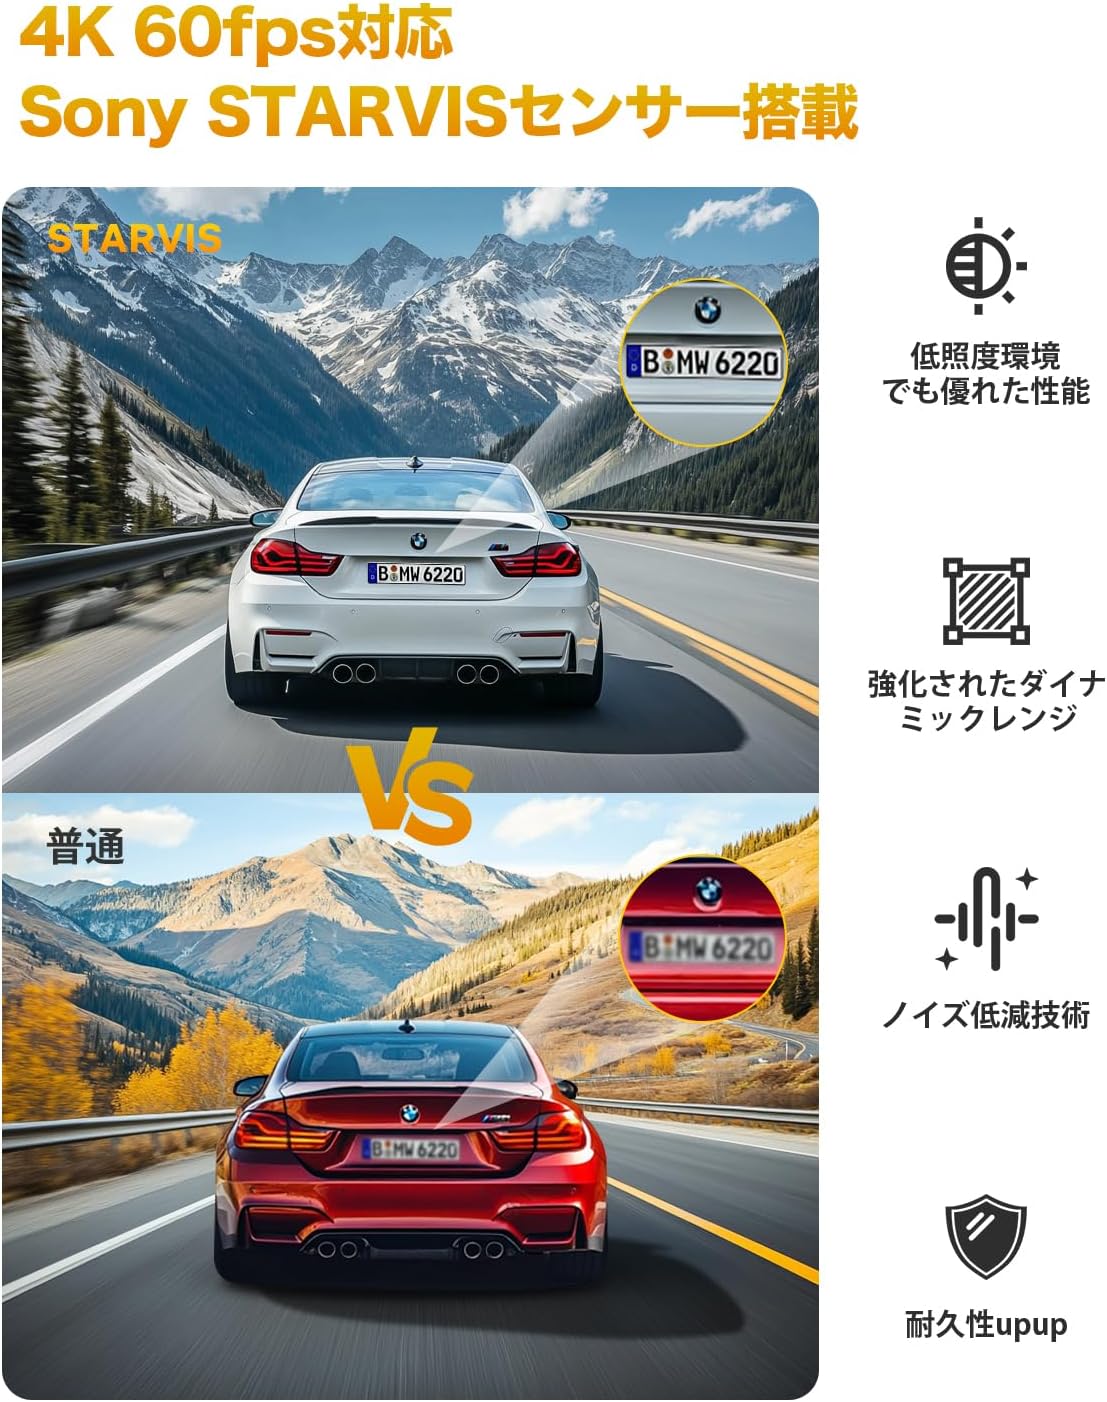
- Sony IMX335 Sensor & STARVIS Technology: Ensures clear and vivid images day and night, suppressing noise in low-light conditions.
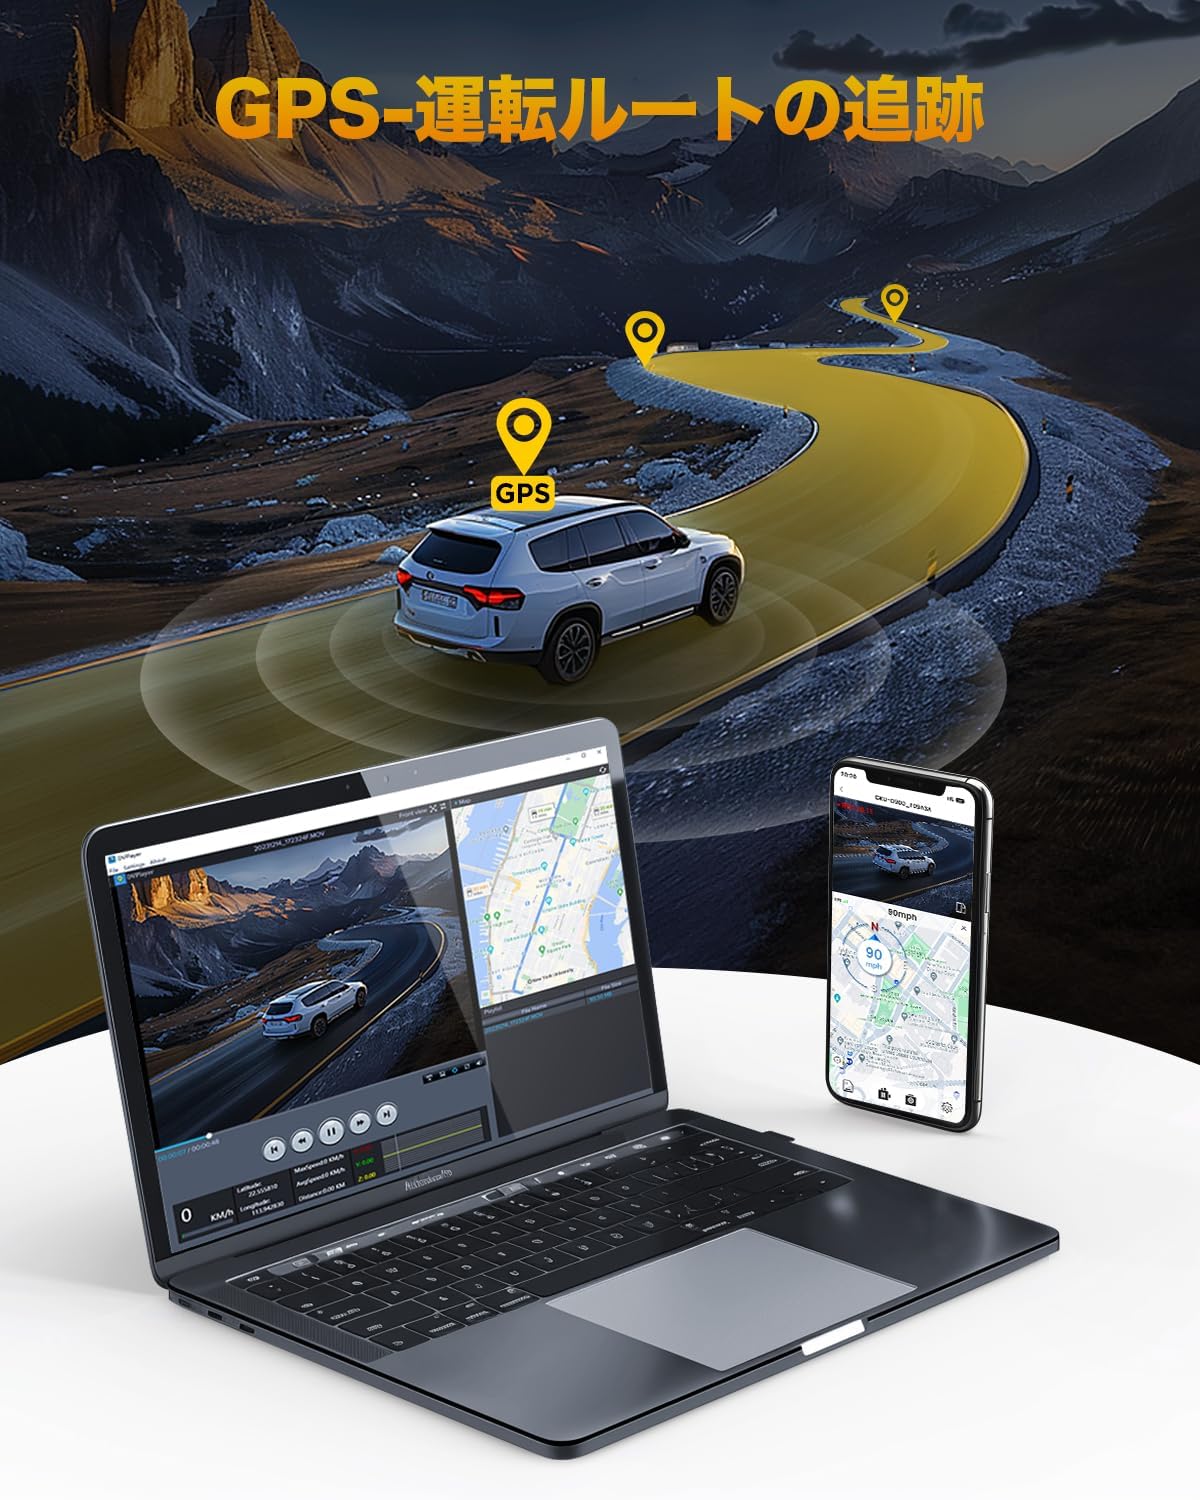
- GPS integrado: Accurately records driving route, location, and speed data.
- Pantalla LCD de 1.47 polgadas: Permite en tempo real viewing of recorded footage.
- 5GHz Wi-Fi & App Control: High-speed data transfer to smartphones for viewing, downloading, and sharing videos via the GKU GO app.
- Función HDR: Optimizes images in strong backlight or high contrast scenes, preventing overexposure and underexposure.
- Rotatable Cameras: Front camera rotates 340°, rear camera rotates 360° for flexible angle adjustment.
- Supercondensador: Provides stable power supply and enhanced durability in extreme temperatures (-20°C to 70°C).
- Gravación en bucle: Sobrescribe automaticamente as versións máis antigas files cando a tarxeta SD estea chea.
- Gravación de emerxencia G-Sensor: Bloquea automaticamente footage upon detecting impacts or sudden braking to prevent overwriting.
- Vixilancia de estacionamento as 24 horas: Utilizes G-sensor and time-lapse recording (requires dedicated ACC step-down cable, sold separately).
3. Configuración
3.1. Inserción da tarxeta SD
- Asegúrate de que a cámara do salpicadero estea apagada.
- Locate the SD card slot on the main unit.
- Insert the provided 64GB SD card (or a compatible U3 standard SD card up to 512GB) into the slot until it clicks into place.
- Upon first use, it is recommended to format the SD card through the dash cam's settings menu to ensure optimal performance.

4. Instalación
4.1. Mounting the Front Camera
- Limpa a zona do parabrisas onde se montará a cámara do salpicadero.
- Apply the electrostatic protection film to the chosen area on the windshield. This allows for easier removal later.
- Attach the 3M double-sided tape to the dash cam's mounting bracket.
- Press the bracket firmly onto the electrostatic film on the windshield.
- Attach the main unit to the bracket. The front camera can be rotated 340° to adjust the viewángulo de ing.
4.2. Mounting the Rear Camera
- Clean the rear windshield area.
- Attach the rear camera using the provided 3M double-sided tape.
- Connect the rear camera cable to the main unit. The rear camera can be rotated 360° for optimal positioning.

4.3. Power Connection and Cable Management
- Connect the charging cable to the main unit and plug the other end into your car's cigarette lighter socket.
- Route the power cable and rear camera cable neatly along the edges of the windshield and interior trim using the provided wiring removal tool and clips.
- For 24-hour parking monitoring, a dedicated ACC step-down cable (sold separately) is required for direct wiring to the car's fuse box.

5. Instrucións de funcionamento
5.1. Acendido/apagado
- A cámara do salpicadero acenderase automaticamente e comezará a gravar cando se acenda o contacto do vehículo.
- Apagarase automaticamente ao cortar o contacto.
5.2. Gravación básica
Once powered on, the dash cam will automatically start recording. The 1.47-inch LCD screen will display the live view das cámaras.
5.3. Navegación por menús
Use the physical buttons on the dash cam to navigate through the menu options. Refer to the on-screen prompts for specific functions like formatting the SD card, adjusting recording settings, or changing display modes.
6. App and Connectivity
6.1. Connecting to the GKU GO App
- Download the "GKU GO" app from the Apple App Store or Google Play Store.
- Turn on the dash cam's Wi-Fi function (refer to the dash cam's menu).
- On your smartphone, go to Wi-Fi settings and connect to the dash cam's Wi-Fi network (SSID and password can be found on the dash cam screen or in the manual).
- Open the GKU GO app. You can now view vivir footage, explorar vídeos gravados, descargar files, and adjust settings directly from your phone.
Note: For optimal connection, temporarily disable your phone's cellular data and Bluetooth when connecting to the dash cam's Wi-Fi.

6.2. High-Speed 5GHz Wi-Fi
The GKU D900JP supports 5GHz Wi-Fi, enabling faster data transfer speeds compared to standard 2.4GHz connections. This facilitates quick viewing and downloading of high-resolution video files ao teu smartphone.
7. Funcións avanzadas
7.1. Seguimento GPS
The integrated GPS module accurately records your vehicle's driving route, location, and speed. This data can be viewxunto co teu vídeo footage using the dedicated GKU GO app or PC player, providing crucial evidence in case of an incident and enhancing your travel records.

7.2. HDR Night Vision
The High Dynamic Range (HDR) function optimizes video quality in challenging lighting conditions, such as strong backlight or low light. It captures details in both bright and dark areas simultaneously, reducing overexposure and underexposure to produce clear and balanced footage, especially during night driving.

7.3. Vixilancia de estacionamento as 24 horas
When connected to a dedicated ACC step-down cable (sold separately), the dash cam can monitor your vehicle for 24 hours. It supports G-sensor emergency recording and time-lapse recording modes to capture events while parked.
7.4. G-Sensor Emergency Recording
The built-in G-sensor detects sudden impacts or rapid acceleration/deceleration. When triggered, it automatically locks the current video segment, protecting it from being overwritten by loop recording. These locked videos are stored in a separate folder on the SD card.

7.5. Gravación en bucle
The dash cam continuously records video in short segments (e.g., 1, 2, or 3 minutes). When the SD card reaches its storage limit, the oldest unlocked fileAs novas gravacións sobrescríbense automaticamente. Isto garante a gravación continua sen intervención manual.

8. Mantemento
8.1. Xestión da tarxeta SD
- Regularly format the SD card (e.g., once a month) to prevent data corruption and ensure smooth recording.
- Facer unha copia de seguridade do vídeo importante files to a computer or cloud storage before formatting.
- Replace the SD card if you notice any recording errors or performance degradation.
8.2. Limpeza do dispositivo
- Use a soft, dry cloth to clean the camera lenses and the device body.
- Evite usar produtos de limpeza abrasivos ou disolventes que poidan danar o dispositivo.
9 Solución de problemas
If you encounter any issues with your GKU D900JP Dash Cam, please refer to the following common solutions:
| Problema | Causa posible | Solución |
|---|---|---|
| A cámara do salpicadero non se acende. | No power supply; faulty cable; car's power outlet issue. | Check power cable connection; test with another power source; ensure car's ignition is on. |
| A gravación detense ou conxélase. | Erro da tarxeta SD; tarxeta SD incompatible; tarxeta SD chea. | Format the SD card; use a U3 standard SD card; replace the SD card. |
| Poca calidade de vídeo. | Lente suxa; película protectora aínda na lente; configuración incorrecta. | Clean the lens; remove any protective film; check resolution settings in the menu. |
| Problemas coa conexión wifi. | Incorrect password; interference; phone settings. | Verify Wi-Fi password; disable cellular data/Bluetooth on phone; restart dash cam and phone. |
| GPS not working. | Poor satellite signal; GPS module error. | Asegúrese de claro view of the sky; check GPS settings in the menu; contact support if issue persists. |
If the problem persists after attempting these solutions, please contact GKU customer support for assistance.
10. Especificacións
The following table outlines the technical specifications of the GKU D900JP Dash Cam:
| Característica | Especificación |
|---|---|
| Tamaño da pantalla | 1.47 polgadas |
| Dispositivos compatibles | Teléfono intelixente, ordenador |
| Cor | D900JP |
| Nome da marca | GKU |
| Fabricante | GKU |
| Número de modelo do produto | D900-JP |
| Outras Funcións | LED Signal Light Compatible, Sony IMX335 Sensor, STARVIS, Parking Monitor, Night Vision |
| Tamaño | Pequeno |
| Tipo de visualización | LCD |
| Método de montaxe | Soporte de vidro frontal |
| Dimensións do produto | 4.2 x 10.6 x 5.4 cm; 550 g |
| Resolución de captura de vídeo | 4K+2.5K |
| Tipo de montaxe | Soporte de vidro frontal |
| Campo de View | 340 graos |
| Método de control | Aplicación |
11. Garantía e soporte
11.1. Información da garantía
The GKU D900JP Dash Cam comes with a 12-month warranty from the date of purchase. This warranty covers manufacturing defects and ensures that the product meets its specified performance standards. Please retain your proof of purchase for warranty claims.
11.2. Atención ao cliente
GKU provides dedicated customer support. If you have any questions, require technical assistance, or need to make a warranty claim, please contact our support team. Our Japanese-speaking support center and specialized customer service team are available to assist you.
Contact information can be found on the GKU official website or through the contact details provided with your product packaging.


