1. Introdución
This manual provides detailed instructions for the IINE Wireless Controller with Charging Dock. It covers setup, operation, maintenance, and troubleshooting to ensure optimal performance and user experience. This controller is designed for multi-platform compatibility, including PC, Nintendo Switch, Android, and iOS devices.
2. Contido do paquete
- IINE Wireless Controller
- Base de carga
- Cable de carga USB-C
- Cat Tail USB Adapter (for wireless connection)
- Manual de usuario
3. Produto rematadoview
The IINE Wireless Controller features an ergonomic design with a unique kitten aesthetic, optimized for comfortable use, especially for smaller hands. It includes advanced functionalities such as programmable macro buttons, turbo function, 6-axis motion control, and adjustable rumble feedback.

Imaxe 3.1: Fronte view of the IINE Wireless Controller with its charging dock.

Image 3.2: The charging dock with the removable cat tail USB adapter. The adapter can be used for wireless connectivity.
Compoñentes do controlador:
- Manetas analóxicas esquerda/dereita: With paw print caps for precise movement.
- D-Pad: Entrada direccional.
- Botóns de acción (A, B, X, Y): Standard gaming inputs.
- Shoulder Buttons (L, R, ZL, ZR): Top-mounted buttons and triggers.
- Back Buttons (ML, MR): Programmable buttons located on the rear grip.
- Botón de inicio: Para acceder ao menú do sistema.
- Botón de captura de pantalla: Fai capturas de pantalla dentro do xogo.
- Botón Turbo: Activa a función turbo.
- Conector para auriculares de 3.5 mm: For audio output (functional in wired mode).
- Porto USB-C: Para carga e conexión por cable.
4. Configuración e conexión
4.1 Carga do controlador
Before first use, fully charge the controller. Connect the USB-C cable to the charging dock and a power source. Place the controller onto the charging dock. The indicator light on the controller will show charging status.

Image 4.1: The controller placed on its charging dock. A unique meowing sound may play upon docking.
A full charge typically takes approximately 3 hours and provides up to 6 hours of gameplay.
4.2 Conexión a dispositivos
The controller supports both wireless (Bluetooth or USB adapter) and wired connections.
4.2.1 Conexión sen fíos (Bluetooth)
- Asegúrate de que o controlador estea apagado.
- Manteña premido o Casa button for 3 seconds until the indicator lights flash rapidly, indicating pairing mode.
- On your device (Switch, PC, Android, iOS), navigate to Bluetooth settings and select the IINE controller from the list of available devices.
- Unha vez conectado, o indicador luminoso acenderase de forma fixa.
4.2.2 Wireless Connection (USB Adapter)
- Remove the Cat Tail USB Adapter from the charging dock.
- Plug the adapter into a USB port on your PC or other compatible device.
- Acende o controlador. Debería conectarse automaticamente ao adaptador.
4.2.3 conexión por cable
- Connect the USB-C cable to the controller and then to your device (PC, Switch dock).
- O controlador cambiará automaticamente ao modo con fíos.
5. Instrucións de funcionamento
5.1 Controis básicos
Consulte o produtoview section for button identification. The controller functions as a standard gamepad for navigation and gameplay.
5.2 Características especiais
5.2.1 Funcións macro
The ML and MR buttons on the back of the controller are programmable. Use the IINE app (if available for your device) or specific button combinations to record and assign complex sequences of button presses to these macro buttons.

Image 5.1: Illustration of the programmable ML/MR buttons for macro functions.
5.2.2 Función Turbo
The Turbo button allows for rapid-fire input. To activate:
- Manteña premido o Turbo button, then press the desired action button (e.g., A, B, X, Y, L, R, ZL, ZR). The button will now continuously register input when held.
- To adjust turbo speed, press Turbo and push the left joystick up or abaixo.
- To deactivate, press and hold Turbo again, then press the same action button.

Image 5.2: Visual guide for activating and adjusting the Turbo function.
5.2.3 Adjustable Rumble
The controller features adjustable vibration feedback. To modify the intensity:
- To increase rumble intensity: Press Turbo + push the left joystick up.
- To decrease rumble intensity: Press Turbo + push the left joystick abaixo.

Image 5.3: Diagram showing how to adjust rumble intensity levels.
5.2.4 Control de movemento de 6 eixes
The integrated 6-axis gyroscope provides precise motion sensing for compatible games. This feature is automatically active when connected to a supported platform like Nintendo Switch.

Image 5.4: Visual representation of the 6-axis gyro motion control in action with a Nintendo Switch.
5.2.5 Conector para auriculares
A 3.5mm headphone jack is located at the bottom of the controller. Please note that the headphone jack functions only when the controller is connected via a wired USB-C connection.
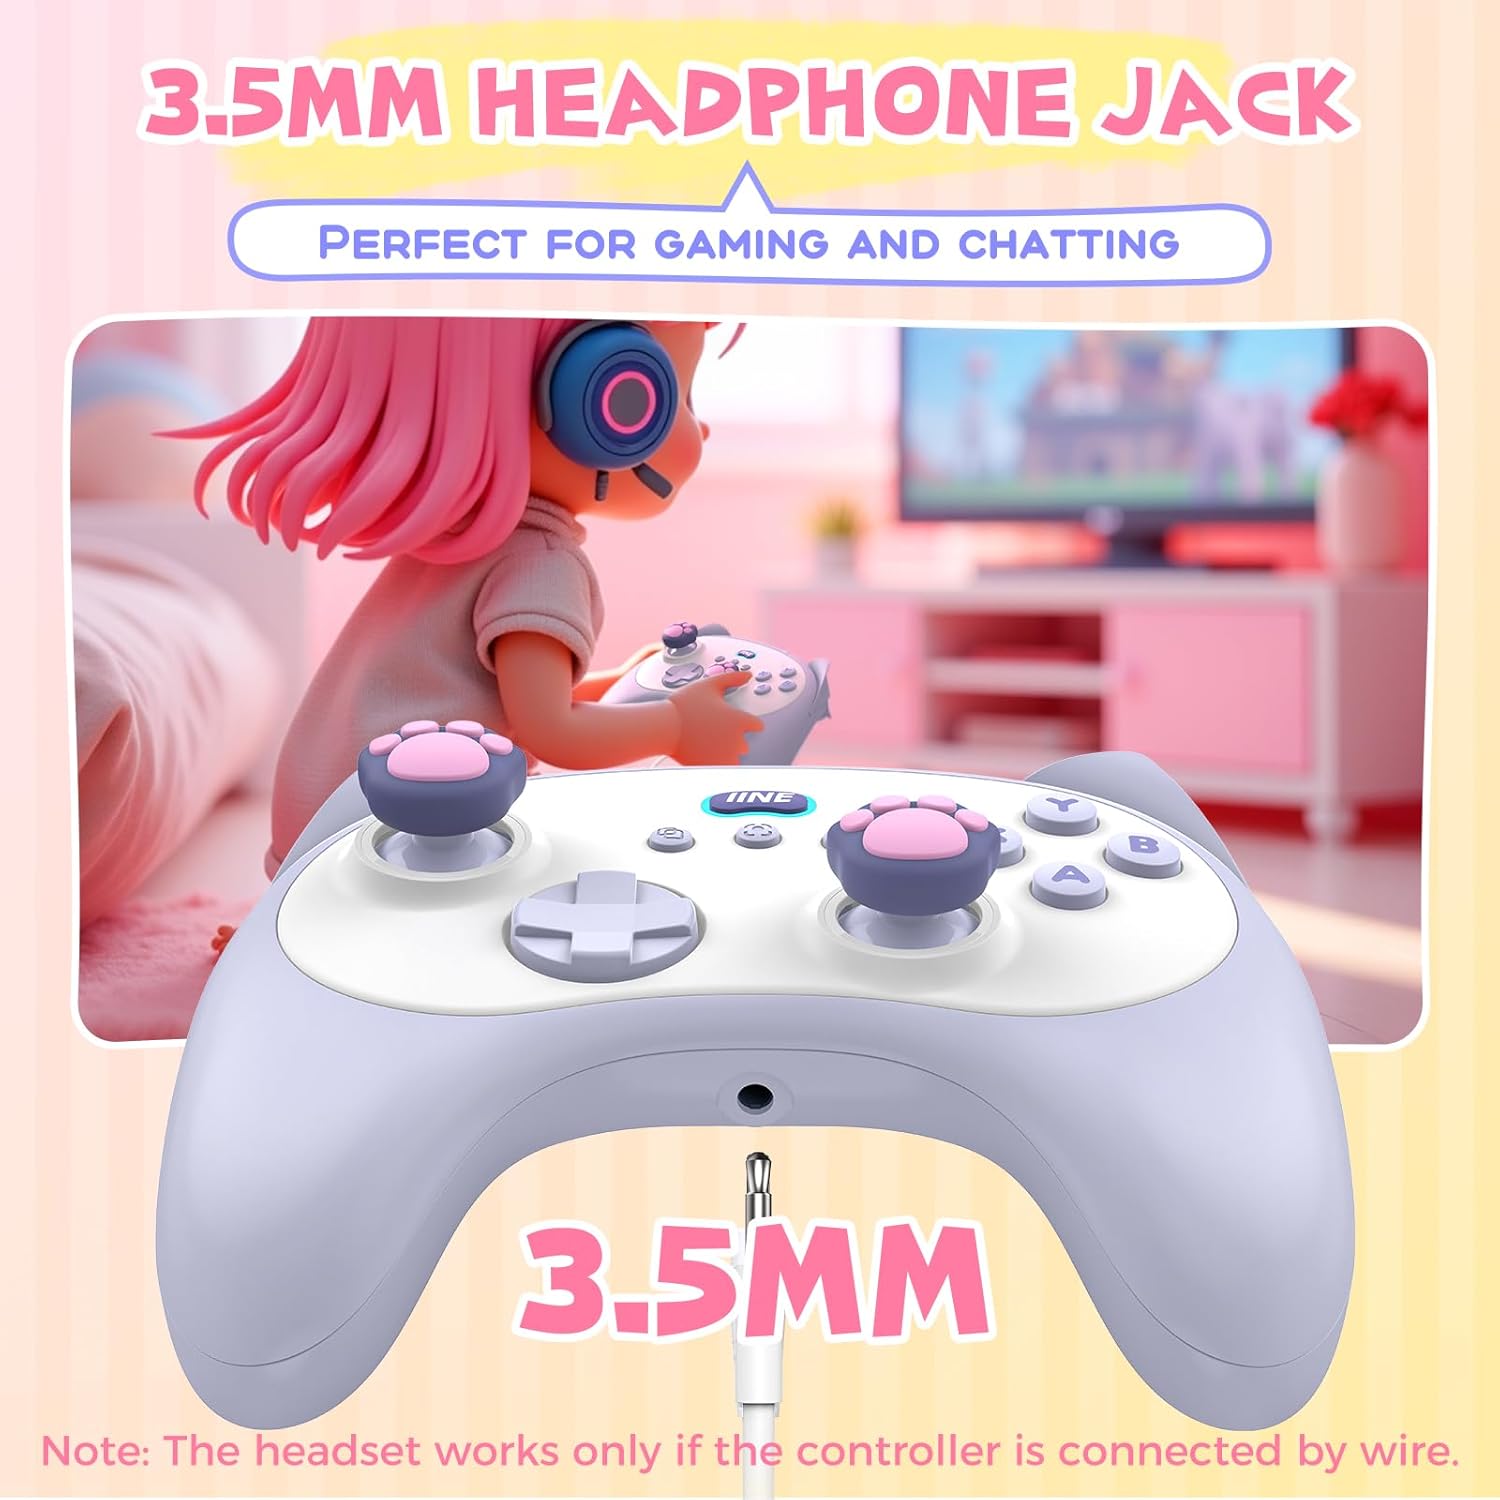
Image 5.5: Close-up of the 3.5mm headphone jack on the controller.
5.3 Comprobación do estado da batería
To check the controller's battery status, press the Turbo button + the Igual (=) button. The indicator lights will display the current battery level.

Image 5.6: Visual guide for checking the controller's battery status.
5.4 Meowing Sound Control
The charging dock emits a meowing sound when the controller is placed on it. To turn this sound on or off, press the Casa botón + Igual (=) botón + X botón simultaneamente.

Image 5.7: Instructions for enabling or disabling the meowing sound feature.
6. Mantemento
6.1 Limpeza
Use a soft, dry cloth to clean the controller and charging dock. For stubborn dirt, slightly dampEnxágüe o pano con auga. Evite o uso de produtos químicos agresivos ou materiais abrasivos, xa que poden danar a superficie.
6.2 Almacenamento
Store the controller and dock in a cool, dry place away from direct sunlight and extreme temperatures. When not in use for extended periods, ensure the controller is fully charged before storage to preserve battery life.
7 Solución de problemas
| Problema | Causa posible | Solución |
|---|---|---|
| O controlador non se acende. | Batería baixa. | Charge the controller using the charging dock or USB-C cable. |
| Non se puido conectar a través de Bluetooth. | Controller not in pairing mode; device Bluetooth off; interference. | Ensure controller is in pairing mode (flashing lights). Check device Bluetooth settings. Move closer to the device. |
| A toma de auriculares non funciona. | Controller is in wireless mode. | Connect the controller via USB-C cable to enable the headphone jack. |
| Os botóns non responden ou funcionan con atraso. | Low battery; wireless interference; firmware issue. | Charge the controller. Reduce distance to device. Check for firmware updates (via IINE app if available). |
| Meowing sound not playing/stopping. | Sound feature toggled off/on. | Press Home + Equals (=) + X to toggle the sound. |
8. Especificacións
- Modelo: IINE Wireless Controller with Charging Dock
- Conectividade: Bluetooth, Wired (USB-C), 2.4GHz Wireless (via USB adapter)
- Compatibilidade: PC, Nintendo Switch, Android, iOS
- Batería: 500mAh (approx. 6 hours playtime, 3 hours charge time)
- Características: Macro function, Turbo function, 6-Axis Motion Control, Adjustable Rumble, Hall Effect Joysticks, Hall Effect Triggers, 3.5mm Headphone Jack
- Dimensións: Approximately 5.19 x 3.77 x 2.12 inches (Controller)
- Peso: Aproximadamente 15.5 onzas

Image 8.1: Diagram illustrating the dimensions of the IINE Wireless Controller.
9. Garantía e soporte
9.1 Información da garantía
IINE products are covered by a limited warranty against manufacturing defects. Please refer to the warranty card included in your package or visit the official IINE websitio web para obter información detallada sobre os termos e condicións da garantía.
9.2 Atención ao cliente
For technical assistance, troubleshooting, or warranty claims, please contact IINE customer support through their official website or the contact information provided in your product packaging. When contacting support, please have your product model and purchase details ready.


