1. Introdución
This manual provides essential instructions for setting up, operating, and maintaining your CONSUMER CELLULAR Iris Connect smartphone. The Iris Connect is designed for reliable performance, featuring a 6.5-inch display, 32GB of storage, and running on Android 13. Please read this manual thoroughly to ensure proper use and to maximize your device's capabilities.
2. Que hai na caixa
Upon unboxing your CONSUMER CELLULAR Iris Connect, verify that all the following items are included:
- CONSUMER CELLULAR Iris Connect Smartphone
- Cable USB
- Guía de inicio rápido
3. Dispositivo rematadoview
Familiarize yourself with the physical components of your Iris Connect smartphone.

Figura 3.1: Fronte e traseiro view of the Iris Connect smartphone, highlighting its sleek design and camera placement.

Figura 3.2: Fronte view of the Iris Connect, showcasing the 6.5-inch display and front-facing camera.
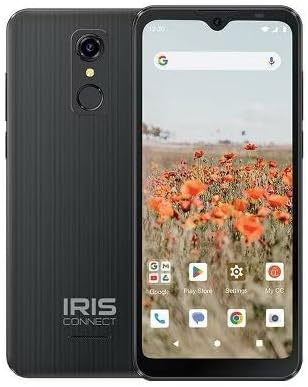
Figura 3.3: De volta view of the Iris Connect, showing the main camera, flash, and fingerprint sensor.
Compoñentes clave:
- Pantalla de 6.5 polgadas: High Definition+ screen for clear visuals.
- Cámara frontal (8MP): Located at the top of the display for selfies and video calls.
- Cámara principal (13MP): Located on the rear, for high-resolution photos and videos.
- Escáner de pegadas dixitais: Integrated on the rear for secure unlocking.
- Botón de encendido: Typically on the right side, used to turn the device on/off or wake/sleep the screen.
- Botóns de volume: Adxacente ao botón de acendido, para axustar os niveis de son.
- Porto USB-C: Na parte inferior, para cargar e transferir datos.
- Conector de audio de 3.5 mm: Para conectar auriculares.
4. Configuración
4.1. Inserción da tarxeta SIM e da tarxeta MicroSD
- Localiza a bandexa da tarxeta SIM no lateral do teu dispositivo.
- Insert the SIM ejector tool (not included, use a thin paperclip) into the small hole next to the tray and press gently until the tray pops out.
- Place your Nano-SIM card(s) into the designated slots with the gold contacts facing down.
- If desired, insert a microSD card (up to 256GB) into its dedicated slot for expanded storage.
- Volva inserir a bandexa con coidado no dispositivo ata que encaixe no seu lugar.
4.2. Asistente de acendido inicial e configuración
- Manteña premido o Botón de encendido ata que se ilumine a pantalla.
- Segue as instrucións en pantalla para seleccionar o teu idioma, conectarte a unha rede wifi e configurar a túa conta de Google.
- You may be prompted to transfer data from an old device or set up security features like the fingerprint scanner.
4.3. Cargando o dispositivo
Before first use, it is recommended to fully charge your device. The Iris Connect features a 3500 mAh battery with an approximate charging time of 2.5 hours.
- Conecta o cable USB ao porto USB-C que se atopa na parte inferior do teléfono.
- Connect the other end of the USB cable to a compatible power adapter (not included) and plug it into a wall outlet.
- O indicador de carga aparecerá na pantalla.
5. Instrucións de funcionamento
5.1. Navegación básica
- Toca: Toca unha icona para abrir unha aplicación ou seleccionar un elemento.
- Pasar o dedo: Arrastra o dedo pola pantalla para desprazarte ou navegar entre pantallas.
- Beliscar: Usa dous dedos para ampliar ou reducir as fotos e web páxinas.
- Pantalla de inicio: O centro neurálxico para as túas aplicacións e widgets.
- Caixón de aplicacións: Desliza o dedo cara arriba desde a pantalla de inicio para acceder a todas as aplicacións instaladas.
5.2. Facer chamadas
- Toca o Teléfono icona na pantalla de inicio ou no caixón de aplicacións.
- Introduza o número de teléfono usando o teclado numérico ou seleccione un contacto da súa axenda de enderezos.
- Toca o Chamar botón para iniciar a chamada.
5.3. Envío de mensaxes
- Abre o Mensaxes aplicación.
- Toca o Inicia o chat or Nova mensaxe icona.
- Introduza o número do destinatario ou seleccione un dos contactos e, a seguir, escriba a súa mensaxe.
- Toca o Enviar botón.
5.4. Conectando a wifi
- Ir a Configuración > Rede e internet > Internet.
- Activar/desactivar Wi-Fi On.
- Selecciona a rede Wi-Fi desexada da lista e introduce o contrasinal se se che solicita.
5.5. Emparellamento Bluetooth
- Ir a Configuración > Dispositivos conectados > Preferencias de conexión > Bluetooth.
- Activa o Bluetooth On.
- Seleccione Vincular novo dispositivo and choose your desired device from the list. Follow any on-screen prompts to complete pairing.
5.6. Uso da cámara
The Iris Connect features a 13MP main camera and an 8MP front-facing camera.
- Abre o Cámara aplicación.
- Toca o Obturador botón para facer unha foto.
- Switch between photo and video modes, or front and rear cameras, using the on-screen icons.
5.7. Escáner de pegadas dixitais
To set up the fingerprint scanner for secure unlocking:
- Ir a Configuración > Seguridade e privacidade > Desbloqueo do dispositivo > Pegada dixital.
- Siga as instrucións que aparecen na pantalla para rexistrar a(s) súa(s) impresión(is) dixital(is).
6. Mantemento
6.1. Limpeza do dispositivo
To keep your device clean and functional:
- Usa un pano suave e sen fiapos para limpar a pantalla e a carcasa.
- Evita o uso de produtos químicos agresivos, produtos de limpeza abrasivos ou aerosois.
- Asegúrate de que os portos estean libres de po e residuos.
6.2. Coidado da batería
To optimize your battery life (up to 26 hours of use):
- Evita temperaturas extremas.
- Non deixes o dispositivo cargando durante períodos prolongados despois de que estea cheo.
- Adjust screen brightness and close unused apps to conserve power.
6.3. Actualizacións de software
Regularly check for software updates to ensure your device has the latest features and security patches:
- Ir a Configuración > Sistema > Actualización do sistema.
- Siga as instrucións que aparecen na pantalla para descargar e instalar as actualizacións dispoñibles.
7 Solución de problemas
This section addresses common issues you might encounter with your Iris Connect smartphone.
- O dispositivo non se acende: Asegúrate de que a batería estea cargada. Conecta o cargador e agarda uns minutos antes de tentar acender de novo.
- Sen sinal de rede: Check if your SIM card is correctly inserted. Verify that Airplane Mode is off (swipe down from the top of the screen to check quick settings). Contact your service provider if the issue persists.
- As aplicacións fallan ou conxélanse: Try restarting the app. If the issue continues, restart the phone. You may also clear the app's cache or data via Configuración > Aplicacións > [Nome da aplicación] > Almacenamento e caché.
- Rendemento lento: Close unused apps, clear cache, or consider uninstalling rarely used applications to free up storage.
- Unable to connect to Wi-Fi/Bluetooth: Ensure Wi-Fi/Bluetooth is enabled in settings. Try forgetting the network/device and reconnecting. Restart your phone and the router/Bluetooth device.
- Forgot screen lock password/pattern: If you have a Google account linked, you might be able to reset it. Otherwise, a factory reset may be necessary (this will erase all data).
For more complex issues, please refer to the official CONSUMER CELLULAR support resources or contact their customer service.
8. Especificacións
Detailed technical specifications for the CONSUMER CELLULAR Iris Connect smartphone (Model: SH4650).
| Característica | Especificación |
|---|---|
| Nome do modelo | Iris Connect |
| Número de modelo | SH4650 |
| Sistema Operativo | Android 13.0 |
| Tamaño de visualización | 6.5 polgadas |
| Resolución de visualización | 1440 x 810 |
| Modelo CPU | Snapdragon 710 |
| Velocidade da CPU | 2 GHz |
| Tamaño da memoria RAM instalada | 3 GB |
| Almacenamento interno | 32 GB |
| Almacenamento ampliable | Ata 256 GB vía microSD |
| Cámara principal | 13 MP |
| Cámara frontal | 8 MP |
| Capacidade da batería | 3500 millónsamp Horario |
| Potencia nominal da batería | 3600 (likely Wh or similar unit, as mAh is 3500) |
| Tempo de carga | 2.5 horas |
| Conectividade | 4G LTE, Bluetooth, Wi-Fi |
| Características especiais | Dual Camera, Expandable Storage, Fingerprint Scanner, Long Battery Life |
| Jack de audio | 3.5 milímetro |
| Dimensións | 8 x 6 x 3 polgadas |
| Peso do elemento | 6.5 onzas |
9. Garantía e soporte
For information regarding your product's warranty, please refer to the warranty card included with your purchase or visit the official CONSUMER CELLULAR website. For technical assistance, troubleshooting beyond this manual, or customer service inquiries, please contact CONSUMER CELLULAR support directly.
CONSUMER CELLULAR Official Websitio: www.consumercellular.com


