1. Introdución
This manual provides detailed instructions for the installation, operation, and maintenance of your Ulecoce Keyless Entry Door Lock Deadbolt with Handle Set. This smart lock offers multiple access methods and enhanced security features for your home or office.

Image 1.1: The Ulecoce Keyless Entry Door Lock Deadbolt with Handle Set in satin nickel finish, installed on a dark door.
2. Características do produto
- Entrada sen chave: Supports 100 user codes (97 user, 3 admin), one-time codes, and 2 backup physical keys.
- Smart Access Management: Generate and share temporary or permanent codes for family, house sitters, or guests.
- Seguridade mellorada: Features auto-lock, one-touch locking, anti-peeping code input, and low battery alerts.
- Durabilidade: Designed to withstand extreme temperatures (-4℉ to 140℉) and is IP54 waterproof.
- Potencia: Operates on 4 AA batteries (not included) with an approximate 180-day lifespan.

Imaxe 2.1: Acabadoview of the Ulecoce Keyless Entry Door Lock Set highlighting its main features.
3. Especificacións
| Atributo | Detalle |
|---|---|
| Marca | Ulecoce |
| Nome do modelo | WZ-U18L-S-0513-TP |
| Tipo de bloqueo | Peche morto |
| Material | Metal |
| Cor | Níquel satinado |
| Dimensións do artigo (L x W x H) | 1 x 1 x 1 polgadas |
| Peso do elemento | 3.36 libras |
| Características especiais | Anti-Peeping Password, Auto-Lock, Keyless Entry, One-Touch Lock |
| Uso recomendado | Porta de entrada |
| Fonte de enerxía | 4 pilas AA (non incluídas) |
| Temperatura de funcionamento | -4 ℉ a 140 ℉ (-20 ℃ a 60 ℃) |
| Humidade de funcionamento | 0% a 95% |
| Clasificación impermeable | IP54 |
| Certificación | ANSI Grade 3 Certified |
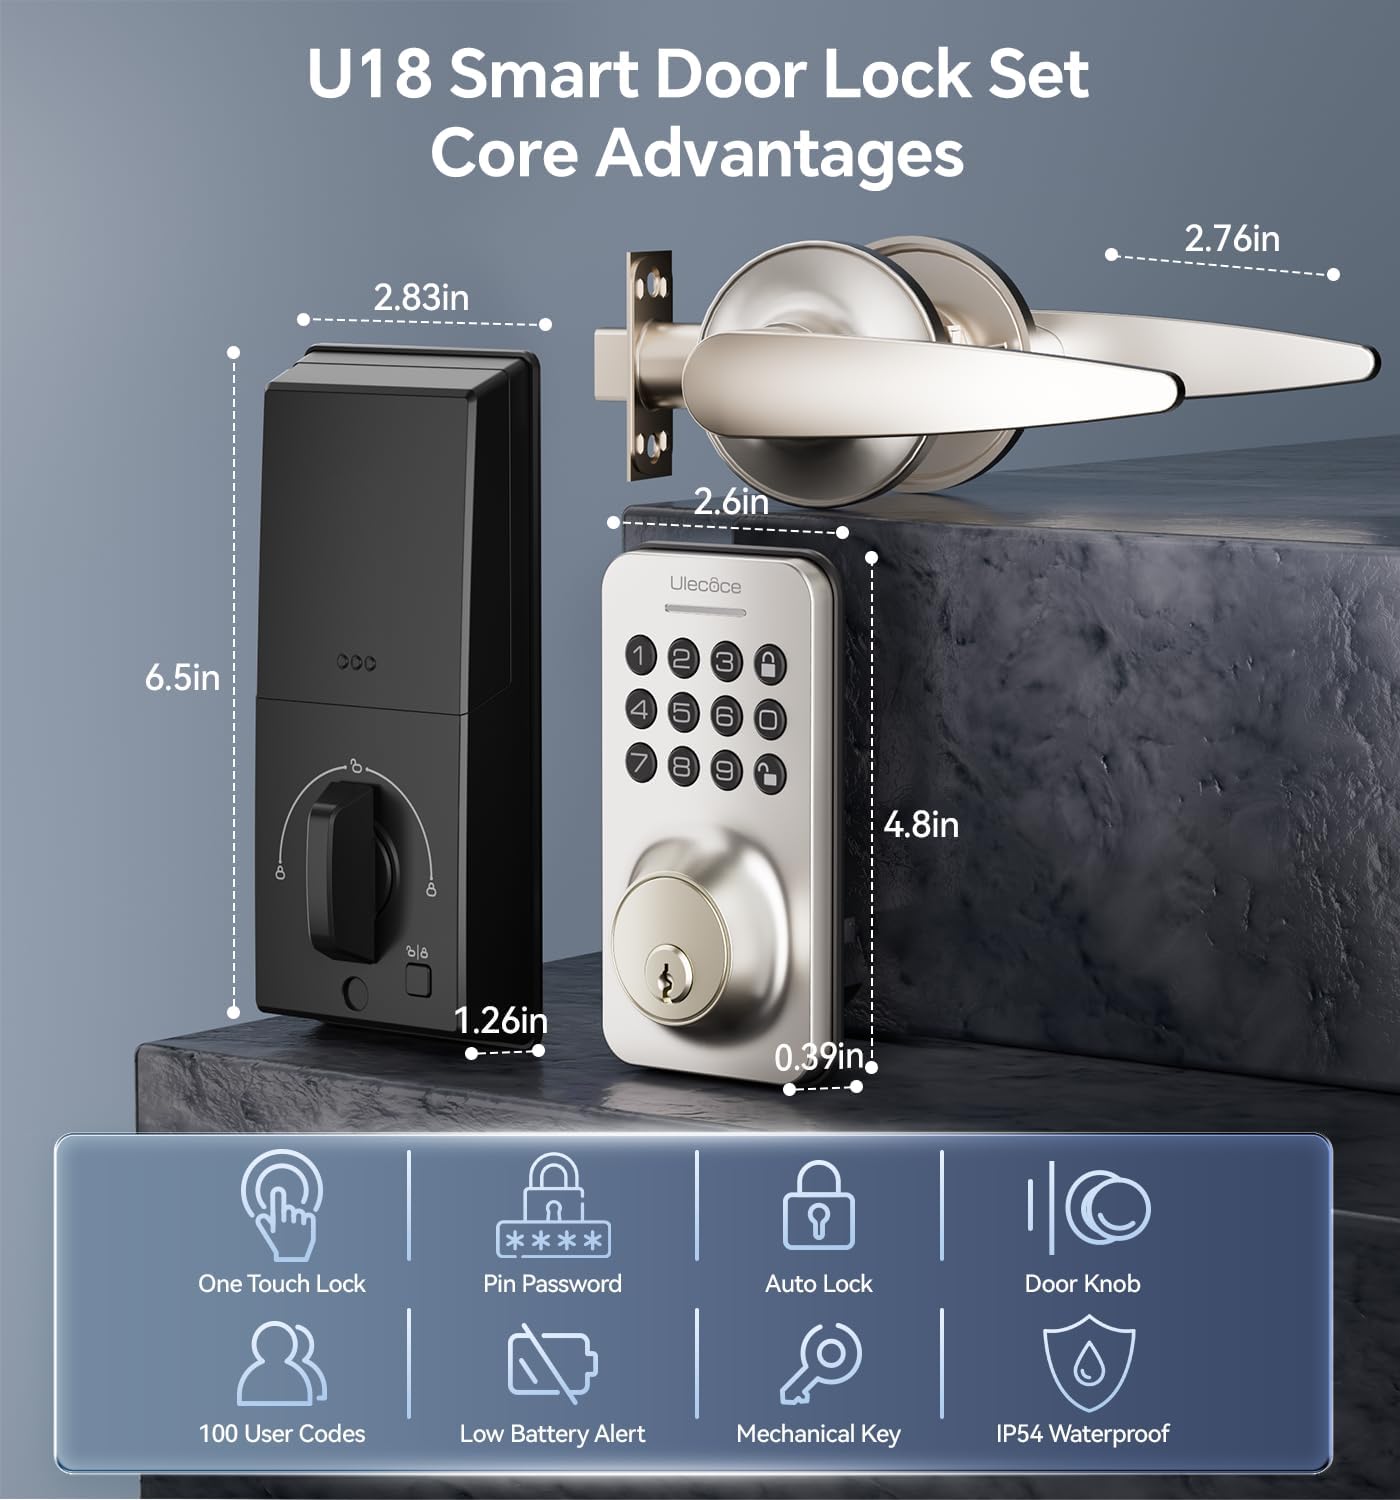
Image 3.1: Dimensions and key features of the Ulecoce U18 Smart Door Lock Set.

Image 3.2: ANSI Grade 3 certification and durability test results for the Ulecoce smart lock.
4. Configuración e instalación
The Ulecoce Keyless Entry Door Lock is designed for easy installation, requiring only a screwdriver. No additional drilling or professional locksmith services are typically needed. It is compatible with both left and right-hand doors.
4.1 Comprobación previa á instalación
Before beginning installation, ensure your door meets the compatibility requirements for latch hole and backset dimensions.
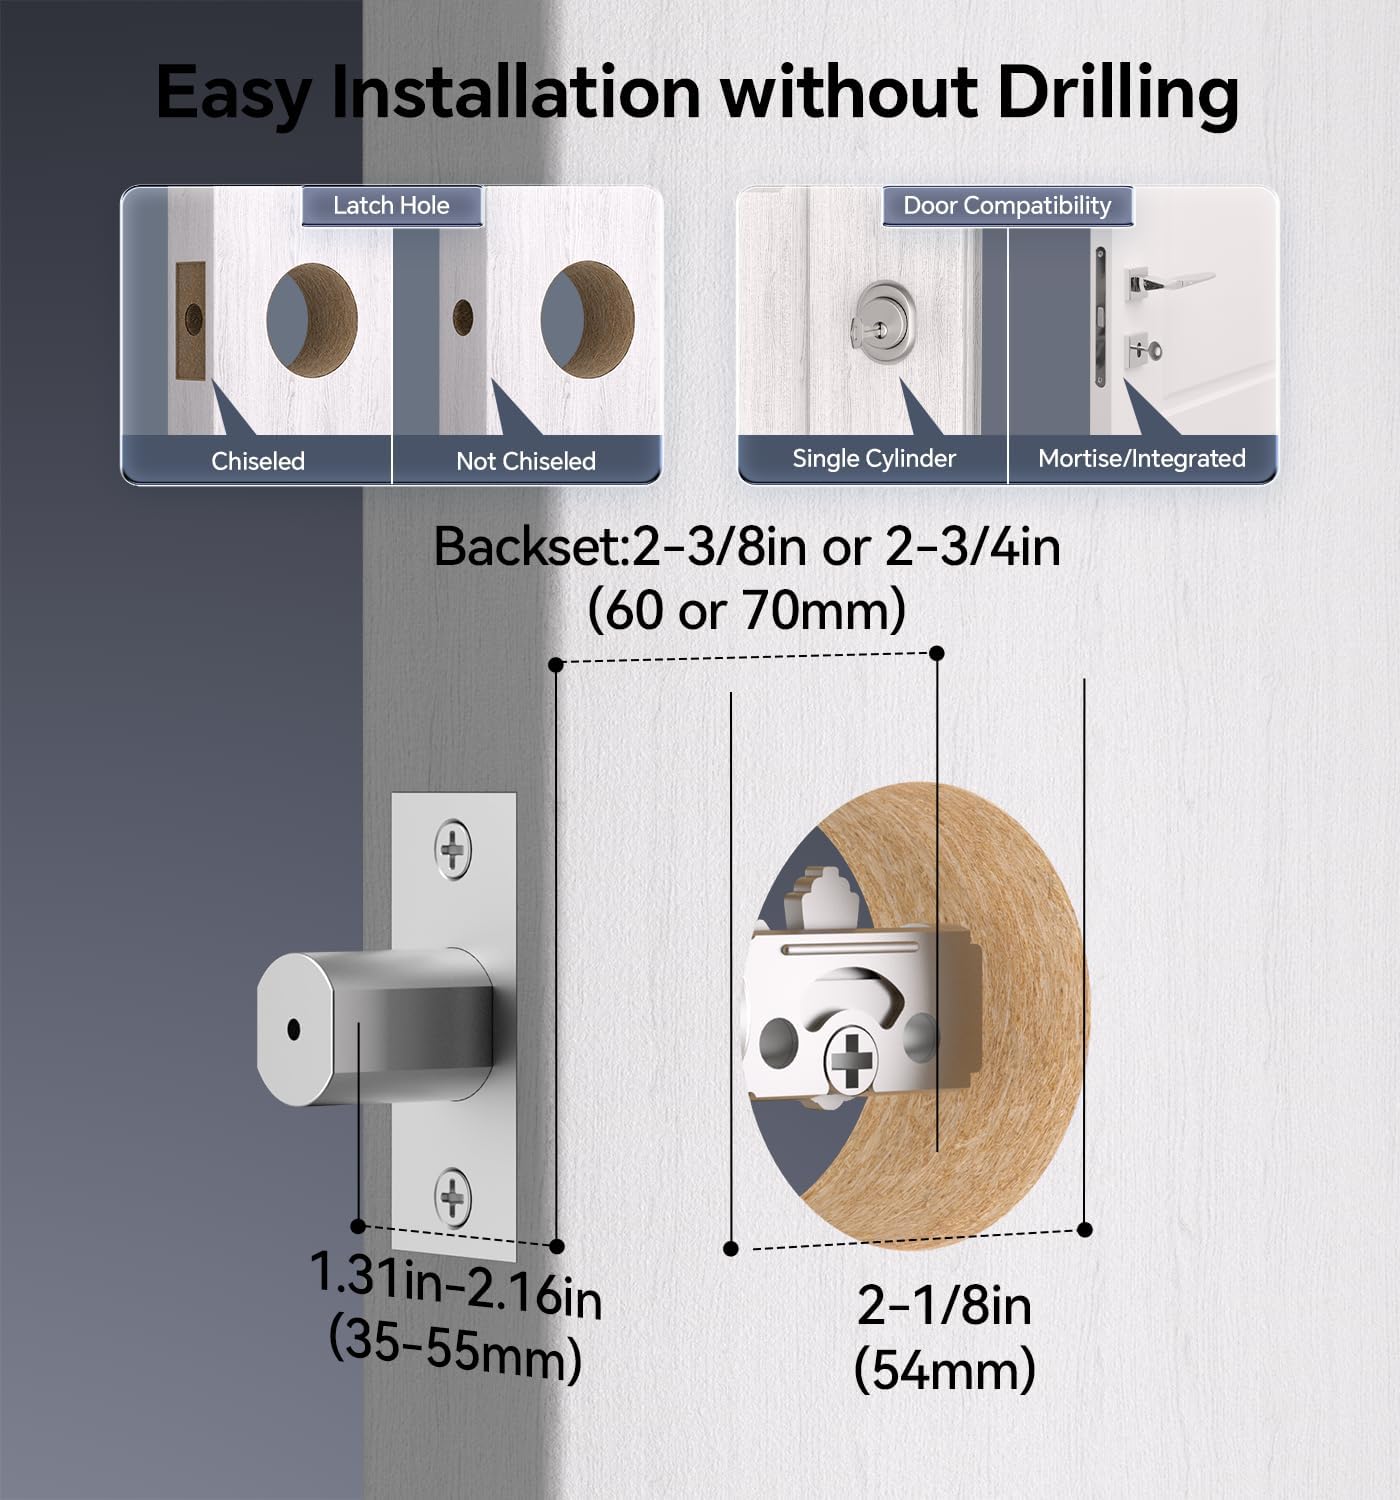
Image 4.1: Door compatibility and latch hole requirements for installation.

Image 4.2: Check door dimensions and lock measurements before purchase.
4.2 Pasos da instalación
- Prepare the door: Ensure the door is properly prepped with the correct bore hole and backset.
- Instale o pestillo e a placa de peche.
- Instale o conxunto do teclado exterior.
- Install the interior assembly, connecting the cable.
- Secure the lock with screws.
- Insira 4 pilas AA (non incluídas) no compartimento das pilas.
- Test the lock's functionality.

Image 4.3: Installation process using a screwdriver.

Image 4.4: The lock is compatible with both left and right-hand door orientations.
5. Instrucións de funcionamento
The Ulecoce smart lock offers various convenient ways to unlock and manage access.
5.1 Métodos de desbloqueo
- Código do teclado: Enter your programmed user code on the keypad.
- Códigos de uso único: Generate temporary codes for single use.
- Clave física: Use the provided backup keys for manual unlocking.
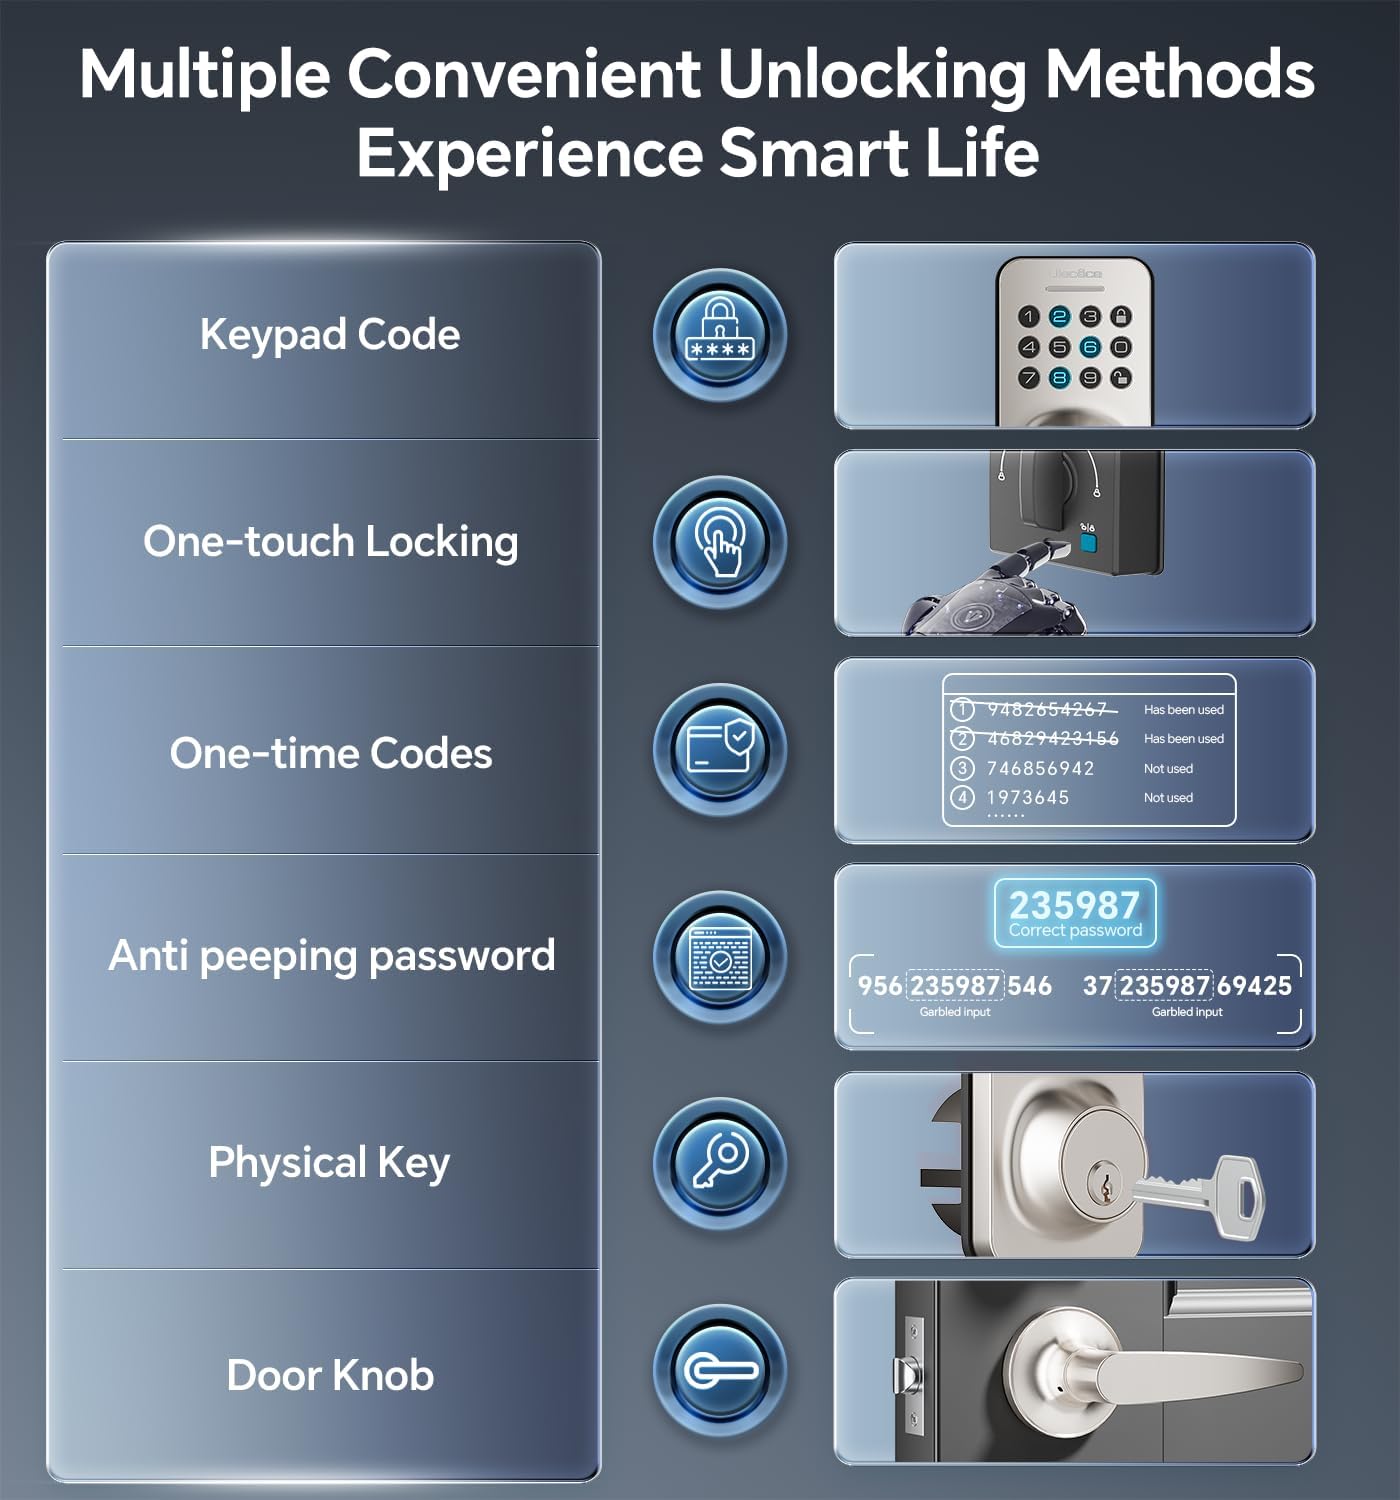
Image 5.1: Multiple methods available for unlocking the door.
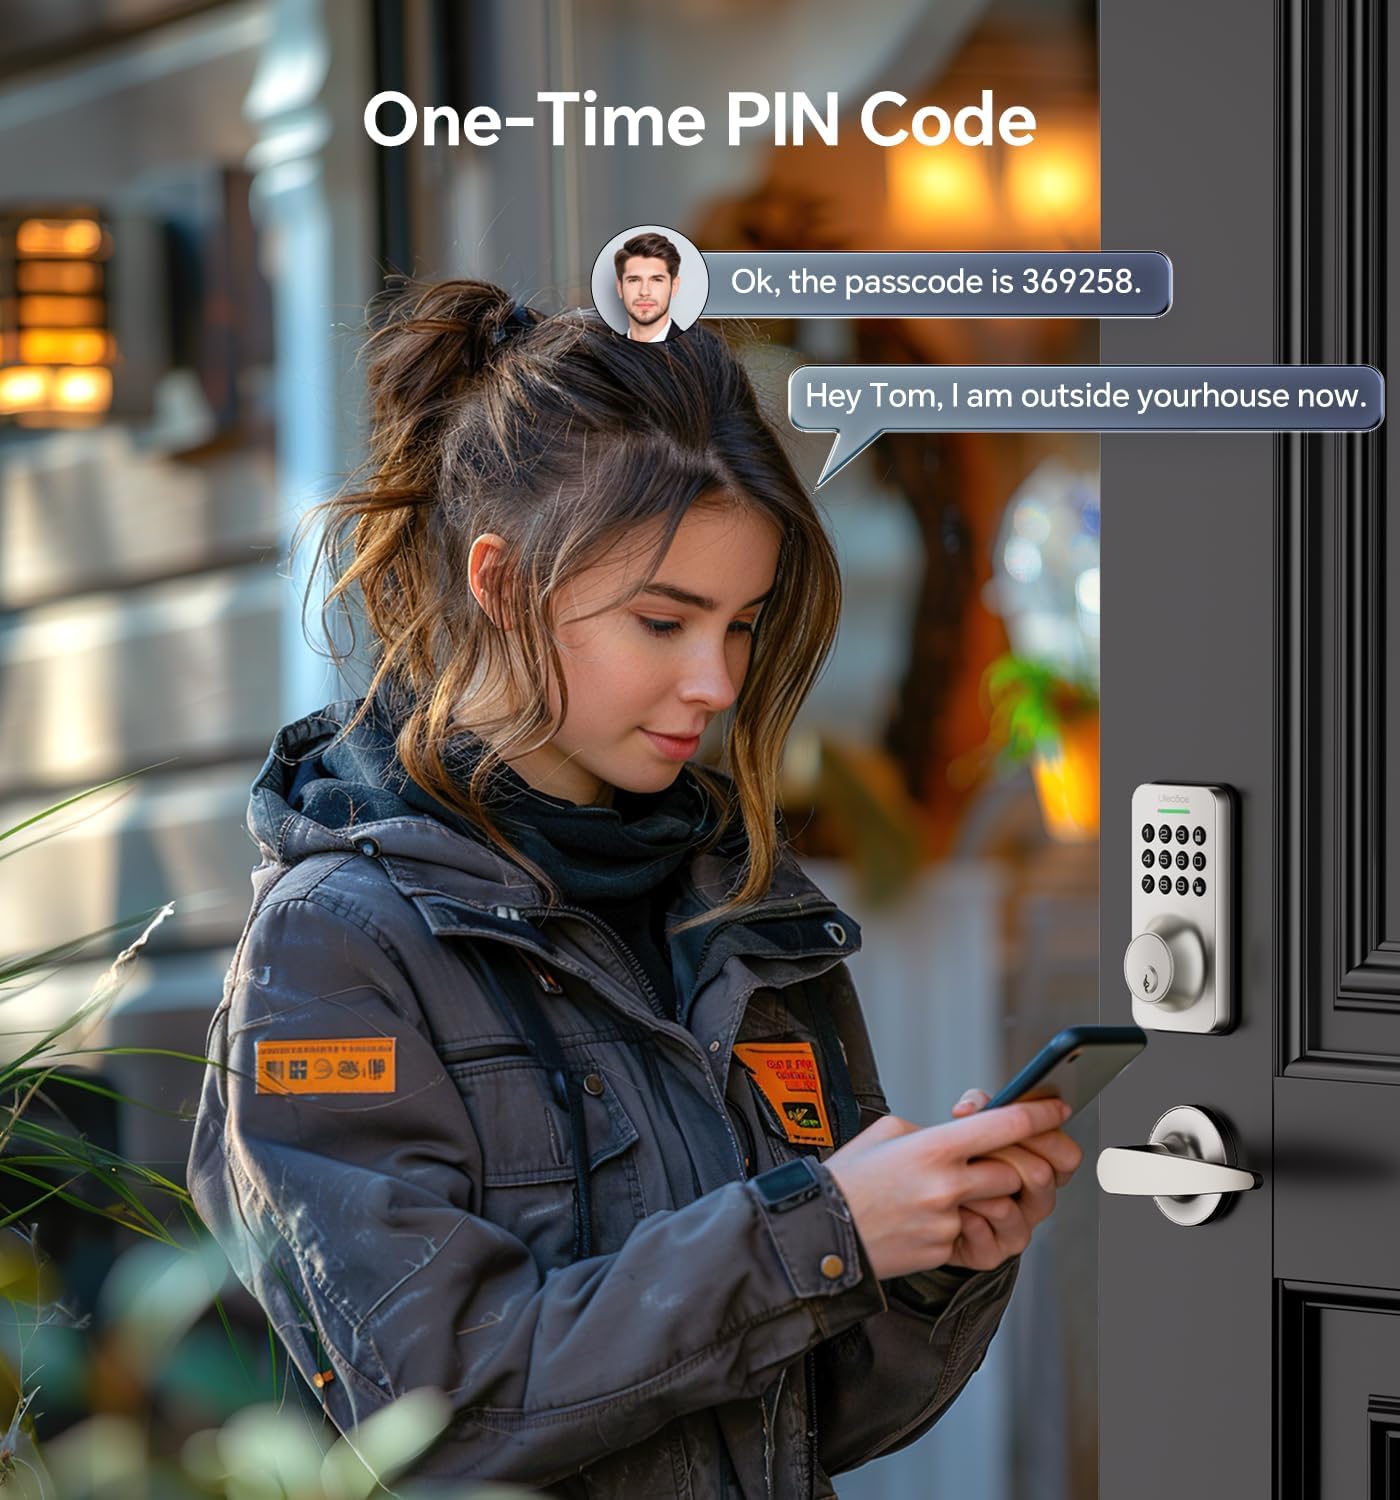
Image 5.2: Using a one-time PIN code for temporary access.
5.2 Contrasinal antiespionaxe
To prevent others from guessing your code, you can enter random digits before or after your actual passcode. The lock will recognize the correct consecutive sequence within the input.
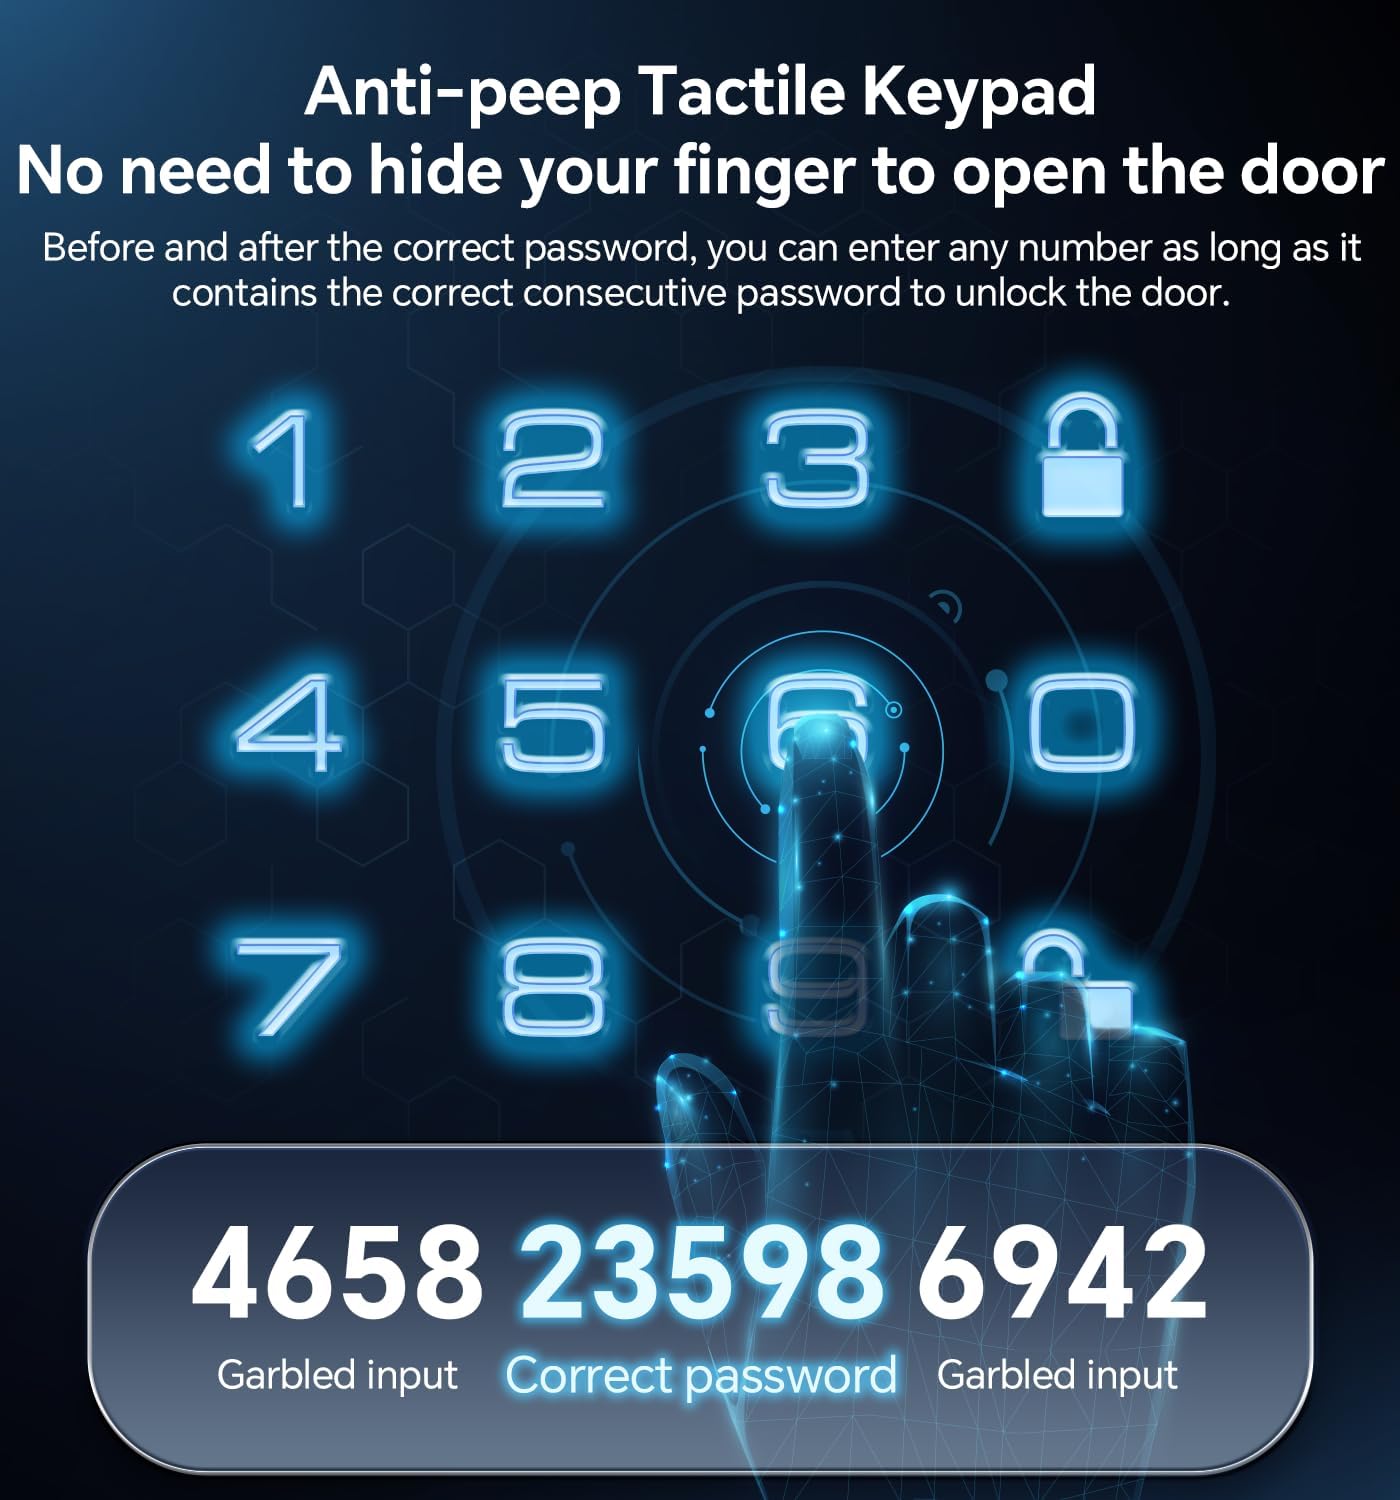
Imaxe 5.3: Ex.ample of using the anti-peeping password feature.
5.3 Auto-Lock and One-Touch Locking
- Bloqueo automático: A fechadura pódese programar para que se bloquee automaticamente despois dun período establecido (10-30 segundos) unha vez que a porta estea pechada.
- Bloqueo dun toque: A dedicated button on the interior assembly allows for quick manual locking.

Image 5.4: The auto-lock feature provides convenience and security.
6. Mantemento
6.1 Substitución da batería
The lock is powered by 4 AA batteries (not included). When the battery level is low, the lock will provide an alert. Replace all four batteries promptly to ensure continuous operation.

Image 6.1: Low battery indicator and backlit keypad for visibility.
6.2 Limpeza
Clean the lock's exterior with a soft, dry cloth. Avoid using abrasive cleaners or solvents, as these can damage the finish or electronic components.
7 Solución de problemas
- O peche non responde: Comprobe os niveis da batería e substitúaa se é necesario. Asegúrese de que o teclado estea limpo e libre de residuos.
- Código non funciona: Verify the code is entered correctly. Ensure the anti-peeping feature is used as intended. If issues persist, reset the code or use a physical key.
- Auto-lock not engaging: Check the auto-lock settings to ensure it is enabled and the timer is set appropriately.
- A chave física non funciona: Ensure the key is fully inserted and turned correctly. Check for any obstructions in the keyway.
Para obter máis axuda, consulte a sección Garantía e asistencia.
8. Garantía e soporte
Ulecoce provides a 3 anos de garantía do produto and lifetime after-sales service for this product. Our customer support team is available 24/7 via email to assist with any questions or concerns you may have.
Please feel free to contact us for support.


