1. Introdución
Thank you for choosing the Aeitto Nugget Ice Maker. This manual provides essential information for the safe and efficient operation, maintenance, and troubleshooting of your new ice maker. Please read it thoroughly before first use and keep it for future reference.
Vídeo: Acabadoview of the Aeitto Nugget Ice Maker's features and operation. This video demonstrates the ice making process and various uses for nugget ice.
2. Garantías importantes
Para reducir o risco de incendio, descarga eléctrica ou lesións ao usar a máquina de xeo, siga estas precaucións básicas:
- Le todas as instrucións antes de usar.
- Non toque o evaporador nin a cesta do xeo cando a unidade estea en funcionamento.
- Non mergulle o aparello, o cable de alimentación nin o enchufe en auga ou outros líquidos.
- Vixiar aos nenos cando o aparello estea en uso.
- Unplug the ice maker from the outlet when not in use, before cleaning, or during servicing.
- Non faga funcionar ningún aparello cun cable ou enchufe danados, ou despois de que o aparello funcione mal ou teña dano dalgún xeito.
- Use só auga potable na máquina de xeo.
- Asegúrate de que haxa unha ventilación axeitada arredor da unidade. Mantén polo menos 5 cm de espazo libre en todos os lados.
3. Compoñentes do produto
Familiarize yourself with the parts of your Aeitto Nugget Ice Maker:
- Unidade de fabricación de xeo
- Cesta de xeo
- Scoop de xeo
- Bandexa de goteo
- Mangueira de drenaxe

Imaxe: The Aeitto Nugget Ice Maker showing its compact dimensions (7.3"W x 13.0"D x 12.8"H) and included accessories: an ice scoop, ice basket, and drip tray. The ice basket can store up to 1.8 lbs of nugget ice.
4. Antes do primeiro uso
Before operating your ice maker for the first time, perform the following steps:
- Desempaquetar: Remove all packaging materials and check that all accessories are present.
- Limpar: Wash the ice basket and ice scoop with warm water and mild detergent. Rinse thoroughly and dry.
- Posición: Coloque a máquina de xeo sobre unha superficie estable e nivelada, lonxe da luz solar directa e de fontes de calor. Asegúrese de que haxa unha ventilación axeitada arredor da unidade.
- Ciclo de limpeza inicial: It is recommended to run a self-cleaning cycle before making ice for consumption. Refer to the "Self-Cleaning Function" section for detailed instructions.
5. Instrucións de funcionamento
5.1 Facer xeo
Follow these simple steps to produce nugget ice:
- Engadir auga: Open the lid and pour potable water into the water reservoir up to the MAX fill line.
- Insert Ice Basket: Place the ice basket securely inside the unit.
- Comezar a produción de xeo: Press the "ICE" button on the control panel. The ice maker will begin the ice-making cycle.
- Recoller xeo: The first batch of ice may take approximately 5 minutes. The unit will continue to produce ice until the ice basket is full or the water reservoir is empty.
Imaxe: A visual guide demonstrating the three steps to make nugget ice: 1. Add water to the reservoir. 2. Press the "ICE" button on the control panel. 3. Enjoy the freshly made nugget ice.
5.2 Ice Full Reminder
The ice maker is equipped with an "Ice Full" sensor. When the ice basket is full, the unit will automatically stop ice production to prevent overflow and save energy. Production will resume once ice is removed from the basket.

Imaxe: The ice maker's control panel showing the "ICE FULL" indicator light, which illuminates when the ice basket is full, signaling the unit to pause ice production.
6. Limpeza e Mantemento
6.1 Función de autolimpeza
The ice maker features an automatic self-cleaning function for convenience and hygiene:
- Auga baleira: Asegúrate de que o depósito de auga estea baleiro.
- Engadir auga para a limpeza: Fill the reservoir with clean, potable water. You may add a small amount of white vinegar or a descaling solution (follow product instructions) for enhanced cleaning.
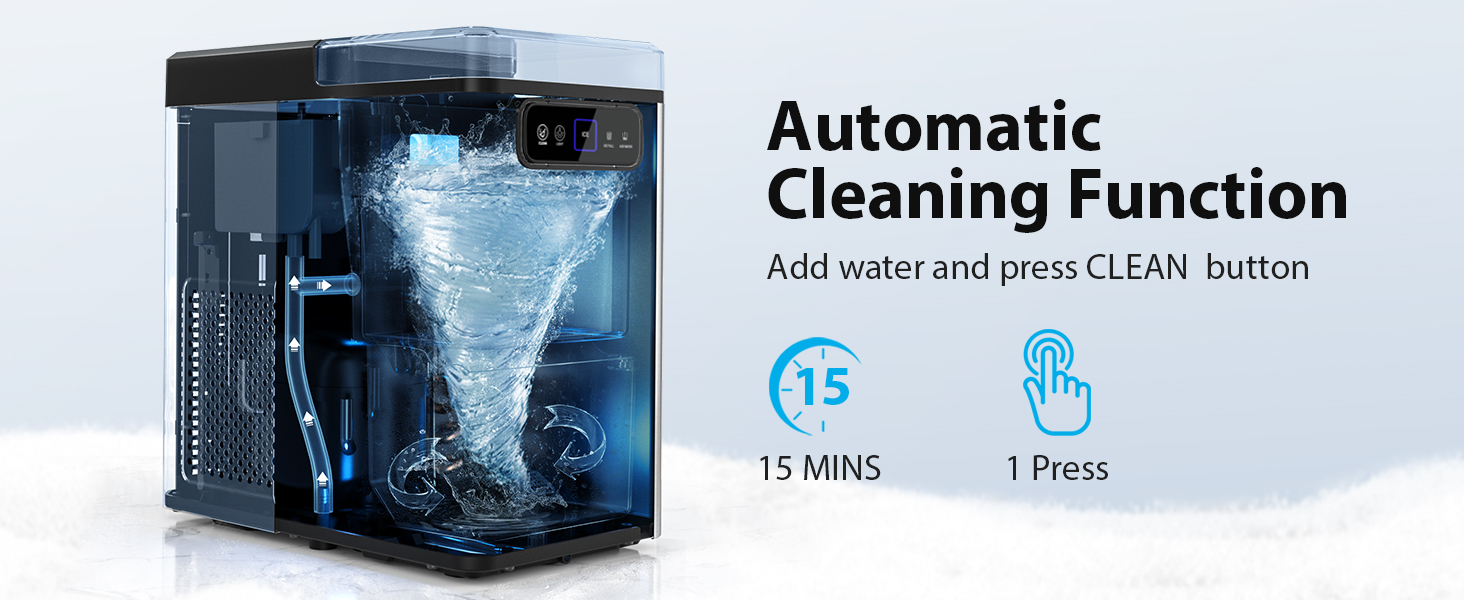
- Comeza a limpeza: Press and hold the "CLEAN" button for 3 seconds. The unit will initiate a 15-minute cleaning cycle.
- Drenaxe de auga: After the cycle, drain the water from the unit using the drain hose.
- Enxágüe: Repeat the process with fresh water only to rinse out any cleaning solution residue.

Imaxe: The internal mechanism of the ice maker during a self-cleaning cycle, showing water circulating to clean the components. The process takes 15 minutes and is activated with a single press of the clean button.
6.2 Draining the Unit
To drain water from the ice maker:
- Locate the drain pipe at the back of the unit.
- Remove the stopper from the drain pipe.
- Direct the drain pipe into a sink or container to collect the water.
- Once drained, replace the stopper firmly.

Imaxe: A close-up of the ice maker's unique water outlet design, showing how the drain pipe is connected and used to easily discharge water into a sink, preventing leaks.
6.3 Descalcificación
Mineral buildup from hard water can affect ice production and the lifespan of your machine. Descale your ice maker regularly:
- Mensual: In moderately hard water areas.
- Every two or three weeks: In hard to very hard water areas.
Use a descaling solution specifically designed for ice makers or a mixture of water and white vinegar (1:1 ratio). Follow the self-cleaning instructions, substituting the cleaning solution for water in the first step.

Imaxe: A map illustrating hard water concentrations across the United States, with recommendations for descaling frequency based on water hardness: monthly for moderately hard water (1-60mg/L) and every 2-3 weeks for hard to very hard water (61-250mg/L).
7 Solución de problemas
If your ice maker is not functioning correctly, consult the table below for common issues and solutions:
| Problema | Causa posible | Solución |
|---|---|---|
| A máquina de xeo non produce xeo. | Non hai auga no depósito. | Engade auga ao depósito. |
| A cesta de xeo está chea. | Elimina o xeo da cesta. | |
| Unit is unplugged or power outage. | Ensure unit is plugged in and power is on. | |
| A produción de xeo é lenta. | Ventilación deficiente. | Asegúrese de que haxa espazo suficiente arredor da unidade para a circulación do aire. |
| Alta temperatura ambiente. | Operar nun ambiente máis fresco. | |
| O xeo ten un sabor ou cheiro inusual. | Stale water or mineral buildup. | Perform a self-cleaning cycle and use fresh, potable water. Descale if necessary. |
| A unidade é ruidosa. | Ruídos de funcionamento normal (compresor, bomba de auga). | Isto é normal. Se o ruído é excesivo ou inusual, póñase en contacto co servizo de atención ao cliente. |
8. Especificacións técnicas
| Especificación | Detalle |
|---|---|
| Nome do modelo | BLK23-24M |
| Dimensións do produto | 12.99" D x 7.29" W x 12.79" H |
| Capacidade (produción de xeo) | Ata 40 libras ao día |
| Wattage | 110 vatios |
| Refrixerante | R600a |
| Material | Aceiro inoxidable |
| Peso do elemento | 19.36 libras |
9. Garantía e atención ao cliente
For warranty information or customer support, please refer to the warranty card included with your product or visit the official Aeitto website. If you encounter any issues not covered in this manual, please contact Aeitto customer service for assistance.
Información de contacto: Please refer to your product packaging or the official Aeitto websitio web para obter os datos de contacto máis actualizados.