Introdución
This manual provides essential instructions for the safe operation, assembly, maintenance, and troubleshooting of your HART 8 Gallon 6 Peak HP Stainless Steel Wet/Dry Vacuum. Please read this manual thoroughly before using the product to ensure proper function and to prevent injury or damage.
Información importante de seguridade
Siga sempre as precaucións básicas de seguridade ao usar este electrodoméstico para reducir o risco de incendio, descarga eléctrica ou lesións. Garde este manual para futuras consultas.
- Non deixe o aspirador sen vixilancia cando estea enchufado. Desenchufe da toma de corrente cando non estea en uso e antes de realizar o mantemento.
- Non o use con cable ou enchufe danados. Se o aparello non funciona como debería, caeu, estrañouse, deixouse ao aire libre ou caeu á auga, devólveo a un centro de servizo.
- Non tire ou transporte co cable, non use o cable como asa, non peche unha porta sobre o cable nin tire do cable por bordos ou esquinas afiadas. Non pase o aparello sobre o cable. Manteña o cable lonxe de superficies quentes.
- Non desconecte tirando do cable. Para desenchufar, agarre o enchufe, non o cable.
- Non manipule o enchufe ou o aparello coas mans molladas.
- Non coloque ningún obxecto nas aberturas. Non use con ningunha abertura bloqueada; manteña libre de po, pelusa, cabelos e calquera cousa que poida reducir o fluxo de aire.
- Manteña o cabelo, a roupa solta, os dedos e todas as partes do corpo lonxe das aberturas e das partes móbiles.
- Non coller nada que arde ou fume, como cigarros, mistos ou cinzas quentes.
- Teña coidado extra ao limpar as escaleiras.
- Non o use para recoller líquidos inflamables ou combustibles, como a gasolina, nin o use en áreas onde poidan estar presentes.
- Non use sen filtros colocados.
- Conéctese só a unha toma de corrente debidamente conectada a terra. Consulte as instrucións de conexión a terra.
- Este aparello non está pensado para o seu uso por persoas (incluídos nenos) con capacidades físicas, sensoriais ou mentais reducidas, ou con falta de experiencia e coñecementos, a menos que teñan supervisión ou instrucións sobre o uso do aparello por unha persoa responsable da súa seguridade.
- Os nenos deben ser supervisados para asegurarse de que non xoguen co aparello.
Contido do paquete
Verifique que todos os elementos que se indican a continuación estean incluídos no seu paquete:
- HART 8 Gallon Stainless Steel Wet/Dry Vacuum Unit
- 7' x 1-7/8" Premium Hose
- (2) Varitas de extensión
- Boquilla de utilidade
- Ferramenta de fendas
- Cepillo para pisos/boquilla para escobillas
- Cartridge Filter (for dry vacuuming)
- Foam Wet Filter (for liquid pick-up)
- Bolsa de colección

Figure 1: HART 8 Gallon Wet/Dry Vacuum with included hose and floor nozzle.
Montaxe e configuración
Siga estes pasos para montar o seu aspirador de líquidos/secos antes do primeiro uso.
- Desempaquetar compoñentes: Retire coidadosamente todos os compoñentes da embalaxe.
- Fixar rodas: Insert the casters into the designated slots on the vacuum base. Ensure they click securely into place for easy mobility.
- Instalar filtros:
- For dry vacuuming, install the cartridge filter over the filter cage. Secure it with the filter nut.
- For wet vacuuming, remove the cartridge filter and install the foam wet filter over the filter cage.
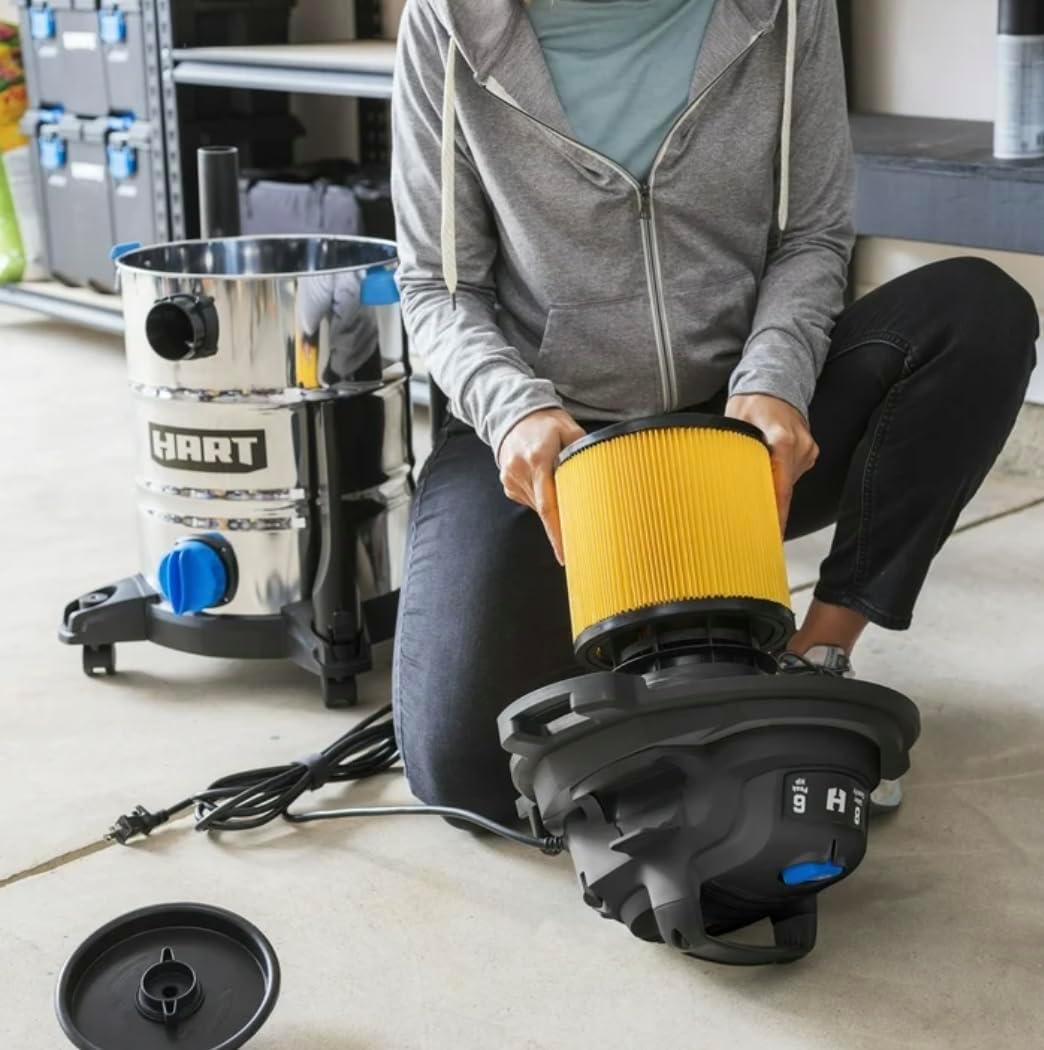
Figure 2: Proper installation of the cartridge filter for dry vacuuming.
- Cabeza do motor segura: Place the motor head onto the tank, aligning the latches. Press down on the latches until they securely lock the motor head to the tank.
- Mangueira de conexión: Insert the larger end of the premium hose into the vacuum's inlet port on the tank. Twist to lock it in place.
- Adjuntar accesorios: Connect the desired extension wands and nozzle (utility, crevice, or floor brush/squeegee) to the free end of the hose. The locking accessories ensure they won't detach during use.
Operación
A. Aspiración en seco
- Ensure the cartridge filter is correctly installed.
- Enchufe o cable de alimentación a unha toma eléctrica conectada a terra.
- Turn the vacuum ON using the large dust-sealed switch.
- Guide the nozzle over the dry debris to be collected.
- Ao rematar, apague o aspirador e desconécteo.
- Empty the tank as needed.
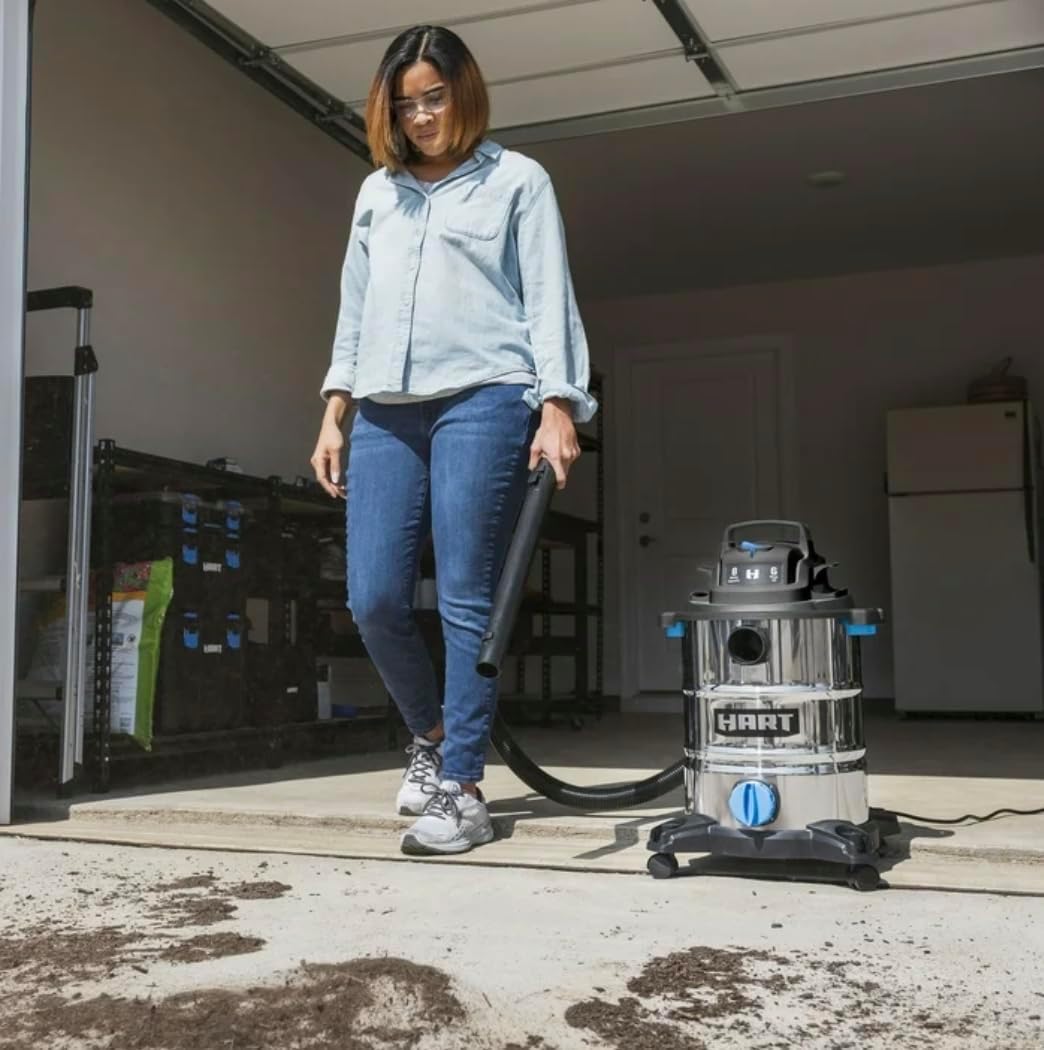
Figure 3: Using the vacuum for dry debris collection in a garage.
B. Aspiración húmida
- Remove the cartridge filter and install the foam wet filter.
- Enchufe o cable de alimentación a unha toma eléctrica conectada a terra.
- Turn the vacuum ON using the large dust-sealed switch.
- Guide the nozzle over the liquid to be collected. The vacuum will automatically shut off when the tank is full.
- Ao rematar, apague o aspirador e desconécteo.
- Empty the tank by using the extra-large drain port.
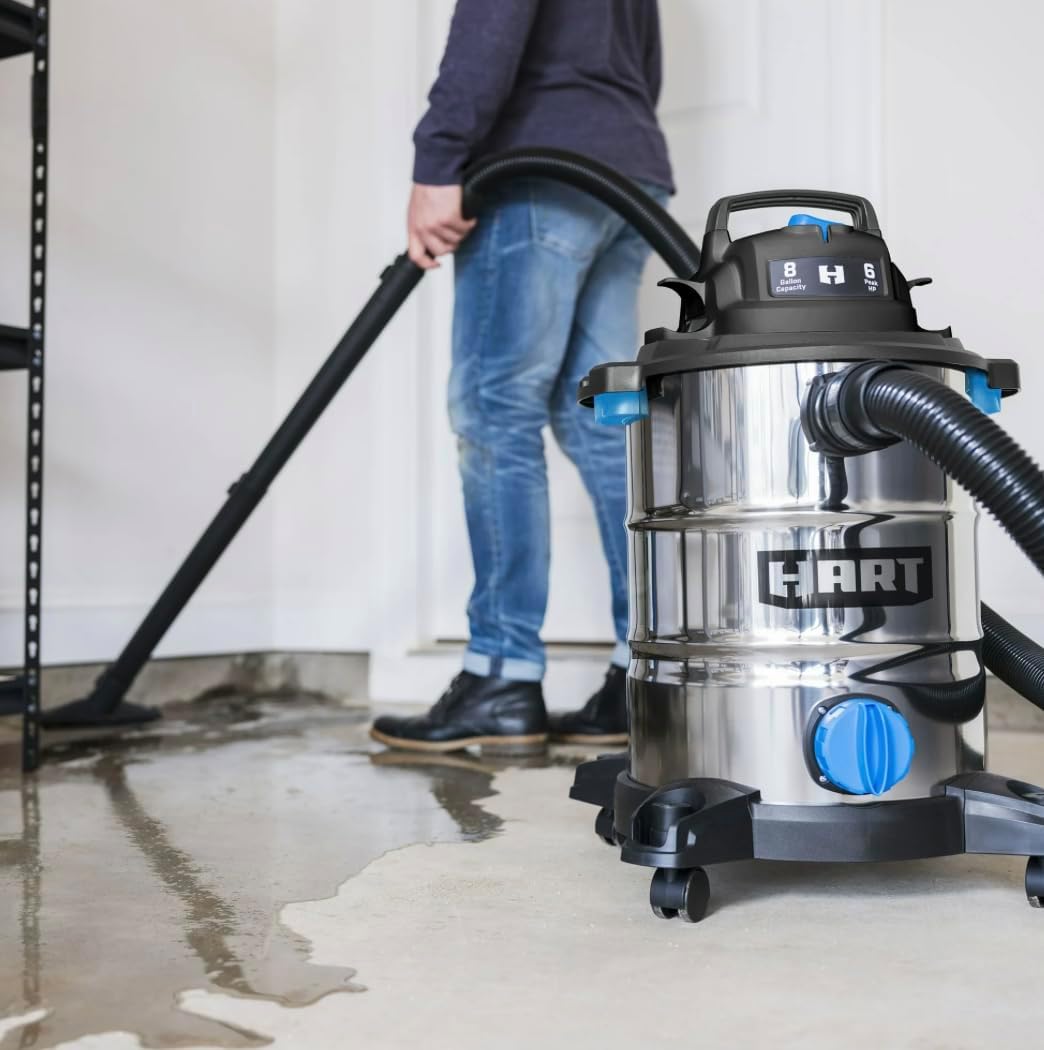
Figure 4: Demonstrating wet vacuuming on a garage floor.
C. Blower Function
- Locate the blower port on the motor head.
- Remove the hose from the vacuum inlet port.
- Insert the hose into the blower port and twist to lock it in place.
- Enchufe o cable de alimentación a unha toma eléctrica conectada a terra.
- Turn the vacuum ON. The vacuum will now function as a blower, useful for clearing debris from driveways or workshops.
- Ao rematar, apague o aspirador e desconécteo.
Mantemento
Un mantemento regular garante un rendemento óptimo e prolonga a vida útil do seu aspirador.
A. Emptying the Tank
- Desconecte sempre o aspirador antes de baleiralo.
- For dry debris, unlatch the motor head and lift it off. Carefully remove the collection bag (if used) and dispose of contents.
- For liquids, open the extra-large drain port at the bottom of the tank to empty the liquid.
- Limpar o interior do tanque cun damp pano se é necesario.
B. Coidado do filtro
- Filtro de cartucho (seco):
- Remove the filter and gently tap it to dislodge dust.
- For heavy dirt, the filter can be rinsed with water. Allow it to air dry completely before reinstallation.
- Replace the cartridge filter if it is damaged or excessively dirty.
- Foam Wet Filter (Wet):
- Rinse the foam filter with water after each wet use.
- Squeeze out excess water and allow it to air dry completely before storing or using for dry applications.
C. Almacenamento
- Ensure the tank is empty and clean, and filters are dry before storing.
- Utilize the on-board hose, cord, and accessory storage to keep all attachments organized and in one place.
- Store the vacuum in a dry, indoor area.

Figure 5: The vacuum stored with its hose and accessories on board.
Resolución de problemas
Consulta esta sección para ver os problemas comúns e as súas solucións.
| Problema | Causa posible | Solución |
|---|---|---|
| O aspirador non se acende. | No power to outlet; Power cord not fully plugged in; ON/OFF switch in OFF position. | Check power outlet with another appliance; Ensure power cord is securely plugged in; Move switch to ON position. |
| Aspiración reducida. | Tank is full; Filter is clogged; Hose or nozzle is blocked; Motor head latches not secured. | Empty the tank; Clean or replace filter; Clear any blockages from hose or nozzle; Ensure motor head latches are fully engaged. |
| Liquid overflow during wet vacuuming. | Foam filter not installed; Automatic shut-off float is stuck. | Ensure foam filter is installed for wet use; Check and clear the float mechanism for free movement. |
| O motor funciona, pero non aspira. | Hose not connected properly; Large obstruction in hose or inlet. | Ensure hose is securely connected to the inlet port; Check and clear any large obstructions. |
Especificacións
- Modelo: VOC812SF 3703
- Tamaño do tanque: 8 Gallons (actual tank volume)
- Potencia máxima en cabalos de vapor: 6 HP (Note: Peak Horsepower is a term used for consumer comparison and does not denote operational horsepower output.)
- Diámetro da mangueira: 1-7/8 polgadas
- Lonxitude da mangueira: 7 pés
- Lonxitude do cable de alimentación: 10 pés
- Cleaning Reach: 17 feet (with hose and power cord)
- Tipo de filtro: Cartridge (dry), Foam (wet)
- Dimensións (L x W x H): 16.6" x 16.4" x 25"
- Peso: 18 libras
- Fabricante: HART

Figure 6: Product dimensions for the HART 8 Gallon Wet/Dry Vacuum.
Información da garantía
This HART 8 Gallon 6 Peak HP Stainless Steel Wet/Dry Vacuum is covered by a 3 ano de garantía limitada. For specific terms and conditions, please refer to the warranty card included with your product or contact HART customer support.
Atención ao cliente
If you have any questions, require assistance, or need to report a problem with your HART Wet/Dry Vacuum, please contact HART customer support. Refer to the product packaging or the official HART websitio para obter a información de contacto máis actualizada.


