1. Introdución
This manual provides essential information for the safe and effective operation, maintenance, and troubleshooting of your YESWELDER LYG-Q910D Auto Darkening Welding Helmet. Please read this manual thoroughly before use and retain it for future reference.

Image 1.1: The YESWELDER LYG-Q910D Auto Darkening Welding Helmet, showcasing its design and included protective lenses.
2. Información de seguridade
WARNING: Welding and cutting processes can cause serious injury or death. Always follow safety precautions and wear appropriate personal protective equipment (PPE).
- Always wear safety glasses under the welding helmet.
- Asegúrate de que o casco estea axustado correctamente e funcione antes de cada uso.
- Do not use the helmet if the auto-darkening filter is damaged or not darkening correctly.
- Protect the helmet from extreme temperatures, moisture, and direct sunlight when not in use.
- Replace scratched or damaged protective lenses immediately.
- Ensure adequate ventilation in the work area to avoid inhaling fumes.
- Manteña os nenos e as persoas non autorizadas lonxe da zona de soldadura.
3. Características do produto
The YESWELDER LYG-Q910D welding helmet incorporates advanced features for enhanced safety and performance.
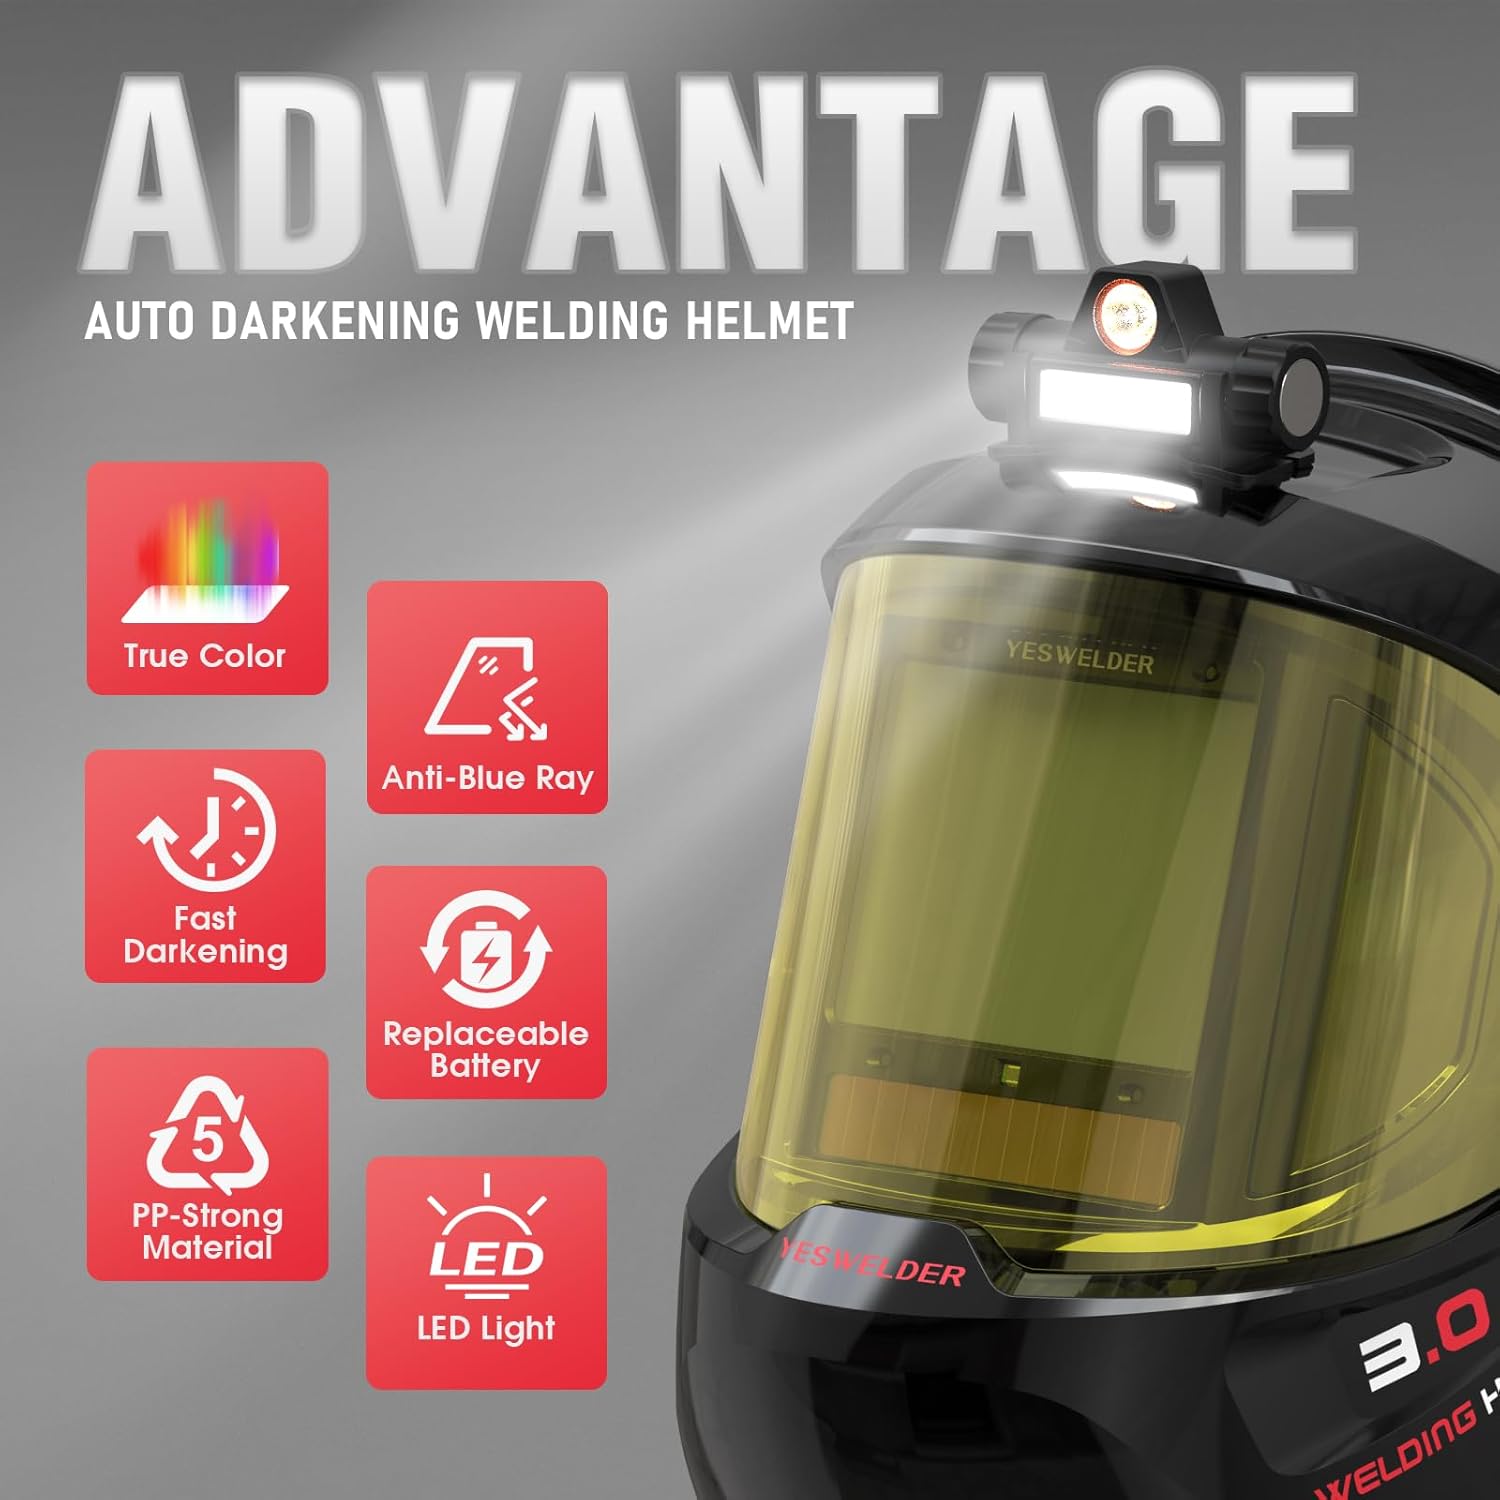
Imaxe 3.1: Acabadoview of the helmet's key advantages including True Color, Anti-Blue Ray, Fast Darkening, Replaceable Battery, PP-Strong Material, and LED Light.
3.1. Auto-Darkening Filter
Equipped with 4 arc sensors, the auto-darkening filter provides a rapid switching time of 1/30,000 seconds, ensuring immediate eye protection upon arc ignition. The digital control panel allows for precise adjustment of sensitivity and delay.
3.2. Panorámica View & True Color Technology
The helmet features a 3.94" x 3.27" main viewing area complemented by side views (DIN5, non-auto-darkening) for a 180° panoramic field of vision. True Color technology provides a clear and natural view of the workpiece, enhancing visibility and reducing eye strain. The optical clarity rating is 1/1/1/1.

Image 3.2: Comparison illustrating the clarity of True Color lens technology versus traditional lenses.
3.3. Blue Light Blocking & UV/IR Protection
The helmet incorporates blue light blocking technology to filter harmful high-energy blue light rays, reducing eye fatigue during extended welding sessions. Continuous UV/IR protection is provided by the filter, regardless of whether the auto-darkening function is active or not.
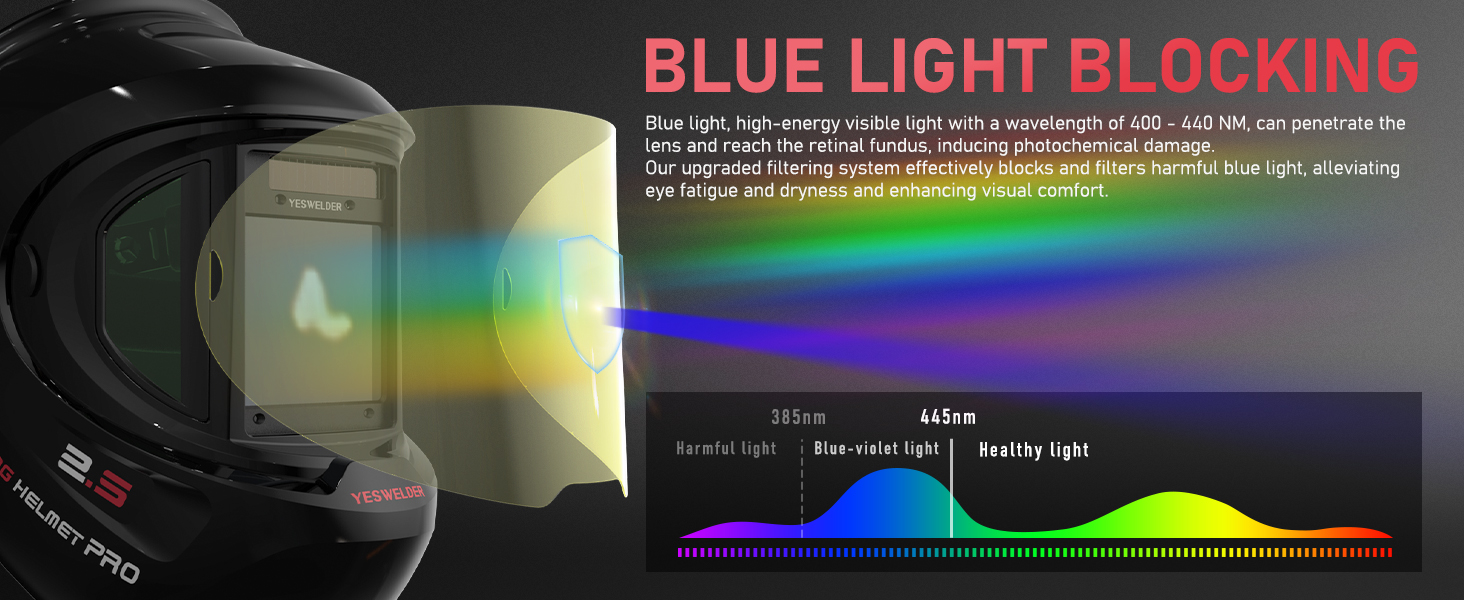
Image 3.3: Diagram explaining how the helmet's blue light blocking technology filters harmful light wavelengths.
3.4. Rechargeable LED Light
An integrated, USB-rechargeable LED light provides illumination for the work area, offering both a larger lighting area and concentrated lighting modes. This feature is particularly useful in low-light environments.

Image 3.4: The rechargeable LED light feature, showing its charging port and two distinct lighting modes.
3.5. Dual Power Sources
The helmet is powered by a combination of solar panel technology and a replaceable CR2450 lithium battery, ensuring long service life and energy efficiency. It includes automatic sleep and shutdown functions to conserve power.
3.6. Durabilidade
Constructed from PP-strong material, the helmet is designed for fall resistance, impact resistance, corrosion resistance, and flame resistance, providing robust protection in demanding work environments.
4. Configuración e axuste
4.1. Headgear Adjustment
Proper adjustment of the headgear is crucial for comfort and stability. Use the various adjustment points to achieve a secure and balanced fit.
- Axuste de tamaño: Use the knob at the back of the headgear to adjust the headband's circumference to fit your head.
- Axuste de distancia: Adjust the distance between the helmet and your face for optimal observation and comfort.
- Axuste de ángulo: The helmet's angle knob allows adjustment to any desired viewángulo de ing.
- Tightness Adjustment: The headband's fixing knob eases adjustment and prevents the helmet from falling off during use.

Imaxe 4.1: Detallada view of the headgear adjustment points for size, distance, angle, and tightness.
4.2. Instalación/comprobación da batería
The helmet comes with a CR2450 lithium battery installed. Ensure it is properly seated. The digital control panel includes a battery indicator to show the current charge level.
4.3. Protective Lens Installation
The helmet includes replacement protective lenses. To install or replace, carefully remove the old lens and insert the new one, ensuring it is securely fitted to prevent dust and debris from entering.
5. Instrucións de funcionamento
Familiarize yourself with the digital control panel for optimal performance.

Image 5.1: Diagram of the digital control panel, indicating arc sensors, UV/IR filter, and control buttons.
5.1. Acendido/apagado
Press the power button on the digital control panel to turn the helmet on or off. The helmet also features automatic sleep and shutdown functions.
5.2. Selección de modo
The helmet supports multiple operating modes: Weld, Cut, and Grind. Use the 'MODE/TEST' button to cycle through these modes.
- Modo de moenda (DIN 3): For grinding operations. The filter remains in a light state.
- Modo de corte (DIN 5-9): For cutting applications.
- Modo de soldadura (DIN 9-15): For various welding processes (TIG, MIG, MMA/STICK).

Image 5.2: Visual representation of the shade settings for Grind, Cut, and Weld modes.
5.3. Digital Control Panel Adjustments
The digital control panel allows for fine-tuning of the helmet's performance.
- Control de sensibilidade: Adjusts the filter's sensitivity to arc light. Use the 'SENS' buttons (+/-) to set the desired level.
- Control de atraso: Adjusts the time it takes for the lens to return from dark to light state after welding. Use the 'DELAY' buttons (+/-) to set between 0.1 and 1.0 seconds.
- Shade Control & Auto Button: In Weld/Cut mode, use the 'SHADE' buttons (+/-) to manually select the shade level. Long press the 'SHADE AUTO' button for 2 seconds to enter Auto mode, where the helmet automatically adjusts shade according to the arc.
- Función de memoria: Short press the 'MEMORY' button to select stored setup parameters. Long press for 2 seconds to save current settings to one of 9 memory slots.
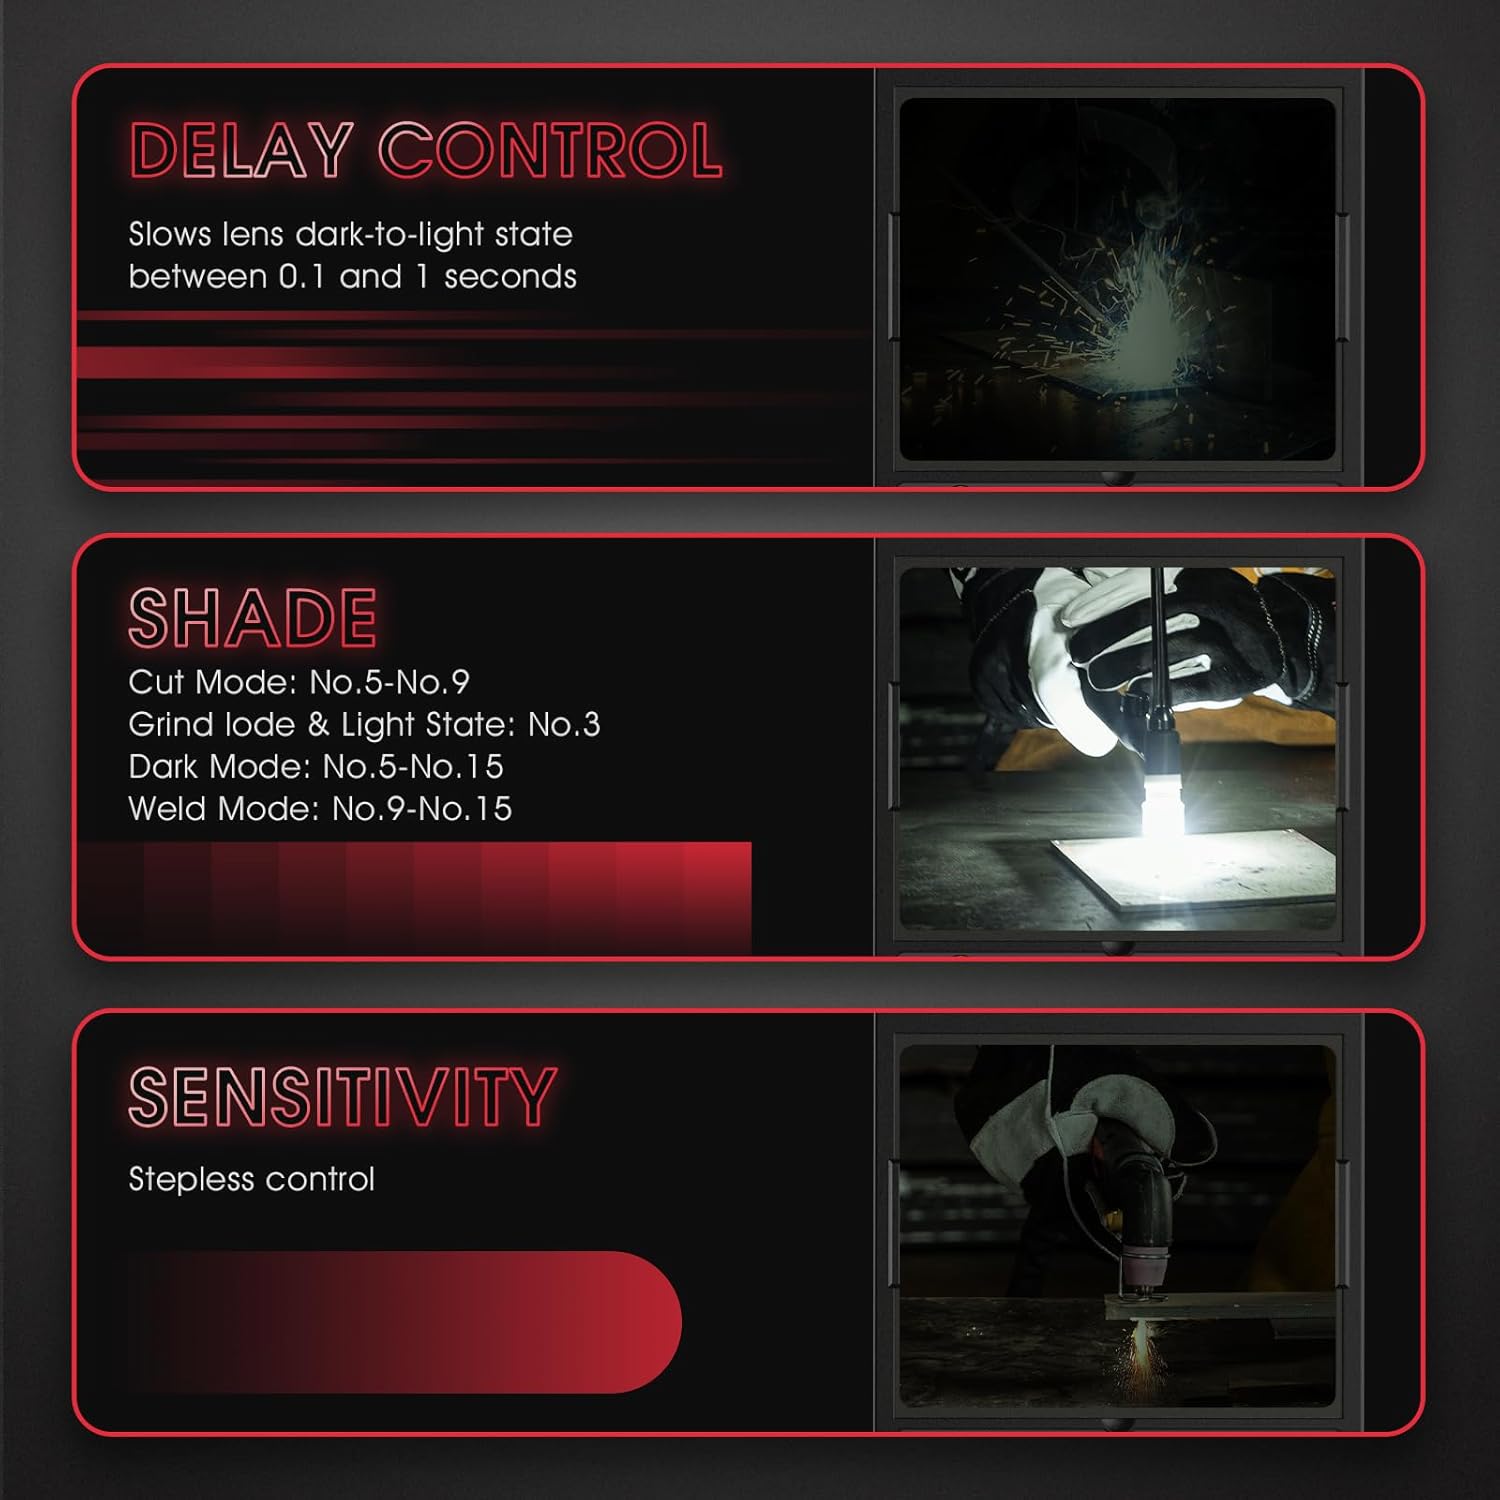
Image 5.3: Explanations for Delay Control, Shade Control, and Sensitivity settings.
5.4. Funcionamento da luz LED
Press the button on the LED light module to cycle through its lighting modes (larger lighting area, concentrated lighting) or to turn it off.
6. Mantemento
6.1. Limpeza do casco
- Clean the helmet shell with mild soap and water. Avoid harsh solvents.
- Wipe the auto-darkening filter and protective lenses with a soft, clean cloth. Do not use abrasive materials or cleaners that could scratch the surface.
6.2. Replacing Protective Lenses
Regularly inspect the inner and outer protective lenses for scratches, cracks, or excessive spatter. Replace them as needed to maintain clear vision and protect the auto-darkening filter.
6.3. Substitución da batería
When the battery indicator shows low power, replace the CR2450 lithium battery. Refer to the diagram on the digital control panel for battery compartment location.
6.4. Almacenamento
Store the helmet in a dry, clean environment, away from direct sunlight and extreme temperatures. Use the provided storage bag or a protective case if available.
7 Solución de problemas
| Problema | Causa posible | Solución |
|---|---|---|
| Filter does not darken | Low battery; Arc sensors obstructed; Incorrect mode selected; Filter damaged. | Check/replace battery; Clean arc sensors; Select Weld/Cut mode; Contact support if damaged. |
| Mala visibilidade | Scratched/dirty protective lenses; Incorrect shade setting. | Clean or replace lenses; Adjust shade setting. |
| Helmet slips or is uncomfortable | Arnés para a cabeza non axustado correctamente. | Adjust headgear for size, distance, angle, and tightness. |
| A luz LED non funciona | Low battery; Not charged. | Recharge the LED light using the USB cable. |
8. Especificacións

Image 8.1: Visual summary of the helmet's key specifications and included accessories.
- Modelo: LYG-Q910D
- Principal ViewTamaño: 3.94" x 3.27" (100 mm x 83 mm)
- Lado ViewTamaño: 4.29" x 1.97" x 3.98" (DIN5, non-auto-darkening)
- Claridade óptica: 1/1/1/1
- Rango de sombras: DIN 3 (Grind), DIN 5-9 (Cut), DIN 9-15 (Weld)
- Tempo de cambio: 1/30,000 segundos
- Sensores de arco: 4
- Fonte de alimentación: Solar panel and replaceable CR2450 Lithium Battery (included)
- Estándares: ANSI ISEA Z87.1-2015, CSA Z94.3, EN 379 CE
- Peso do artigo: Aproximadamente 2.74 libras
- Compoñentes incluídos: Welding helmet, 3x replacement lenses, 1x headlamp, 1x headlamp charging cable, 1x replaceable battery.
9. Garantía e soporte
YESWELDER products are designed for quality and reliability. This product comes with a 1-year warranty from the date of purchase, covering manufacturing defects.
- Cobertura da garantía: Cobre defectos de materiais e fabricación en condicións normais de uso.
- Exclusións: Does not cover damage due to misuse, neglect, unauthorized modification, or normal wear and tear.
- Atención ao cliente: For warranty claims, technical assistance, or any questions regarding your product, please contact YESWELDER customer support. Refer to the official YESWELDER websitio para obter información de contacto actual.


