1. Introdución
This manual provides detailed instructions for the installation, operation, and maintenance of your AZDOME V600 1080P Dual Dash Camera. Please read this manual thoroughly before using the device to ensure proper function and safety. The AZDOME V600 is designed to record both the road ahead and the vehicle's interior simultaneously, offering comprehensive video evidence for various driving situations.
2. Contido do paquete
Verify that all items listed below are present in your package. If any items are missing or damaged, please contact customer support.

Image: Contents of the AZDOME V600 Dash Camera package, showing the dash camera, Type-C car charger, electrostatic films, 3M adhesive, pry tool, cable clips, and user manual.
- AZDOME V600 Dash Camera x 1
- Type-C Car Charger x 1
- Electrostatic Films x 2
- Adhesivo 3M x 1
- Pry Tool x 1
- Clips para cables x 5
- Manual de usuario x 1
3. Configuración e instalación
Follow these steps for proper installation of your dash camera. A secure and correct installation ensures optimal performance and safety.
3.1 Preparación para a instalación
- Clean the windshield area where the dash camera will be mounted. Ensure it is free from dust and grease.
- Apply an electrostatic film to the chosen spot on the windshield. This protects your windshield and allows for easier removal of the dash cam mount.
3.2 Mounting the Dash Camera

Image: The AZDOME V600 Dash Camera mounted on a car windshield, showing its compact size and dual lens design.
- Attach the 3M adhesive mount to the dash camera.
- Firmly press the dash camera with the attached mount onto the electrostatic film on your windshield. Ensure the front lens has a clear view da estrada e a lente interior ten un claro view da cabana.
- Adjust the flexible lens for the best view. The interior lens can be rotated up to 90 degrees.

Image: Close-up of the AZDOME V600 Dash Camera showing the flexible interior lens that can be adjusted for optimal cabin view.
3.3 Conexión de alimentación
- Connect the Type-C car charger to the dash camera's power input.
- Conecta o outro extremo do cargador do coche á toma do acendedor de cigarros do teu vehículo.
- Route the power cable neatly along the windshield and dashboard using the provided cable clips and pry tool to conceal it.

Image: Diagram illustrating how to route the power cable for the dash camera neatly along the car's interior trim.
3.4 Instalación da tarxeta MicroSD
- Insert a high-speed (Class 10 or higher) microSD card (up to 128GB, not included) into the designated slot on the dash camera. Ensure the card is inserted correctly until it clicks into place.
- Format the microSD card within the dash camera's settings menu before first use to ensure compatibility and optimal performance.
4. Funcionamento
4.1 Encendido/apagado
- The dash camera will automatically power on and begin recording when connected to the car's power supply and the vehicle is started.
- It will automatically power off when the car's engine is turned off and the power supply is disconnected.
- Para acender/apagar manualmente, manteña premido o botón de acendido/apagado.
4.2 Gravación en bucle
The dash camera records video in continuous loops. When the memory card is full, the oldest unlocked fileas novas gravacións sobrescribiranse. Isto garante a gravación continua sen intervención manual.

Image: Illustration of loop recording, showing how new video segments overwrite older, unlocked segments on the memory card.
4.3 Sensor G (gravación de emerxencia)
The built-in G-sensor detects sudden impacts or collisions. When an event is detected, the current video segment is automatically locked and saved to prevent it from being overwritten by loop recording. These files are stored in a separate folder on the microSD card.

Image: Depiction of the G-Sensor Auto Lock feature, showing a car accident scenario and a lock icon indicating that the video footage is protected.
4.4 Parking Mode (24-Hour Monitoring)
To enable 24-hour parking mode, a hardwire kit (not included, search ASIN: B0B9M9JL327 for a compatible 3-lead hardwire kit with 1.5A output current) is required. When properly installed, the dash camera can monitor your vehicle even when parked.
- Modo de estacionamento de detección de colisións: The G-sensor triggers recording and locks the clip if an impact is detected while parked.
- Modo de estacionamento por intervalos de tempo: Continuously records at 1 frame per second (1fps) to save storage space while providing a comprehensive overview of parking activity.
- Baixo Voltage Protección: Automatically cuts off power to prevent draining your car battery if the voltage cae por debaixo dun limiar establecido.

Image: Visual representation of the 24-hour parking mode, detailing collision detection, time-lapse recording, and low voltage características de protección.
4.5 Visión nocturna
The dash camera features IR night vision to enhance clarity in low-light conditions. The interior cabin camera utilizes infrared lights for improved visibility, switching to black-and-white mode for clearer footage when necessary. The f/1.8 aperture and 6-glass lens also contribute to superior low-light performance for both front and interior cameras.

Image: A car driving on a dark road at night, demonstrating the clear night vision capabilities of the dash camera.
4.6 Wide Field of View
The AZDOME V600 features a 150° wide-angle front lens and a 150° wide-angle cabin lens, providing extensive coverage of both the road and the vehicle's interior. This wide field of view helps reduce blind spots and captures more details.

Image: Diagram showing the 150-degree wide-angle coverage for both the front and cabin cameras, illustrating reduced blind spots.
5. Viewing and Downloading Videos
Para view or download recorded videos, you will need to remove the microSD card from the dash camera and use a card reader (not included) to connect it to a computer or smartphone.
- Apagado: Ensure the V600 dash camera is powered off.
- Eject MicroSD Card: Gently push the microSD card to eject it from its slot.
- Inserir no lector de tarxetas: Insert the microSD card into a compatible card reader.
- Conectar ao dispositivo: Plug the card reader into your computer or smartphone.
- Acceso Files: Navigate to the card's storage to view and transfer video files. Pechado files are typically in a separate folder (e.g., "EMERGENCY" or "LOCK").
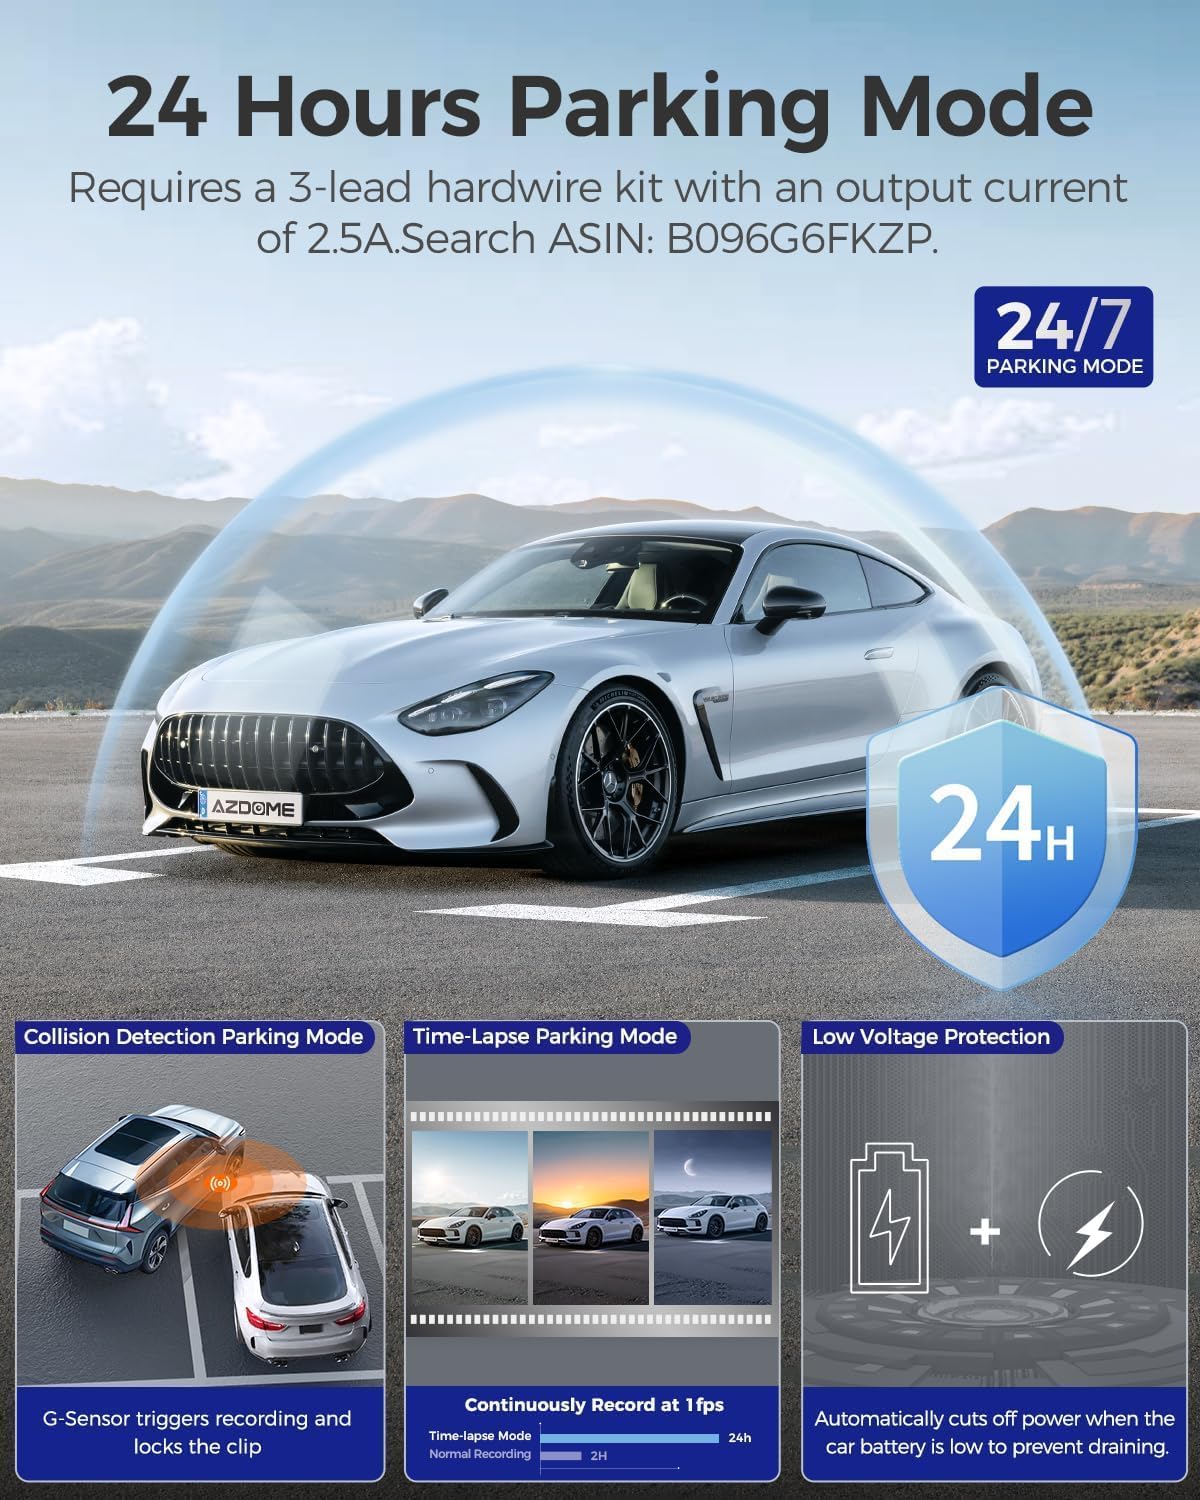
Image: Step-by-step guide showing how to remove the microSD card, insert it into a card reader, and connect to a computer or phone to view vídeos.
6. Mantemento
- Lentes limpas: Regularly clean the front and interior camera lenses with a soft, lint-free cloth to ensure clear video quality. Avoid abrasive materials.
- Tarxeta MicroSD: Format the microSD card periodically (e.g., once a month) within the dash camera's settings to maintain optimal performance and prevent data corruption. Back up any important files antes de formatar.
- Actualizacións de firmware: Check the AZDOME official website for any available firmware updates. Keeping your dash camera's firmware up-to-date can improve performance and add new features.
- Condicións de almacenamento: Avoid exposing the dash camera to extreme temperatures for extended periods. Store it in a cool, dry place when not in use.
7 Solución de problemas
7.1 Dash Camera Does Not Power On
- Ensure the car charger is securely plugged into both the dash camera and the vehicle's cigarette lighter socket.
- Comprobe se a toma do acendedor de cigarros do vehículo recibe corrente (por exemplo, probándoa con outro dispositivo).
- Try a different power source or charging cable if available.
7.2 Recording Stops or Freezes
- Ensure you are using a high-speed (Class 10 or higher) microSD card.
- Format the microSD card within the dash camera's settings.
- The microSD card may be full. If loop recording is enabled, ensure there are no excessive locked files preventing new recordings.
- Try a different microSD card to rule out card issues.
Vídeo 7.3tage is Blurry or Unclear
- Limpa as lentes da cámara cun pano suave.
- Asegúrate de que se retirou a película protectora das lentes.
- Check if the windshield area where the camera is mounted is clean.
7.4 G-Sensor is Too Sensitive or Not Sensitive Enough
- Adjust the G-sensor sensitivity setting in the dash camera's menu. Lower sensitivity for fewer false triggers, higher for more detection.
7.5 Date and Time are Incorrect
- Ensure the dash camera's internal battery is charged (it charges when connected to power).
- Manually set the date and time in the settings menu.
8. Especificacións
| Característica | Detalle |
|---|---|
| Nome do modelo | V600 |
| Número de modelo do artigo | V600-2CH |
| Resolución de captura de vídeo | 1080P (Front), 1080P (Cabin) |
| Campo de View | 150 Degrees (Front), 150 Degrees (Cabin) |
| Característica especial | G-Sensor, IR Night Vision, Loop Recording, Parking Mode |
| Tecnoloxía de conectividade | Wi-Fi |
| Tipo de montaxe | Montaxe do panel de control |
| Dimensións do produto | 4.72 x 5.51 x 2.36 polgadas |
| Peso do elemento | 13.1 onzas |
| Baterías | 1 batería de metal de litio (incluída) |
| Compoñentes incluídos | Cable de carga |
| Fabricante | AZDOME |
9. Garantía e soporte
AZDOME products come with a standard manufacturer's warranty. For specific warranty details, including duration and coverage, please refer to the warranty card included in your package or visit the official AZDOME websitio.
For technical support, troubleshooting assistance, or any inquiries regarding your AZDOME V600 Dash Camera, please contact AZDOME customer service through their official websitio web ou a información de contacto que se inclúe na embalaxe do produto.
Recursos en liña: For additional resources, FAQs, and firmware updates, please visit the official AZDOME support page.


