1. Introdución
The COUGAR CFV235 is an innovative PC case featuring a Central Floating Ventilation (CFV) structure. This design separates the power supply unit compartment from the main chamber, utilizing the space between them as a highly effective ventilation channel to enhance cooling performance. The CFV235 combines a full panoramic view, a compact footprint, and structurally reinforced cooling capabilities to achieve superior airflow beyond traditional case designs.
This manual provides essential information for the proper installation, operation, and maintenance of your COUGAR CFV235 PC case. Please read it thoroughly before beginning assembly.
2. Características clave
- Central Floating Ventilation (CFV) Structure: Innovative design for enhanced cooling efficiency.
- Full Panoramic View: Clear tempered glass panels for showcasincompoñentes internos g.
- Deseño de alto fluxo de aire: Optimized for superior air circulation.
- Ampla compatibilidade: Supports Mini ITX, Micro ATX, ATX, and CEB motherboards.
- AmpOpcións de almacenamento: Multiple drive bays for 3.5" HDDs and 2.5" SSDs.
- Generous Component Clearance: Accommodates long GPUs, tall CPU coolers, and standard PSUs.
- Construción duradeira: Built with robust materials for longevity.

Figura 2.1: Parte frontal view of the COUGAR CFV235 PC case, highlighting its panoramic glass panels and illuminated interior.

Figure 2.2: The COUGAR CFV235 PC case showcasing its design in both black and white variants, with internal components and customizable RGB lighting.
3. Guía de configuración
3.1 Unpacking the Case
- Retire con coidado a carcasa do PC da súa embalaxe.
- Inspeccione a caixa para detectar calquera signo de dano durante o transporte. Póñase en contacto co seu vendedor inmediatamente se atopa algún dano.
- Remove all protective films and internal packaging materials.
3.2 Instalación de compoñentes
Before installing components, ensure you have all necessary tools, including a Phillips head screwdriver.
- Instalación da placa base:

Figure 3.1: Interior of the CFV235 case, showing pre-installed motherboard standoffs.
- Instale a protección de E/S na abertura traseira da caixa.
- Align your Mini ITX, Micro ATX, ATX, or CEB motherboard with the pre-installed standoffs.
- Fixe a placa base cos parafusos proporcionados.
- Instalación da unidade de alimentación (PSU):
- The CFV235 features a dedicated PSU compartment. Install your ATX PSU (up to 200mm length) into this compartment.
- Fixe a fonte de alimentación con parafusos na parte traseira da caixa.
- Instalación da unidade de almacenamento:

Figure 3.2: Rear interior of the CFV235, illustrating cable management options and locations for 2.5" and 3.5" drive bays.
- Install 3.5" HDDs into the designated drive bays (up to 2 drives).
- Install 2.5" SSDs into the dedicated SSD mounts (up to 4 drives, 2 of which are shared with 3.5" bays).
- Ensure all drives are securely fastened.
- Instalación da tarxeta gráfica (GPU):

Figure 3.3: Diagram indicating the maximum GPU length of 430mm supported by the CFV235 case.
- The case supports GPUs up to 430mm in length.
- Insert your GPU into the appropriate PCIe slot on the motherboard and secure it with the retention clip and screw.
- Instalación do refrigerador da CPU:
- The case supports CPU coolers up to 175mm in height.
- Instala o teu refrigerador de CPU segundo as instrucións do fabricante.
- Xestión de cables
- Utilize the cable routing cutouts and tie-down points behind the motherboard tray to manage cables neatly.
- Proper cable management improves airflow and aesthetics.
4. Instrucións de funcionamento
4.1 Panel frontal de E/S

Figure 4.1: The front I/O panel of the CFV235, featuring USB ports, audio jacks, and the power button.
O panel de E/S frontal proporciona un acceso cómodo aos portos e controis esenciais:
- Botón de encendido: Press to power on/off your system.
- Botón de reinicio: Press to restart your system.
- Portos USB: Conecte dispositivos USB.
- Conectores de son: Conecta auriculares e micrófonos.
4.2 Fluxo de aire e refrixeración
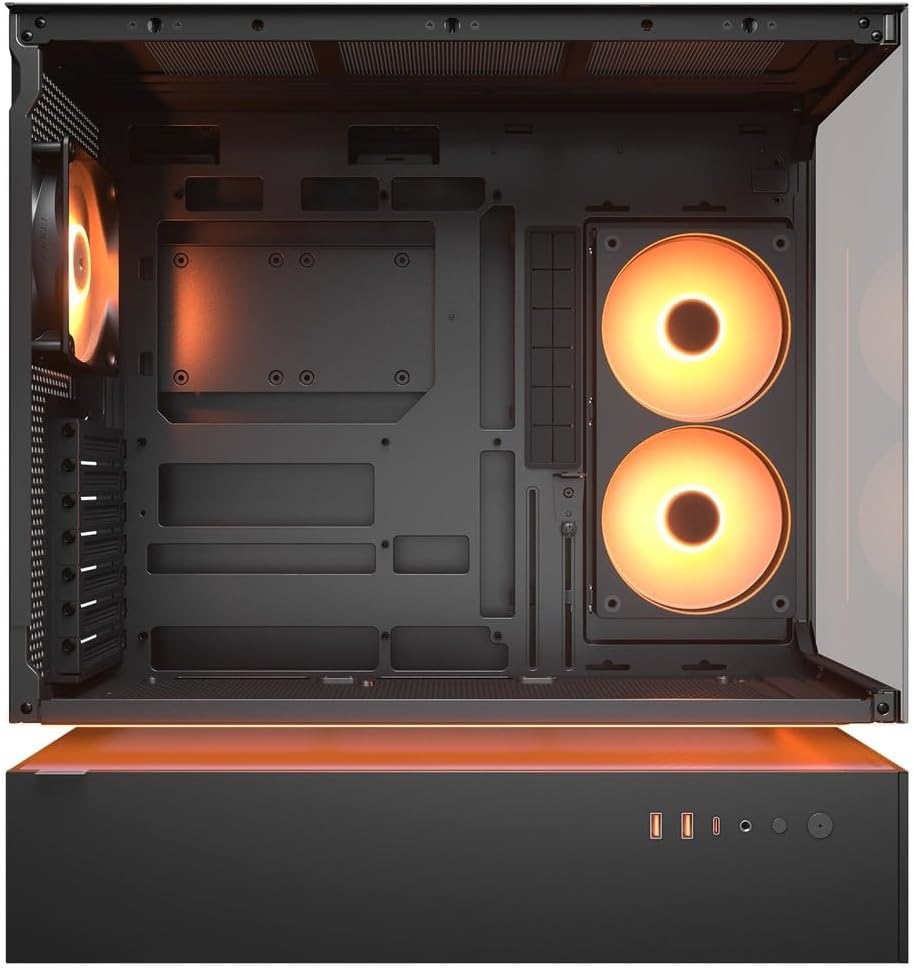
Figura 4.2: Interno view of the CFV235 with fans installed, demonstrating the potential for high airflow.
The CFV235 is designed for optimal airflow. Ensure all fans are correctly installed and oriented to facilitate efficient cooling. The Central Floating Ventilation structure promotes direct airflow to critical components.
5. Mantemento
5.1 Limpeza do filtro de po

Figure 5.1: Removable magnetic dust filter for easy cleaning.
Regular cleaning of dust filters is crucial for maintaining optimal airflow and preventing dust buildup inside your PC. The CFV235 features easily removable dust filters:
- Gently remove the magnetic dust filters located on the top and bottom of the case.
- Clean the filters using compressed air or by rinsing them with water. Ensure they are completely dry before reattaching.
- Reattach the filters to their respective positions.
5.2 Limpeza xeral
- Use un suave, damp cloth to wipe down the exterior surfaces of the case.
- Avoid using harsh chemicals or abrasive materials that could damage the finish or tempered glass.
- For internal cleaning, use compressed air to remove dust from components and fan blades.
6 Solución de problemas
Esta sección aborda problemas comúns cos que podes atoparte. Para problemas máis complexos, consulta a sección de asistencia.
6.1 O sistema non se acende
- Comprobe se o cable de alimentación está conectado correctamente tanto á fonte de alimentación como á toma de corrente.
- Ensure the PSU switch is in the "ON" position.
- Verifique que o cable do botón de acendido do panel frontal estea conectado correctamente á placa base.
- Confirm that all internal power connections (24-pin ATX, CPU, GPU) are firmly seated.
6.2 Problemas de sobrequecemento
- Asegúrate de que todos os ventiladores da caixa e os refrigeradores da CPU/GPU funcionen correctamente.
- Clean any dust buildup from fans and dust filters (refer to Section 5.1).
- Verify that fans are oriented for optimal airflow (intake and exhaust).
- Check for proper cable management to avoid obstructing airflow.
6.3 USB/Audio Ports Not Working
- Ensure the front panel USB and audio cables are correctly connected to the motherboard headers.
- Check your operating system's device manager for any driver issues.
7. Especificacións
| Característica | Especificación |
|---|---|
| Marca | PUMA |
| Nome do modelo | CFV235 |
| Dimensións do produto (W x H x D) | 235 x 493 x 460 mm |
| Peso do produto | 9.5 kg |
| Placas base compatibles | Mini ITX / Micro ATX / ATX / CEB |
| Unidade Bays | 5.25" x0 / 3.5" x2 / 2.5" SSD x2+2 (2 shared with 3.5" bays) |
| Lonxitude máxima da GPU | 430 mm |
| Altura máxima do refrigerador da CPU | 175 mm |
| Lonxitude máxima da PSU | 200 mm |
| Cor | Negro |
| Características | Central Floating Ventilation, Panoramic Glass, High Airflow, Built-in Fans |
8. Garantía e soporte
Your COUGAR CFV235 PC case comes with a 1 ano de garantía desde a data de compra. Esta garantía cobre defectos de fabricación e fallos de materiais en condicións de uso normal.
For technical support, warranty claims, or further assistance, please visit the official COUGAR website or contact your local retailer. Please have your product model number (CFV235) and proof of purchase ready when contacting support.
Official COUGAR Websitio: cougargaming.com


