Introdución
This manual provides detailed instructions for the operation and maintenance of your Vivitar DVR4K 4K & 8K Video Camera Camcorder. Please read this manual thoroughly before using the device to ensure proper functionality and to maximize your recording experience. This camcorder is designed for capturing high-quality video and still images, featuring advanced capabilities for various content creation needs.
O que hai na caixa
Verifique que todos os elementos que se indican a continuación estean incluídos no seu paquete:
- Vivitar DVR4K Camcorder
- Control remoto
- Battery (Nonstandard Battery, 2 included)
- Cable HDMI
- USB Cable (Standard USB to USB-C)
- Tapa de lente
- Bolsa de transporte
- Instruction Manual (Easy Guide)
Video: Unboxing the Vivitar DVR4K Camcorder, showing included accessories like the camcorder, remote, battery, cables, and carrying pouch.
Configuración
1. Cargando a batería
The camcorder uses a 3.7V 1050mAh Li-ion battery (NP-40). Ensure the battery is fully charged before first use.
- Abra a tapa do compartimento da batería da videocámara.
- Insert the battery into the compartment, ensuring correct polarity.
- Pecha a tapa do compartimento da batería.
- Connect the USB cable to the camcorder's USB-C port and to a power source (e.g., computer USB port or USB wall adapter).
- A luz indicadora de carga acenderase. Apagarase ou cambiará de cor cando remate a carga.
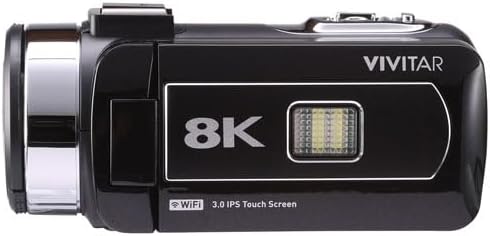
Image: Vivitar DVR4K Camcorder with its flip screen open, showing the controls and ports.
2. Inserción dunha tarxeta de memoria
The camcorder supports SD flash memory cards. A memory card is required to store videos and photos.
- Locate the memory card slot (usually near the battery compartment or on the side).
- Insert the SD card into the slot with the metal contacts facing the correct direction until it clicks into place.
- To remove, press the card gently until it springs out.
3. Attaching the Hand Strap and Lens Cap
- Secure the hand strap to the designated loop on the camcorder for a firm grip during operation.
- Attach the lens cap to protect the lens when the camcorder is not in use.

Imaxe: Fronte view of the Vivitar DVR4K Camcorder with the lens cap in place.
Instrucións de funcionamento
1. Acendido/apagado
- To power on, open the LCD flip screen. The camcorder will automatically turn on.
- To power off, close the LCD flip screen. The camcorder will automatically turn off.
- Alternativamente, mantén premido o botón POTENCIA button located near the screen for a few seconds.
2. Basic Navigation and Modes
Use the buttons next to the LCD screen or the remote control to navigate menus and select modes.
- MODO button: Cycles through video recording, photo capture, and playback modes.
- MENÚ button: Accesses the settings menu for various adjustments.
- UP/DOWN/OK buttons: Navigate menu options and confirm selections.
- WiFi button: Activates Wi-Fi connectivity for file Transferir.

Imaxe: Lateral view of the Vivitar DVR4K Camcorder with the flip screen open, highlighting the control buttons for power, mode, menu, and Wi-Fi.
3. Gravación de vídeo
- Switch to video recording mode using the MODO botón.
- Encadra a túa foto usando a pantalla LCD.
- Preme o RECORDAR button (red button on the top/back) to start recording.
- Preme o RECORDAR botón de novo para deter a gravación.
- Use the zoom lever (located on top) to zoom in or out during recording.
4. Facendo fotos
- Switch to photo capture mode using the MODO botón.
- Encadra a túa foto usando a pantalla LCD.
- Preme o FOTO button (usually near the record button) to take a picture.
5. Usando o mando a distancia
O control remoto incluído permite unha operación cómoda desde a distancia.
- Ensure the plastic tab is removed from the remote's battery compartment to activate it.
- Point the remote at the camcorder's IR receiver.
- Use the corresponding buttons on the remote for recording, taking photos, zooming, and navigating menus.

Image: The Vivitar DVR4K Camcorder's remote control and a spare battery.
6. Connecting to a TV (HDMI)
View your recordings and photos on a larger screen using the HDMI output.
- Connect the mini HDMI end of the HDMI cable to the camcorder's HDMI port.
- Connect the standard HDMI end to an HDMI input on your TV.
- Selecciona a entrada HDMI correcta no teu televisor.
- The camcorder's display will appear on your TV screen.
7. Transferencia Files (USB & Wi-Fi)
Transfer your media to a computer or other device.
- Transferencia USB: Connect the camcorder to your computer using the USB cable. The camcorder will appear as a removable drive, allowing you to copy files.
- Transferencia Wi-Fi: Activate Wi-Fi on the camcorder using the WiFi button. Follow the on-screen instructions or refer to the full manual for connecting to a smartphone app for wireless transfer.
Mantemento
1. Coidado da batería
- Almacene as baterías nun lugar fresco e seco cando non esteas en uso.
- Evite descargar completamente a batería con frecuencia para prolongar a súa vida útil.
- Non expoñas as baterías a temperaturas extremas.
2. Limpeza
- Use a soft, dry cloth to clean the camcorder body.
- For the lens, use a specialized lens cleaning cloth and solution.
- Evite o uso de produtos químicos agresivos ou materiais abrasivos.
3. Almacenamento
- Store the camcorder in its carrying pouch to protect it from dust and scratches.
- Retire a batería se non vai usar a videocámara durante un período prolongado.
- Keep the camcorder away from direct sunlight, high humidity, and extreme temperatures.
Resolución de problemas
| Problema | Causa posible | Solución |
|---|---|---|
| A videocámara non se acende. | A batería non está cargada ou está inserida incorrectamente. | Asegúrate de que a batería estea completamente cargada e inserida correctamente. |
| Non se pode gravar vídeo/tirar fotos. | A tarxeta de memoria está chea, non está inserida ou está danada. | Insert a valid memory card, ensure sufficient space, or format the card (this will erase all data). |
| Mala calidade de vídeo/fotos. | Lens is dirty, lighting conditions are poor, or incorrect settings. | Clean the lens. Adjust lighting or camcorder settings (e.g., exposure, white balance). |
| O control remoto non funciona. | Plastic tab not removed, battery dead, or not pointing correctly. | Remove plastic tab. Replace remote battery. Ensure direct line of sight to IR receiver. |
Especificacións
| Característica | Detalle |
|---|---|
| Marca | En directo |
| Número de modelo | DVR4K |
| Resolución de captura de vídeo | 4K / 8K Ultra HD |
| Still Image Sensor | 48.0 MP |
| Mostrar | 3-inch Rotatable Full-Color LCD (IPS Touchscreen) |
| Zoom | Zoom dixital 18x |
| Conectividade | Wi-Fi, Mini USB, HDMI |
| Características especiais | Image Stabilization, Face Detection, Night Vision, Multiple Shooting Modes (Auto, Portrait, Landscape, Time Lapse, Motion Detection, Loop Recording) |
| Medios de almacenamento | SD Flash Memory (Max size not specified, user review mentions 128GB/256GB attempts) |
| Tipo de batería | Nonstandard Battery (Li-ion, 3.7V 1050mAh, NP-40) |
| Formato de vídeo | MP4 |
| Formato fotográfico | JPG |
| Temperatura de funcionamento | -20 °C a +50 °C |
| Peso do elemento | 3.5 libras |
Garantía e Soporte
For warranty information and technical support, please refer to the official Vivitar website or contact their customer service. Details are typically provided in the full product manual or on the manufacturer's websitio.
Plans de protección: Additional protection plans may be available for purchase. Please check with your retailer for options such as 2-Year or 3-Year Protection Plans.


