Introdución
Thank you for choosing the Gevi 10-Cup Drip Coffee Maker with Built-in Grinder. This appliance is designed to provide fresh, delicious coffee with convenience and versatility. Please read this manual thoroughly before operating the coffee maker to ensure safe and optimal performance. Keep this manual for future reference.
Instrucións de seguridade importantes
Cando se utilicen aparellos eléctricos, débense seguir sempre as precaucións básicas de seguridade para reducir o risco de incendios, descargas eléctricas e lesións ás persoas, incluíndo as seguintes:
- Le todas as instrucións.
- Non toque superficies quentes. Use asas ou botóns.
- Para protexerse contra incendios, descargas eléctricas e lesións ás persoas, non mergulle o cable, os enchufes ou o aparello en auga ou noutro líquido.
- É necesaria unha estreita supervisión cando calquera aparello é usado por nenos ou preto de eles.
- Desenchufe da toma cando non estea en uso e antes de limpalo. Deixar arrefriar antes de poñer ou quitar pezas e antes de limpar o aparello.
- Non faga funcionar ningún aparello cun cable ou enchufe danados ou despois de que o aparello teña un mal funcionamento ou que estea danado de calquera xeito. Devolve o aparello ao centro de servizo autorizado máis próximo para o seu exame, reparación ou axuste.
- O uso de accesorios non recomendados polo fabricante do aparello pode provocar incendios, descargas eléctricas ou lesións ás persoas.
- Non use ao aire libre.
- Non deixes que o cable colgue do bordo da mesa ou do mostrador nin toque superficies quentes.
- Non o coloque sobre ou preto dun queimador eléctrico ou de gas quente, nin nun forno quente.
- Conecte sempre primeiro o enchufe ao electrodoméstico e, a seguir, o cable á toma de corrente. Para desconectalo, poña calquera control na posición de apagado e, a seguir, retire o enchufe da toma de corrente.
- Non use o aparello para outros usos que os previstos.
- Pode producirse escaldadura se se retira a tapa durante os ciclos de elaboración.
Contido do paquete
Marque a caixa para os seguintes elementos:
- 1 x Drip Coffee Maker
- 1 x Glass Coffee Pot (Carafe)
- 1 x Scoop
- 1 x Permanent Filter
- 1 x Manual (este documento)
Note: The Filter Insert with Drip Stop and Filter Ring are typically pre-assembled within the coffee maker.

Image: Included accessories for the Gevi coffee maker, showing the permanent filter, filter insert with drip stop, glass coffee pot, scoop, and filter ring.
Produto rematadoview
Familiarize yourself with the components of your Gevi coffee maker.

Imaxe: Fronte view of the Gevi 10-Cup Drip Coffee Maker, showing the control panel, bean hopper, and glass carafe.
Compoñentes clave:
- Tolva de feixón: Para grans de café enteiros.
- Trituradora: Integrated burr grinder for fresh grinding.
- Depósito de auga: 1.5L capacity for water.
- Panel de control: Digital display, program buttons, grind off, strength control, hour, min, on/off.
- Cesta de filtro: Suxeita o filtro permanente ou o filtro de papel.
- Jarra de vidro: Capacidade de 10 cuncas para café preparado.
- Prato de quecemento: Mantén o café quente despois da súa preparación.
Configuración e primeiro uso
1. Desembalaxe e limpeza inicial:
- Remove all packaging materials and labels from the coffee maker.
- Wash the glass carafe, permanent filter, and scoop in warm, soapy water. Rinse thoroughly and dry.
- Limpe o exterior da cafeteira cun anuncioamp pano.
- Before first use, run two full cycles with only water to clean the internal components. Fill the water tank to the MAX level, place the empty carafe on the warming plate, and press the ON/OFF button to start. Discard the water after each cycle.
2. Colocación:
Place the coffee maker on a flat, stable, heat-resistant surface, away from the edge of the counter. Ensure there is adequate clearance above the unit for opening the lid and accessing the bean hopper and water tank.

Image: Gevi coffee maker on a kitchen counter, illustrating its dimensions (12.36"D x 8.38"W x 16.93"H).
Instrucións de funcionamento
1. Adding Water:
Open the water tank lid and fill the water tank with fresh, cold water up to the desired cup marking (2-10 cups). Do not exceed the MAX fill line.

Image: Hand pouring water into the coffee maker's water reservoir.
2. Adding Coffee Beans (Grind & Brew):
- Open the bean hopper lid and add whole coffee beans. Do not overfill.
- Select your desired grind fineness using the grind setting knob. There are 8 grind settings available.
- Ensure the permanent filter is correctly placed in the filter basket.
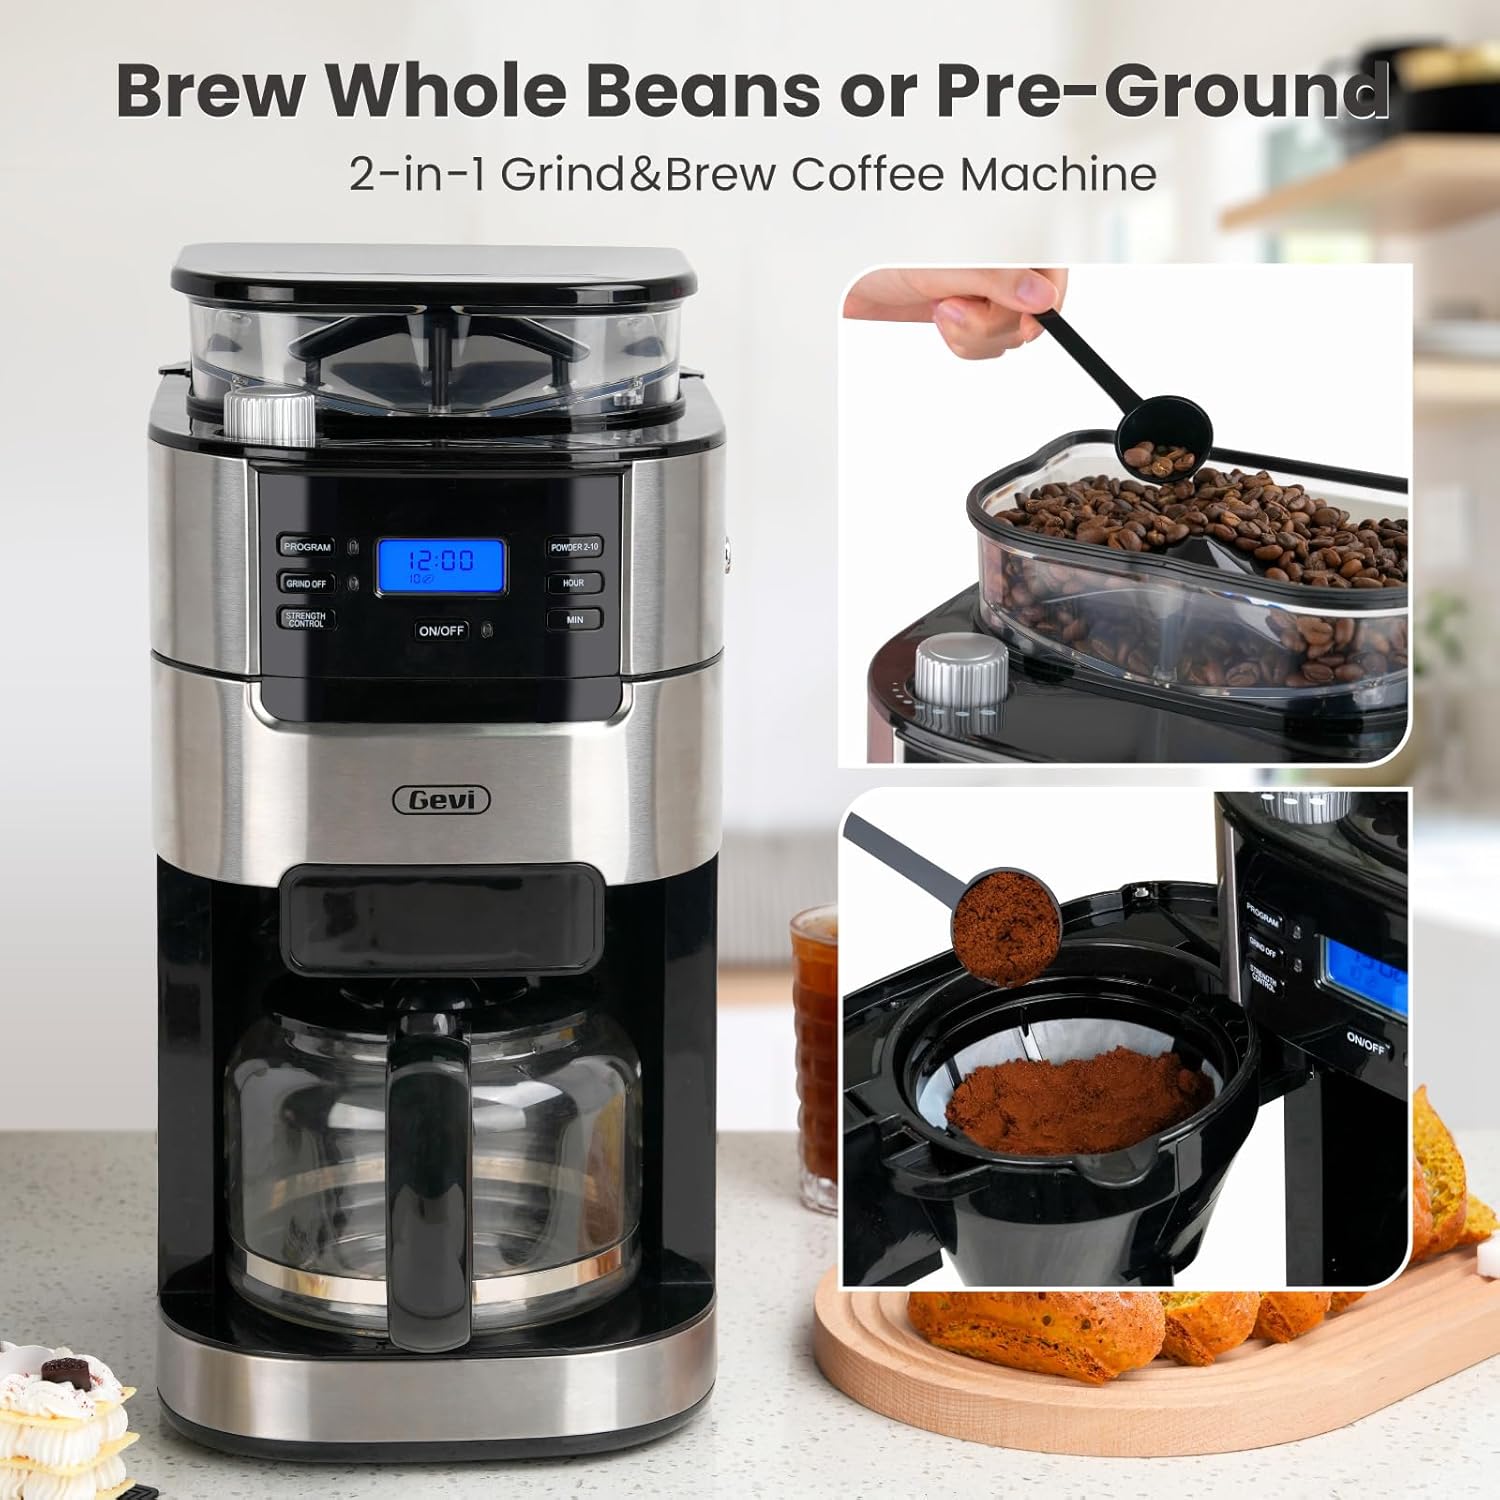
Image: Gevi coffee maker showing coffee beans being added to the grinder and ground coffee in the filter basket.

Image: Hand adjusting the grind fineness knob on the Gevi coffee maker, indicating 8 grind settings.
3. Adding Pre-Ground Coffee:
- Press the "GRIND OFF" button to disable the grinder.
- Add the desired amount of pre-ground coffee directly into the permanent filter. Use the provided scoop for accurate measurement.
4. Selecting Coffee Strength:
Press the "STRENGTH CONTROL" button to cycle through the available strength options: Mild, Medium, and Strong. The selected strength will be indicated on the display.

Image: Control panel of the Gevi coffee maker showing the "STRENGTH CONTROL" button and indicators for Mild, Medium, and Strong coffee.
5. Setting the Timer (Programmable Brew):
The coffee maker features a 24-hour programmable timer for delayed brewing.
- Press the "PROGRAM" button. The display will flash.
- Use the "HOUR" and "MIN" buttons to set the desired brew time.
- Press "PROGRAM" again to confirm the setting. The program indicator light will illuminate.

Image: Close-up of the Gevi coffee maker's control panel, highlighting the digital display and timer setting buttons.
6. Inicio do ciclo de preparación:
Place the glass carafe with its lid on the warming plate. Press the "ON/OFF" button to start brewing. The indicator light will illuminate, and the brewing process will begin.

Image: A sequence of images showing adding water, adding coffee (powder or beans), personalizing settings, and one-touch brewing with the Gevi coffee maker.
7. Función de mantemento da calor:
After brewing, the warming plate will automatically activate to keep the coffee warm for 15 to 120 minutes. The duration can be adjusted (refer to the full manual for specific adjustment steps if not on control panel).

Image: Coffee being poured from the carafe, with the warming plate glowing, indicating the keep warm function is active for 15-120 minutes.
Mantemento e Limpeza
Unha limpeza regular garante un rendemento óptimo e prolonga a vida útil da túa cafeteira.
1. Limpeza diaria:
- Desenchufe sempre a cafeteira antes de limpala.
- Wash the glass carafe, permanent filter, and scoop in warm, soapy water after each use. These parts are also dishwasher safe (top rack only).
- Limpe o exterior da cafeteira cun suave, damp pano. Non utilice produtos de limpeza abrasivos nin estropajos.
- Baleirar e limpar o depósito de grans con regularidade para evitar a acumulación de aceite.
2. Cleaning the Grinder:
The integrated burr grinder should be cleaned periodically to prevent clogging and ensure consistent grinding. Refer to the full manual for detailed instructions on disassembling and cleaning the burr components.
3. Descalcificación:
Mineral deposits (limescale) can build up in your coffee maker over time, affecting performance. Descale your coffee maker every 2-3 months, or more frequently if you have hard water.
- Fill the water tank with a mixture of white vinegar and water (1:2 ratio).
- Coloque a garrafa baleira no prato quentador.
- Executar un ciclo completo de preparación.
- Despois do ciclo, deixe repousar a solución na xerra durante 15-20 minutos.
- Desbote a solución e enxágüe ben a xerra.
- Executa 2 ou 3 ciclos con auga limpa e fresca para eliminar calquera sabor residual a vinagre.
Resolución de problemas
| Problema | Causa posible | Solución |
|---|---|---|
| O café non se prepara. | No water in tank; power not connected; program timer set. | Fill water tank; ensure plug is in outlet; check program settings. |
| O café ten un sabor débil. | Not enough coffee; coarse grind setting; strength setting too low. | Add more coffee; adjust grind to finer setting; select a stronger brew strength. |
| Grinder is noisy or not grinding. | Beans jammed; grinder needs cleaning. | Clear any jammed beans; clean the burr grinder components. |
| O café reborda do filtro. | Demasiado café; filtro atascado; xerra mal colocada. | Reduce coffee amount; clean filter; ensure carafe is centered on warming plate. |
| Fugas de auga da unidade. | Water tank overfilled; components not assembled correctly. | Do not exceed MAX fill line; ensure all parts are securely in place. |
Especificacións
| Marca | gevi |
| Nome do modelo | Drip Coffee Machine (DCMB0-BK0A1) |
| Capacidade | 10 cuncas / 1.5 litros |
| Dimensións do produto | 12.36" D x 8.38" W x 16.93" H |
| Peso do elemento | 9.92 libras |
| Voltage | 120 voltios |
| Características especiais | Auto Shut-Off, Integrated Coffee Grinder, Keep Warm, Permanent Filter, Programmable |
| Acabado Exterior | Aceiro inoxidable |
Garantía e Soporte
Gevi products are manufactured to the highest quality standards. For warranty information or technical support, please refer to the warranty card included with your purchase or visit the official Gevi website. Please have your model number (DCMB0-BK0A1) and purchase date available when contacting support.
Para obter máis axuda, tamén podes contactar directamente co vendedor a través da túa plataforma de compra.
Vídeos de produtos
Vídeo: Rematadoview of the Gevi 10-Cup Drip Coffee Maker's features and operation. (Duration: 1:34)
Video: Demonstration of the Gevi coffee maker's functionality. (Duration: 1:29)
Video: Detailed guide on using the Gevi coffee maker. (Duration: 3:21)
Video: Quick demonstration of the Gevi coffee maker. (Duration: 1:03)
Video: User guide for the Gevi coffee maker. (Duration: 1:25)
Video: Short clip demonstrating a feature of the Gevi coffee maker. (Duration: 0:49)
Video: Comprehensive demonstration of the Gevi coffee maker's functions. (Duration: 1:51)


