1. Introdución
Thank you for choosing the Rothenberger ROSCOPE i2000 Set Pipe 25/16 Inspection Camera. This manual provides essential information for the safe and efficient operation, maintenance, and troubleshooting of your device. Please read this manual thoroughly before using the product and keep it for future reference.
The ROSCOPE i2000 is designed for professional inspection of pipes and drains, featuring a robust design and clear imaging capabilities to assist in diagnostic tasks.
2. Información de seguridade
Observe sempre as seguintes precaucións de seguridade para evitar lesións e danos no dispositivo:
- Le todas as instrucións: Familiarize yourself with the operation and safety guidelines before use.
- Use in appropriate environments: Este dispositivo é non impermeable. Avoid exposure to water or excessive moisture to prevent electrical shock or damage.
- Seguridade da batería: Use only specified Lithium-ion batteries. Ensure correct polarity when inserting. Do not expose batteries to extreme temperatures or dispose of them in fire.
- Avoid damage to the cable: Do not bend, pinch, or stretch the camera cable excessively.
- Mantemento: Realice o mantemento só segundo o descrito neste manual. Encomende calquera outra tarefa de mantemento a persoal cualificado.
- Equipos de protección individual: Wear appropriate PPE, such as gloves and eye protection, when working in potentially hazardous environments.
3. Contido do paquete
Verifica que todos os elementos estean presentes no teu paquete:
- Rothenberger ROSCOPE i2000 Camera Unit
- ROSCOPE i2000 Module 25/16-tec100 (16m cable length)
- Lithium-ion Battery (1 required, may be pre-installed or separate)
- Manual de usuario (este documento)
4. Configuración
4.1. Instalación da batería
- Locate the battery compartment on the ROSCOPE i2000 camera unit.
- Abra a tapa do compartimento.
- Introduza a batería de ións de litio, asegurándose de manter a polaridade correcta.
- Pecha a tapa do compartimento da batería de forma segura.
- Charge the battery fully before first use according to the charger's instructions (charger not explicitly listed, assume standard charging process).
4.2. Connecting the Camera Module
- Align the connector of the ROSCOPE i2000 Module 25/16-tec100 with the port on the main camera unit.
- Gently push the connector in until it clicks into place, ensuring a secure connection.
- To disconnect, press any release buttons or twist the connector collar as indicated on the device, then pull apart.

Figure 1: Rothenberger ROSCOPE i2000 inspection camera with the 16m cable module coiled on its stand.
5. Instrucións de funcionamento
5.1. Acendido/apagado
- Para acender: Manteña premido o botón de acendido (normalmente marcado con ⏻ or similar icon) until the LCD screen illuminates.
- Para apagar: Prema e manteña premido o botón de acendido de novo ata que o dispositivo se apague.
5.2. Basic Inspection
- Ensure the camera module is securely connected and the device is powered on.
- Carefully insert the camera probe into the pipe or area to be inspected. Guide the cable smoothly to avoid kinks or damage.
- Observe the live feed on the integrated LCD screen. The screen provides a 720p video resolution for clear viewing.
- Use the control buttons on the unit to adjust settings such as illumination, zoom (optical zoom available), or to capture images/videos if supported by the model.
- Slowly retract the camera after inspection.
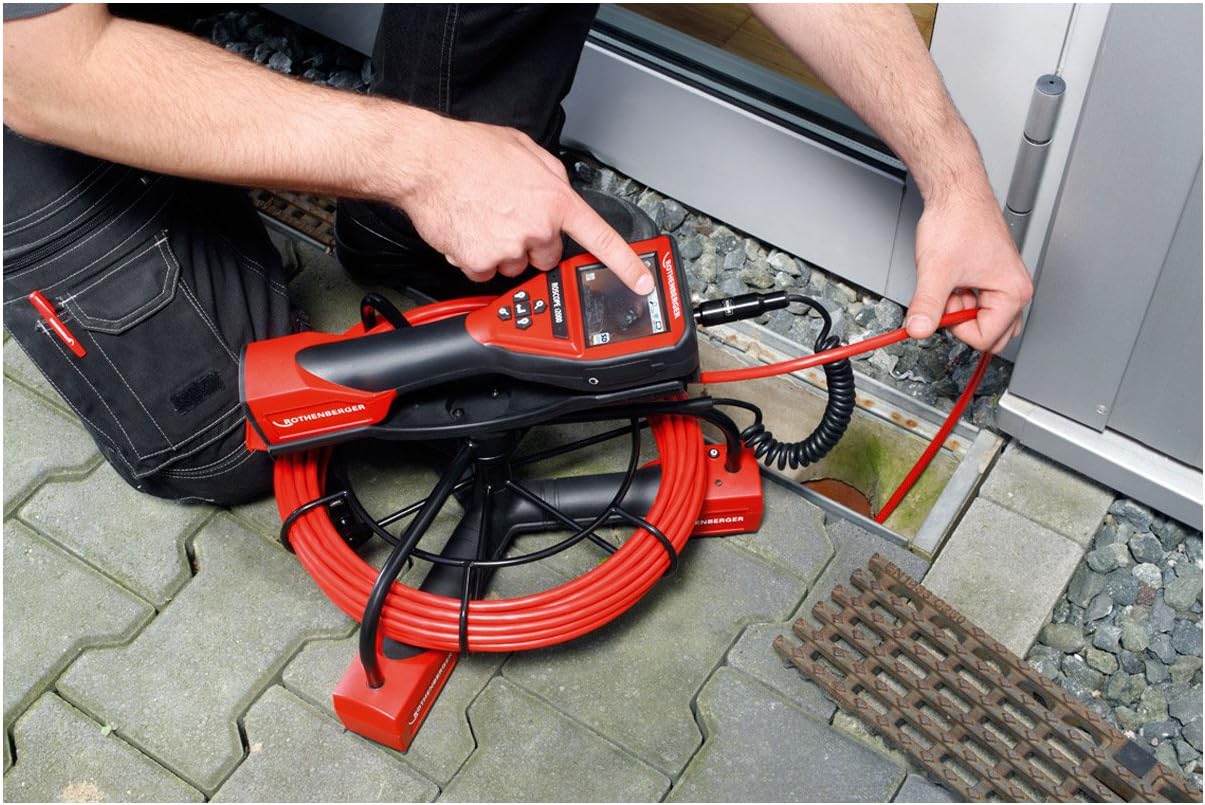
Figure 2: A user inserting the camera probe of the ROSCOPE i2000 into a drain for inspection.
5.3. Viewgravación e gravación
- The device features an LCD screen for direct viewing.
- For external display or recording, the device supports HDMI connectivity. Connect an HDMI cable from the camera unit to a compatible monitor or recording device.
- Refer to the on-screen menu for options to capture still images or record video footage. Saved media can typically be stored on an SD card (if slot available) or transferred via compatible connectivity options.

Figure 3: A user pointing at the live inspection feed displayed on the ROSCOPE i2000's LCD screen.
6. Mantemento
6.1. Limpeza
- After each use, gently wipe the camera probe and cable with a soft, damp pano para eliminar os restos.
- Importante: O dispositivo é non impermeable. Do not immerse the main unit or camera probe in water. Avoid using harsh chemicals or abrasive cleaners.
- Clean the LCD screen with a soft, lint-free cloth.
6.2. Almacenamento
- Store the ROSCOPE i2000 in a clean, dry place, away from direct sunlight and extreme temperatures.
- Ensure the cable is neatly coiled and not kinked to prevent damage.
- If storing for an extended period, remove the battery or ensure it is partially charged to prolong its lifespan.
7 Solución de problemas
If you encounter issues with your ROSCOPE i2000, refer to the following common problems and solutions:
- O dispositivo non se acende:
- Check if the battery is correctly installed and fully charged.
- Asegúrese de que o compartimento da batería estea ben pechado.
- Sen imaxe na pantalla:
- Verify that the camera module is securely connected to the main unit.
- Check for any damage to the camera cable or lens.
- Ensure the device is powered on and not in a standby mode.
- Mala calidade da imaxe:
- Limpar a lente da cámara.
- Adjust the illumination settings if available.
- Ensure there is sufficient light in the inspection area.
If the problem persists, contact Rothenberger customer support for assistance.
8. Especificacións
| Marca | Rothenberger |
| Modelo | ROSCOPE i2000 |
| Módulo | 25/16-tec100 |
| Lonxitude do cable | 16 metros |
| Resolución de vídeo | 720 p |
| Tipo de visualización | Pantalla LCD |
| Tecnoloxía de conectividade | HDMI |
| Estabilización da imaxe | Dixital |
| Tipo de zoom | Zoom óptico |
| Tipo de foco | Enfoque automático |
| Tipo de control de exposición | Automático |
| Formatos multimedia admitidos | Imaxe do produto, contido mellorado |
| Fonte de enerxía | 1 Lithium-ion battery (required) |
| Nivel de resistencia á auga | Non impermeable |
| Peso do elemento | 28.11 libras (aprox. 12.75 kg) |
| Dimensións do paquete | 78.5 x 64 x 45 cm |
9. Garantía e soporte
For warranty information, please refer to the documentation provided with your purchase or visit the official Rothenberger websitio.
Dispoñibilidade de pezas de reposición: Spare parts are generally available within 3 days.
For technical support, service, or to inquire about spare parts, please contact your local Rothenberger dealer or customer service center.


